Modern Angular 10: Rendering Lists with Signals and @for

This is lesson 10 of the Modern Angular Course. In the previous lesson, we built the ProductsGrid and ProductCard components with static placeholder content. Now it is time to make the UI reactive by connecting it to signals and rendering the product list dynamically.
This post is part of the Modern Angular Course series. Check the course page for the full episode list.
In this post, we cover:
- Defining a
Productinterface for type safety - Storing product data in a signal
- Rendering lists using Angular’s
@forsyntax withtrack - Handling empty lists with
@empty - Using loop context variables like
$index,$first,$last,$even,$odd, and$count
Creating the Product Interface
Before we create our signal, let’s define a TypeScript interface for our products. This gives us type safety and better autocomplete in the IDE.
You can generate the file with the Angular CLI:
1
ng generate interface products/product
Or the shorthand:
1
ng g i products/product
Then define the interface in product.ts:
1
2
3
4
5
6
7
export interface Product {
  id: number;
  name: string;
  description: string;
  price: number;
  originalPrice?: number;
}
Notice the optional property originalPrice with the ? syntax. This field only applies to products that are on sale.
This interface will be used throughout the application whenever we work with product data.
Creating the Products Signal
Now let’s create a signal to hold our products data. Open products-grid.ts and update it:
1
2
3
4
5
6
7
8
9
10
11
12
13
14
15
16
17
18
19
20
21
22
23
24
25
26
27
28
29
30
31
32
33
34
35
36
37
import { Component, signal } from '@angular/core';
import { ProductCard } from '../product-card/product-card';
import { Product } from '../product';
import { MatIcon } from "@angular/material/icon";

@Component({
  selector: 'app-products-grid',
  imports: [ProductCard, MatIcon],
  templateUrl: './products-grid.html',
  styleUrl: './products-grid.scss',
})
export class ProductsGrid {
  protected readonly products = signal<Product[]>([
    {
      id: 1,
      name: 'Premium Wireless Headphones',
      description:
        'High-quality wireless headphones with noise cancellation and premium sound quality.',
      price: 199.99,
      originalPrice: 249.99,
    },
    {
      id: 2,
      name: 'Smart Fitness Watch',
      description:
        'Track your fitness goals with this advanced smartwatch featuring heart rate monitoring.',
      price: 299.99,
    },
    {
      id: 3,
      name: 'Portable Bluetooth Speaker',
      description:
        'Compact speaker with powerful bass and 12-hour battery life.',
      price: 79.99,
    },
  ]);
}
Notice the syntax signal<Product[]>. We are passing a type inside angle brackets (sometimes called generic syntax or diamond operator). In this case, Product[] means “an array of Product objects.”
We are explicitly typing this signal as a signal that holds a list of products, not just a single product. This gives us stronger type safety and better autocomplete while we build.
The signal function creates a reactive container for our data. Whenever the value changes, Angular knows to update the UI.
Reading the Signal in the Template
Remember how we read a signal in the template from previous lessons? We call it as a function using parentheses.
1
2
3
<div class="products-container">
  <p>Total products: {{ products().length }}</p>
</div>
Those parentheses after products are what read the signal’s current value. Every time the signal updates, this expression re-evaluates automatically.
Rendering Lists with @for
This is where Angular’s modern control flow really shines. We use the @for block to loop through the array from our signal and render one block per product.
Here is a simplified example to illustrate the syntax:
1
2
3
4
5
6
7
8
9
10
11
<div class="products-container">
  <div class="products-grid">
    @for (product of products(); track product.id) {
      <div class="product-item">
        <h3>{{ product.name }}</h3>
        <p>{{ product.description }}</p>
        <p class="price">{{ product.price | currency }}</p>
      </div>
    }
  </div>
</div>
Let’s break this down:
@for (...)starts the loop block. Inside this block, we place the HTML that Angular repeats for each iteration.product of products()means: read the signal value, then iterate over each item. Theproductvariable is a local loop variable — you can name it anything meaningful, likeitemorcurrentProduct.track product.idtells Angular to use each product’s uniqueidas the key, so it can correctly match existing DOM elements to data items when the list changes.{ ... }contains the template that gets repeated for every product.
In Angular’s @for syntax, the track expression is required. Angular needs a stable way to identify each item, and this also improves rendering performance.
Why track Matters
Without track, Angular has less information to match old items with new ones, so it may recreate more DOM than necessary when the list changes.
With track product.id, Angular can keep the existing DOM nodes for items that did not change and update only the ones that actually changed. That means fewer unnecessary re-renders and a smoother UI, especially as your lists grow.
Compared to the Old *ngFor
For reference, this is how we used to write list rendering with *ngFor:
1
2
3
4
5
6
7
<div class="products-grid">
  <div class="product-item" *ngFor="let product of products(); trackBy: trackByProductId">
    <h3>{{ product.name }}</h3>
    <p>{{ product.description }}</p>
    <p class="price">{{ product.price | currency }}</p>
  </div>
</div>
*ngFor is deprecated and the Angular team indicates intent to remove it in v22, so use @for for new code.
Using @for with Product Cards
In our actual project, instead of rendering product details inline, we render the ProductCard component inside the loop:
1
2
3
4
5
6
7
<div class="products-container">
  <div class="products-grid">
    @for (product of products(); track product.id) {
      <app-product-card />
    }
  </div>
</div>
Right now, the card still shows placeholder content. In the next lesson, we will pass each product to ProductCard using the input() function.
Handling Empty Lists with @empty
What if we have no products? The @for block supports an @empty section for exactly this case:
1
2
3
4
5
6
7
8
9
10
11
12
13
<div class="products-container">
  <div class="products-grid">
    @for (product of products(); track product.id) {
      <app-product-card />
    } @empty {
      <div class="empty-state">
        <mat-icon>inventory_2</mat-icon>
        <h3>No products available</h3>
        <p>Check back later for new arrivals!</p>
      </div>
    }
  </div>
</div>
The @empty block only renders when the array is empty. This is cleaner than wrapping everything in a separate @if check.
Empty State Styles
The styles center the empty state message across the full grid width:
1
2
3
4
5
6
7
8
9
10
11
12
13
14
15
16
17
18
19
20
21
22
23
24
25
26
27
.empty-state {
  grid-column: 1 / -1;
  display: flex;
  flex-direction: column;
  align-items: center;
  justify-content: center;
  padding: 4rem 2rem;
  text-align: center;

  mat-icon {
    font-size: 4rem;
    width: 4rem;
    height: 4rem;
    color: var(--mat-sys-outline);
    margin-bottom: 1rem;
  }

  h3 {
    margin: 0 0 0.5rem;
    color: var(--mat-sys-on-surface);
  }

  p {
    margin: 0;
    color: var(--mat-sys-on-surface-variant);
  }
}
grid-column: 1 / -1 makes the empty state span the full grid width. The --mat-sys-* values are Angular Material theme tokens (CSS variables), so the colors come from the active Material theme instead of hardcoded hex values.
Loop Context Variables
The @for block provides useful context variables you can use inside the loop:
$index— the current index (0-based)$first— true if this is the first item$last— true if this is the last item$even/$odd— true for even/odd indices$count— total number of items
Here is an example that demonstrates all of them:
1
2
3
4
5
6
7
8
9
10
11
12
13
14
15
16
17
18
19
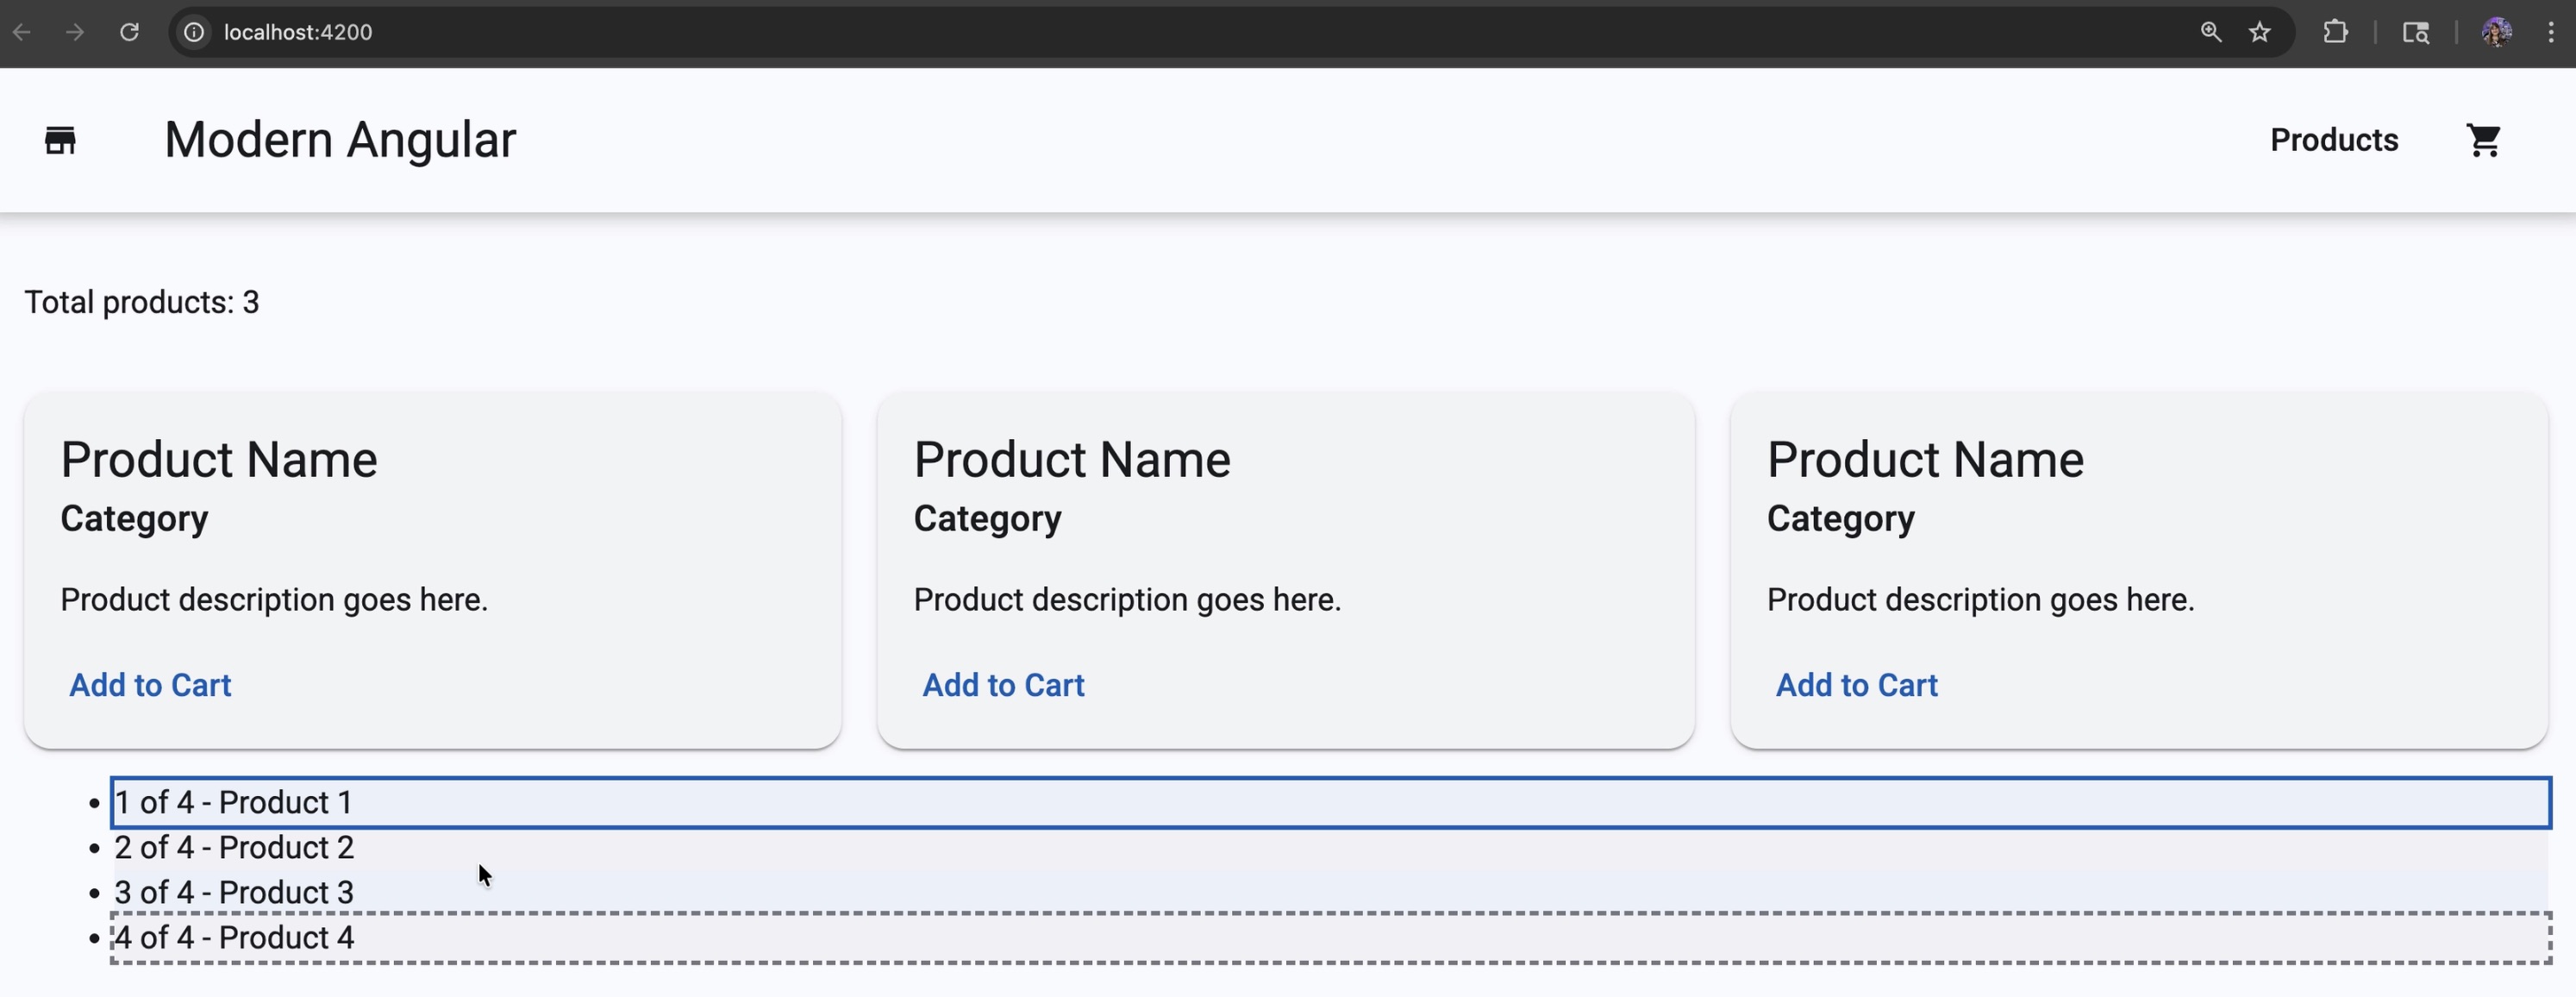
<ul>
@for (label of ['Product 1', 'Product 2', 'Product 3', 'Product 4'];
track $index;
let i = $index;
let total = $count;
let isFirst = $first;
let isLast = $last;
let isEven = $even;
let isOdd = $odd) {
<li
class="demo-item"
[class.first-item]="isFirst"
[class.last-item]="isLast"
[class.even-row]="isEven"
[class.odd-row]="isOdd">
{{ i + 1 }} of {{ total }} - {{ label }}
</li>
}
</ul>
In this example:
isFirstandisLastlet you highlight list boundariesisEvenandisOddlet you style alternating rowstotallets you show progress like “3 of 12”
And the matching styles:
1
2
3
4
5
6
7
8
9
10
11
12
13
14
15
.demo-item.even-row {
  background: color-mix(in srgb, var(--mat-sys-primary) 6%, transparent);
}

.demo-item.odd-row {
  background: color-mix(in srgb, var(--mat-sys-outline) 6%, transparent);
}

.demo-item.first-item {
  outline: 2px solid var(--mat-sys-primary);
}

.demo-item.last-item {
  outline: 2px dashed var(--mat-sys-outline);
}
Updated Grid Styles
The full products-grid.scss now includes styles for the container, grid, product items, empty state, and the context variables demo:
1
2
3
4
5
6
7
8
9
10
11
12
13
14
15
16
17
18
19
20
21
22
23
24
25
26
27
28
29
.products-container {
  display: grid;
  gap: 1rem;
}

.products-grid {
  display: grid;
  grid-template-columns: repeat(auto-fill, minmax(280px, 1fr));
  gap: 16px;
}

.product-item {
  padding: 1rem;

  h3 {
    margin: 0 0 0.5rem;
    color: var(--mat-sys-on-surface);
  }

  p {
    margin: 0 0 0.5rem;
    color: var(--mat-sys-on-surface-variant);
  }

  .price {
    font-weight: 600;
    color: var(--mat-sys-primary);
  }
}
The --mat-sys-on-surface, --mat-sys-on-surface-variant, and --mat-sys-primary are Angular Material theme tokens. Using var(...) means the colors come from the active Material theme instead of hardcoded hex values.
Source Code
The full source code for the course is available on GitHub: loiane/modern-angular.
Next Step
Now that we have a typed product interface, a signal holding our data, and the @for loop rendering cards, the next step is to make the product cards dynamic. In the next lesson, we pass product data to the ProductCard component using Angular’s input() function.
Watch the Video
This post is part of the Modern Angular Course series. Check the course page for the full episode list.