Modern Angular 12: Conditional Rendering with @if and @else

This is lesson 12 of the Modern Angular Course. In the previous lesson, we passed product data from the parent component to child cards using the modern input() API. Now that each card receives real product data, we can make the UI smarter by conditionally rendering parts of the template.
This post is part of the Modern Angular Course series. Check the course page for the full episode list.
In this post, we cover:
- Rendering different UI blocks using
@ifand@else - Showing sale information only when a product is on sale
- Applying conditional styling to highlight sale products
- Keeping templates readable while adding logic
- Safe handling of optional product fields
The Problem with Always Rendering Everything
In real applications, not all products have the same data. Some products have only a current price, while others have both a current price and an original price (on sale). Some might have promotion labels or other conditional content.
If we always render every element in the template, the UI becomes confusing and wastes space. Users see empty fields, misaligned spacing, and information that doesn’t apply to every product.
Instead, we should show only what makes sense for each product. This is where Angular’s modern control flow with @if and @else becomes invaluable.
Setting Up Mixed Product Data
Before we add conditional rendering, let’s make sure our products list has mixed data so we can test both branches. Some products will have an original price (on sale), and others will not.
Open src/app/products/products-grid/products-grid.ts:
1
2
3
4
5
6
7
8
9
10
11
12
13
14
15
16
17
18
19
20
21
22
23
24
25
26
27
28
29
30
31
32
33
34
import { Component, signal } from '@angular/core';
import { ProductCard } from '../product-card/product-card';
import { Product } from '../product';

@Component({
  selector: 'app-products-grid',
  imports: [ProductCard],
  templateUrl: './products-grid.html',
  styleUrl: './products-grid.scss',
})
export class ProductsGrid {
  protected readonly products = signal<Product[]>([
    {
      id: 1,
      name: 'Premium Wireless Headphones',
      description: 'High-quality wireless headphones with noise cancellation and premium sound quality.',
      price: 199.99,
      originalPrice: 249.99,
    },
    {
      id: 2,
      name: 'Smart Fitness Watch',
      description: 'Track your fitness goals with this advanced smartwatch featuring heart rate monitoring.',
      price: 299.99,
    },
    {
      id: 3,
      name: 'Portable Bluetooth Speaker',
      description: 'Compact speaker with powerful bass and 12-hour battery life.',
      price: 79.99,
      originalPrice: 99.99,
    },
  ]);
}
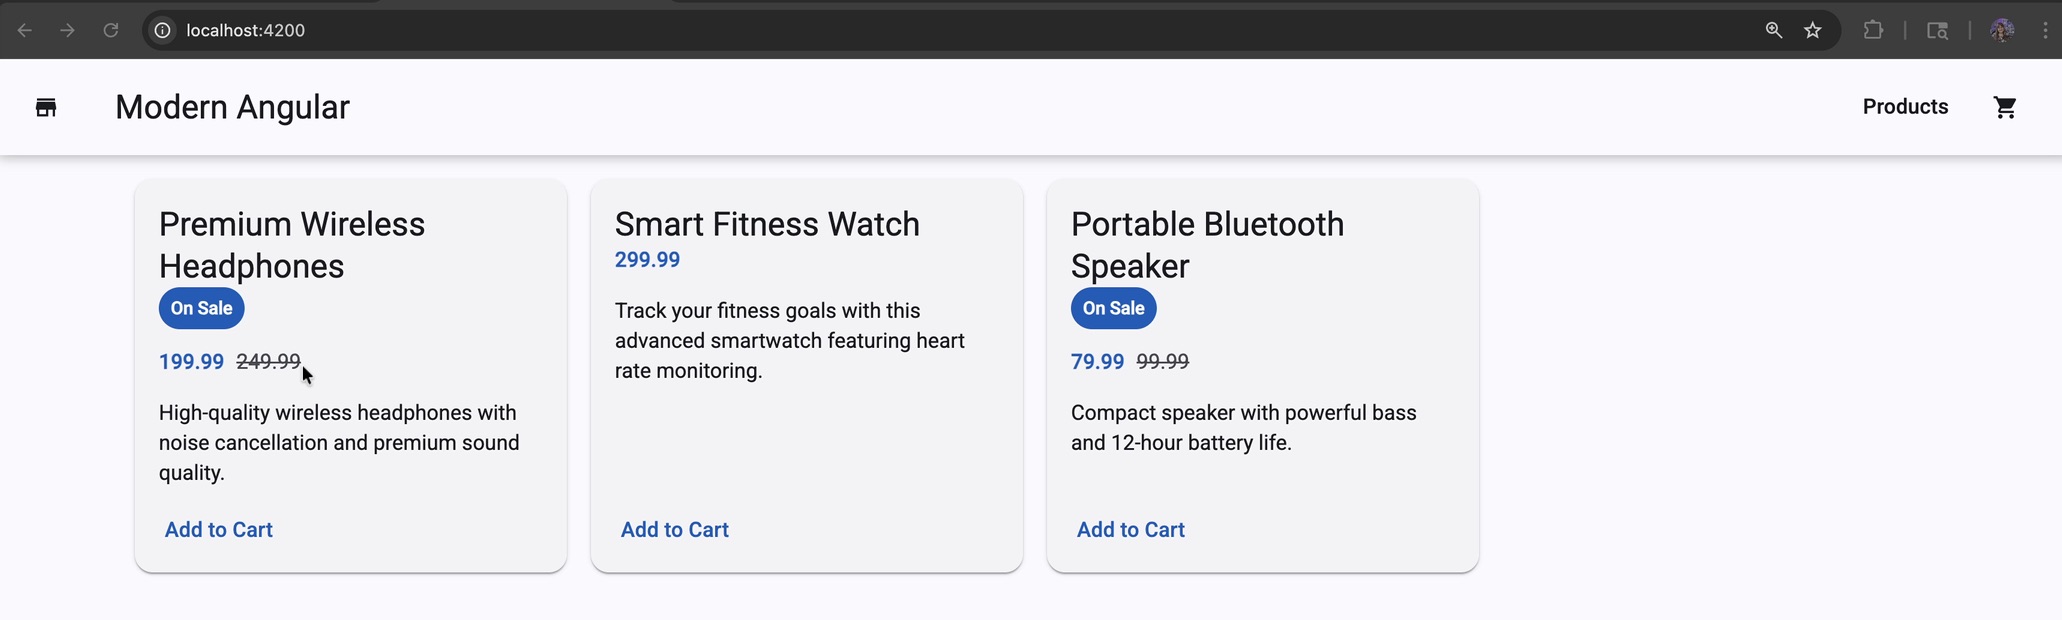
Notice the pattern: product 1 and 3 have originalPrice, while product 2 does not. This mixed data allows us to test both conditional branches and see the UI adapt to each case.
Adding a Sale Badge with @if
Now let’s add the first conditional block. In the product card template, we’ll render a sale badge only when the product has an original price.
Open src/app/products/product-card/product-card.html:
1
2
3
4
5
6
7
8
9
10
11
12
13
14
15
16
17
18
19
<mat-card class="product-card" [class.on-sale]="product().originalPrice">
  <mat-card-header>
    <mat-card-title></mat-card-title>
    <mat-card-subtitle>Product</mat-card-subtitle>
  </mat-card-header>

  <mat-card-content>
    @if (product().originalPrice) {
      <span class="sale-badge">On Sale</span>
    }

    <p></p>
    <p class="price"></p>
  </mat-card-content>

  <mat-card-actions>
    <button matButton></button>
  </mat-card-actions>
</mat-card>
Here is what this does:
@if (product().originalPrice)— checks if the product has an original price- If true, Angular renders the badge
- If false, Angular skips that block entirely
- We also add a conditional class
[class.on-sale]="product().originalPrice"on the card itself to support sale-specific styling
This improves the user experience immediately because sale products now stand out visually.
Let’s add styles to make the badge visible. Update src/app/products/product-card/product-card.scss:
1
2
3
4
5
6
7
8
9
10
.sale-badge {
  display: inline-block;
  margin-bottom: 0.75rem;
  padding: 0.25rem 0.5rem;
  border-radius: 999px;
  font-size: 0.75rem;
  font-weight: 600;
  color: var(--mat-sys-on-primary);
  background: var(--mat-sys-primary);
}
Each property serves a purpose:
display: inline-block— keeps the badge inline with text flow while allowing padding and rounded cornersmargin-bottom: 0.75rem— creates breathing room between the badge and content belowpadding: 0.25rem 0.5rem— adds inner spacing so the label feels like a capsule, not plain textborder-radius: 999px— turns the badge into a rounded, pill-shaped designfont-size: 0.75rem— keeps the badge compact and secondary to the product titlefont-weight: 600— makes the text easy to scancolor: var(--mat-sys-on-primary)— high-contrast text color from the Material themebackground: var(--mat-sys-primary)— uses the primary theme color for consistency
Displaying Price Differently for Sale vs. Regular Products
Now let’s use @if and @else to render the price differently depending on whether the product is on sale.
Update the price section in product-card.html:
1
2
3
4
5
6
7
8
9
10
11
12
13
14
15
16
<mat-card-content>
  @if (product().originalPrice) {
    <span class="sale-badge">On Sale</span>

    <p class="price-row">
      <span class="current-price"></span>
      <span class="original-price"></span>
    </p>
  } @else {
    <p class="price-row">
      <span class="current-price"></span>
    </p>
  }

  <p></p>
</mat-card-content>
Now each card has two rendering paths:
- Sale products — show current price + original price (with strikethrough)
- Regular products — show current price only
This is a clean example of template branching based on data. The syntax is clear, and the intent is obvious to anyone reading the template.
Styling Sale and Regular Price States
Let’s add styles for both branches so the difference is immediately clear to users.
Add this to src/app/products/product-card/product-card.scss:
1
2
3
4
5
6
7
8
9
10
11
12
13
14
15
16
17
18
19
20
.product-card.on-sale {
  border: 1px solid color-mix(in srgb, var(--mat-sys-primary) 35%, transparent);
}

.price-row {
  display: flex;
  align-items: baseline;
  gap: 0.5rem;
  margin: 0 0 0.75rem;
}

.current-price {
  font-weight: 700;
  color: var(--mat-sys-primary);
}

.original-price {
  color: var(--mat-sys-on-surface-variant);
  text-decoration: line-through;
}
Here is what each style does:
.product-card.on-sale— targets only cards where the sale condition is trueborder: 1px solid color-mix(in srgb, var(--mat-sys-primary) 35%, transparent)— adds a subtle sale highlight without overwhelming the carddisplay: flexon.price-row— places prices on a single horizontal linealign-items: baseline— aligns numbers by text baseline for cleaner typographygap: 0.5rem— maintains consistent spacing between current and original pricesmargin: 0 0 0.75rem— adds spacing below the price row before the descriptionfont-weight: 700on.current-price— gives visual priority to the active pricecolor: var(--mat-sys-primary)on.current-price— emphasizes the active price with the theme colorcolor: var(--mat-sys-on-surface-variant)on.original-price— softens the old price with a de-emphasized tonetext-decoration: line-throughon.original-price— clearly shows the original price has been replaced
The result is a clear visual hierarchy that helps users understand the savings immediately.
Keeping Templates Readable as They Grow
As templates become more complex, conditionals can quickly become hard to read. Here are three practices to keep in mind:
- Keep each branch short and focused — if a branch grows beyond a few lines, consider extracting it to a separate component
- Use clear, intent-revealing names — class names like
current-priceandoriginal-pricemake the purpose obvious - Move heavy logic to the component class — if you have complex calculations or transformations, don’t put them in the template; use
computed()signals instead
For now, this template is still simple and readable, so keeping conditions in the HTML is the right choice. As your application grows and templates become more complex, you will know when to refactor.
Summary
In this lesson, we introduced Angular’s modern conditional rendering:
@iffor optional UI blocks that render only when a condition is true@if/@elsefor branching display logic based on data- Conditional class binding (
[class.on-sale])for styling different states - A cleaner user experience by showing only relevant product information
The product cards now adapt to the data they receive, creating a smarter, more responsive interface.
Next Lesson
In the next lesson, we will focus on derived state using computed() signals. We will add a product search field and implement filtering logic so users can find products by name. We will also explore how computed signals make our filtering reactive and efficient.
Related: Check the Modern Angular Course for the complete curriculum and source code.