Github Actions for Angular Projects: CI/CD Pipeline for Testing, Building and ng update
Maintaining Angular projects often involves a series of repetitive steps – testing, building, and updating packages. This blog post will demonstrate how GitHub Actions can automate these tasks, minimizing manual work and helping you deliver high-quality Angular applications faster.
Want the code? Go straight to GitHub
Github Action for testing and building
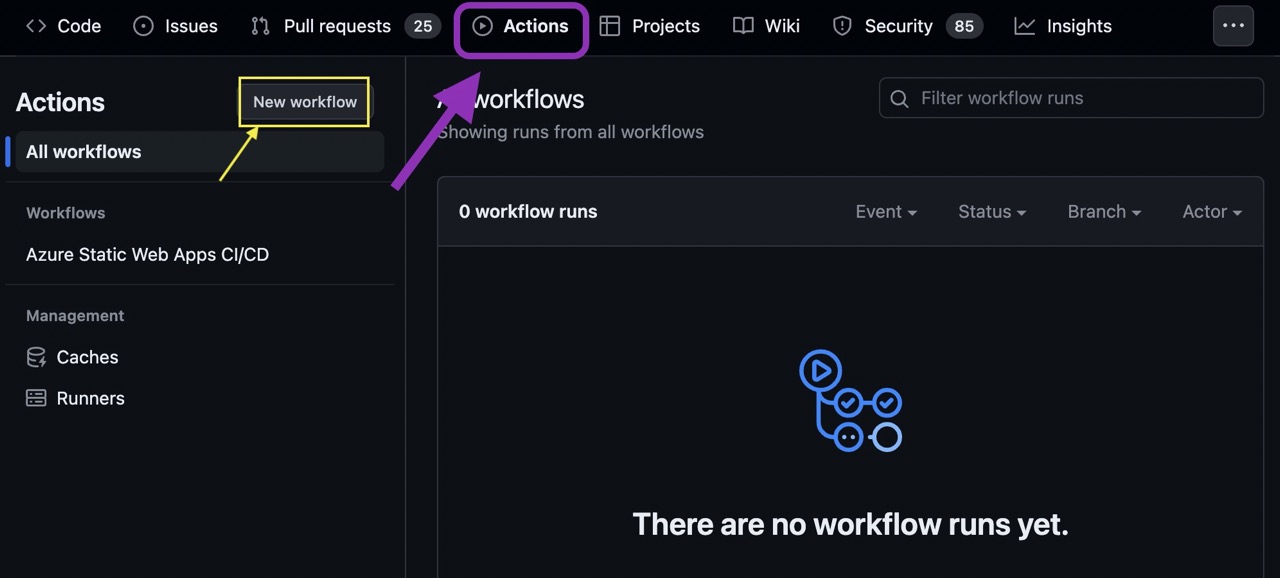
The first Github Action we will add to our repo is the default build pipeline. Go to the Actions tab and click on New Workflow.
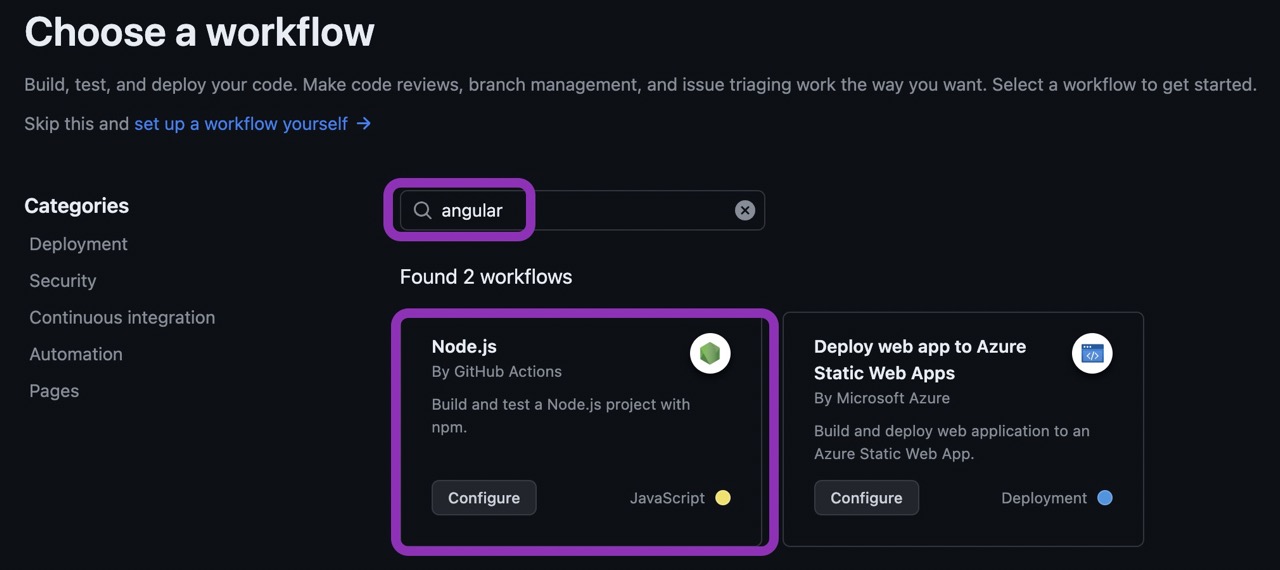
Search by angular and select the Node.js Action by clicking on the Configure button.
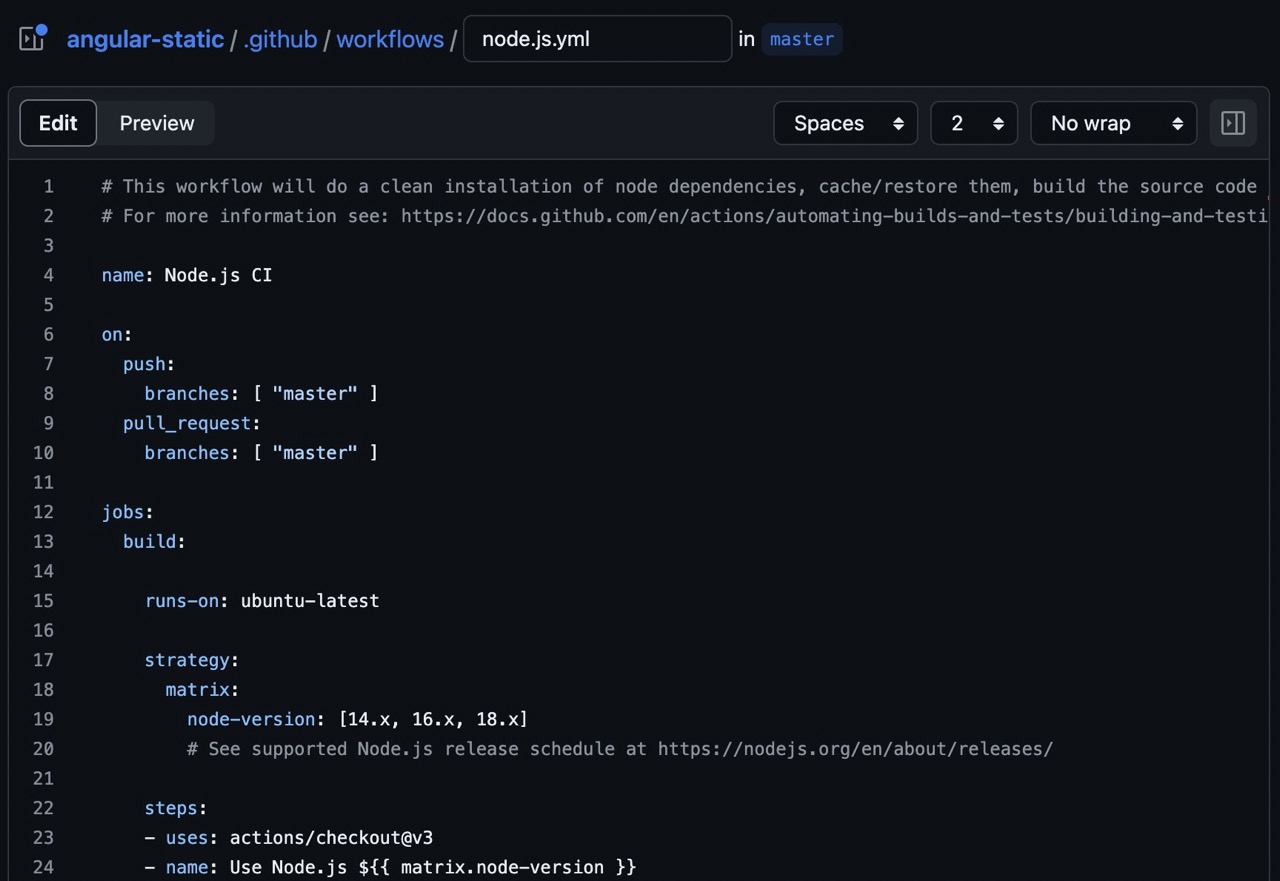
A new yml file will be created under .github/workflows folder under the repository. We can give a different name (I like to name it build.yml or angular.yml) and also customize its contents:
Below is the content I use for all my Angular repos:
name: Angular Build

# {1}
on:
  push:
    branches: [ "main" ]
  pull_request:
    branches: [ "main" ]

jobs:
  angular:
    name: Angular Build
    runs-on: ubuntu-latest
    strategy:
      matrix:
        node-version: [20]
        # See supported Node.js release schedule at https://nodejs.org/en/about/releases/
    steps:
      # {2}
      - name: Checkout the source code
        uses: actions/checkout@v3

      # {3}
      - name: Setup Node.js $
        uses: actions/setup-node@v3
        with:
          node-version: $
          cache: 'npm'
          cache-dependency-path: package-lock.json

      # {4}
      - name: Install dependencies
        run: npm ci
      # {5}
      - name: Run tests
        run: npm run test:ci
      # {6}
      - name: Build
        run: npm run build
Let’s dive into the details:
- {1}: we’ll trigger this Action whenever we create a PR (Pull Request) or when we merge/commit to the main branch. This will help us to make sure our code is working after any code changes or dependency upgrades and we can safely merge the PR.
- {2}: this GitHub Action is responsible for checking out the source code we do we can run the tests and build it.
- {3}: here is where we define what’s the runtime we’ll use in this pipeline. As in Angular we rely on NPM for the dependency management and we use a package.json file to specify the tasks, we need to use Node.js as the base of our environment. You can specify any Node.js version needed, and for Angular projects, check this link for the compatibility matrix. For cache, it’s also good to specify where the package-lock.json is located to speed up the build process.
- {4}: once our code is checked out and we have Node.js available, we can go ahead and run
npm cito install all the project dependencies in our temporary environment. This will install the packages listed from package.json instead of a clean install. - {5}: with everything installed, the next step is to run the tests we have in our project. However, we will not run
ng test, as this will fail in the pipeline. For the CI pipeline, we need to specify a test command that will not open a browser during the test, meaning it will be headless. We can use the following script in our package.json:"test:ci": "ng test --no-watch --no-progress --browsers=ChromeHeadless",
- {6}: Last but not least, we will build the application to make sure it’s compiling and generating the production bundle with no issues.
Once you create the file, commit the changes to your repository, and if you go back to the Actions tab, you can see the history of all builds:
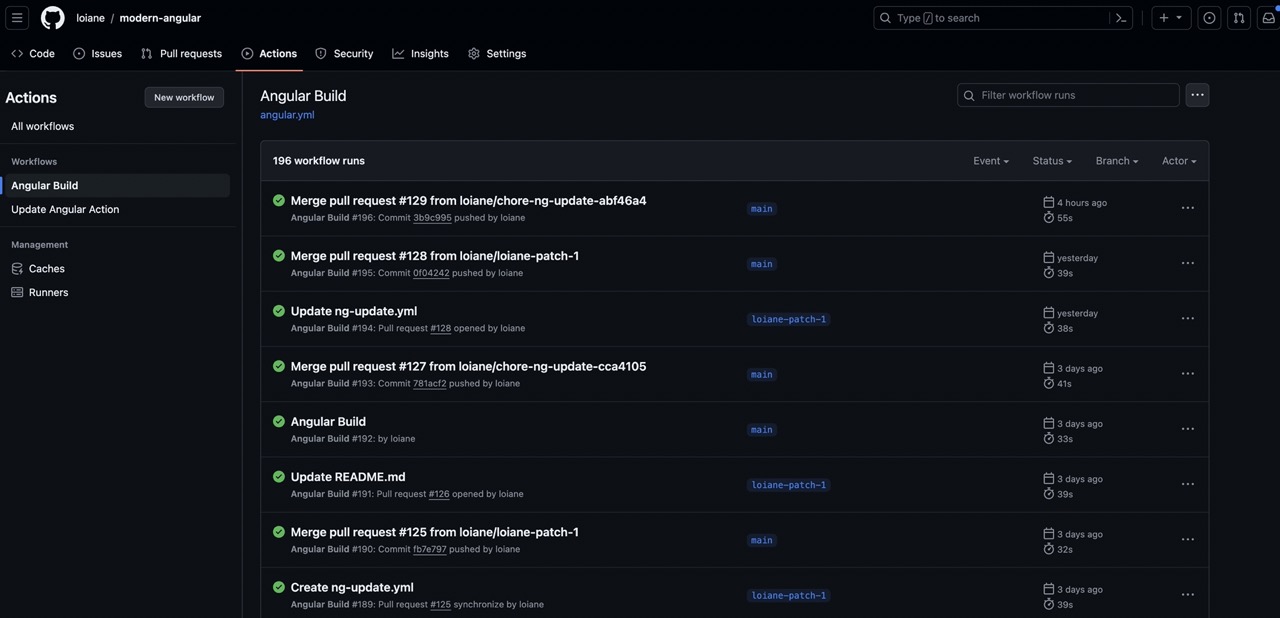
With this step, you have a basic pipeline up and running. Even if I’m not deploying the application (it’s a sample project), I like to have this Github Action enabled to make sure my project works whenever I modify any code or update any dependency.
Enabling Dependabot
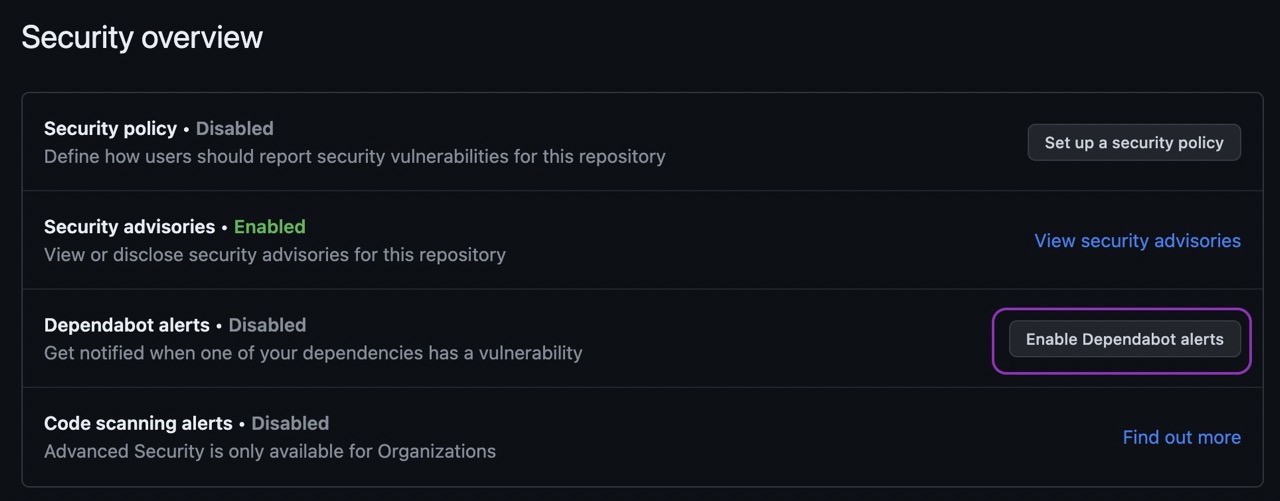
Next, we will Dependabot, which is a tool built in Github that checks for outdated dependencies and security vulnerabilities and raises a detailed PR to fix the vulnerability. It’s highly recommended to enable this option, and it’s a free service available.
To so, go to the Security tab and click on Enable dependabot alerts:
This will create another file under the .github folder named dependabot.yml:
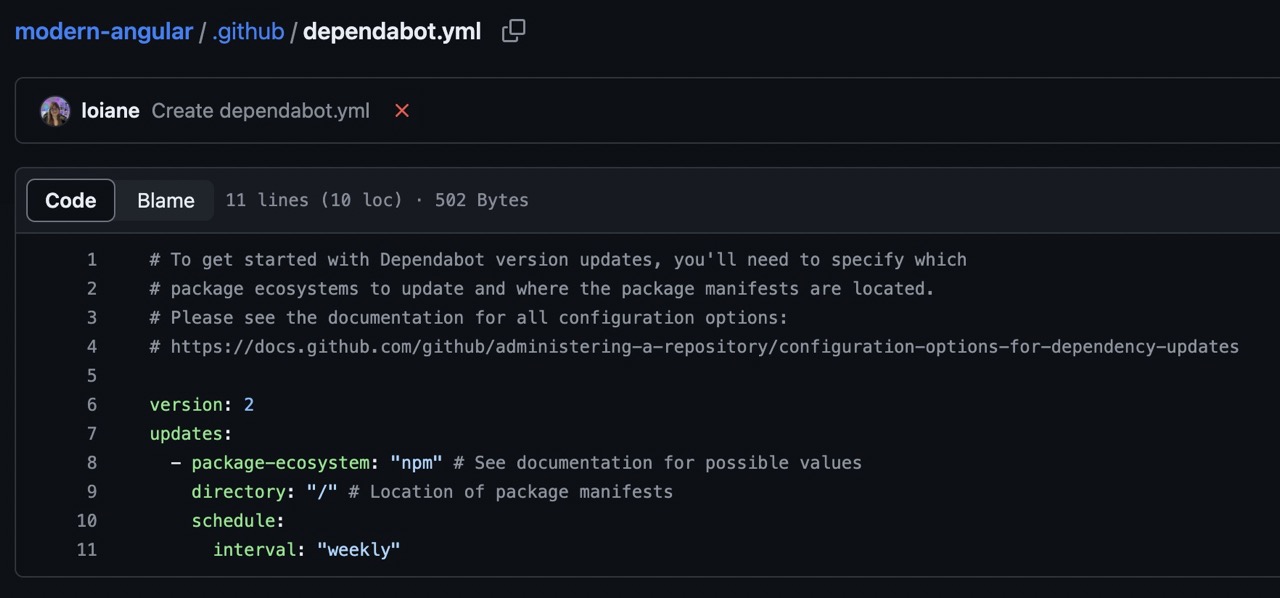
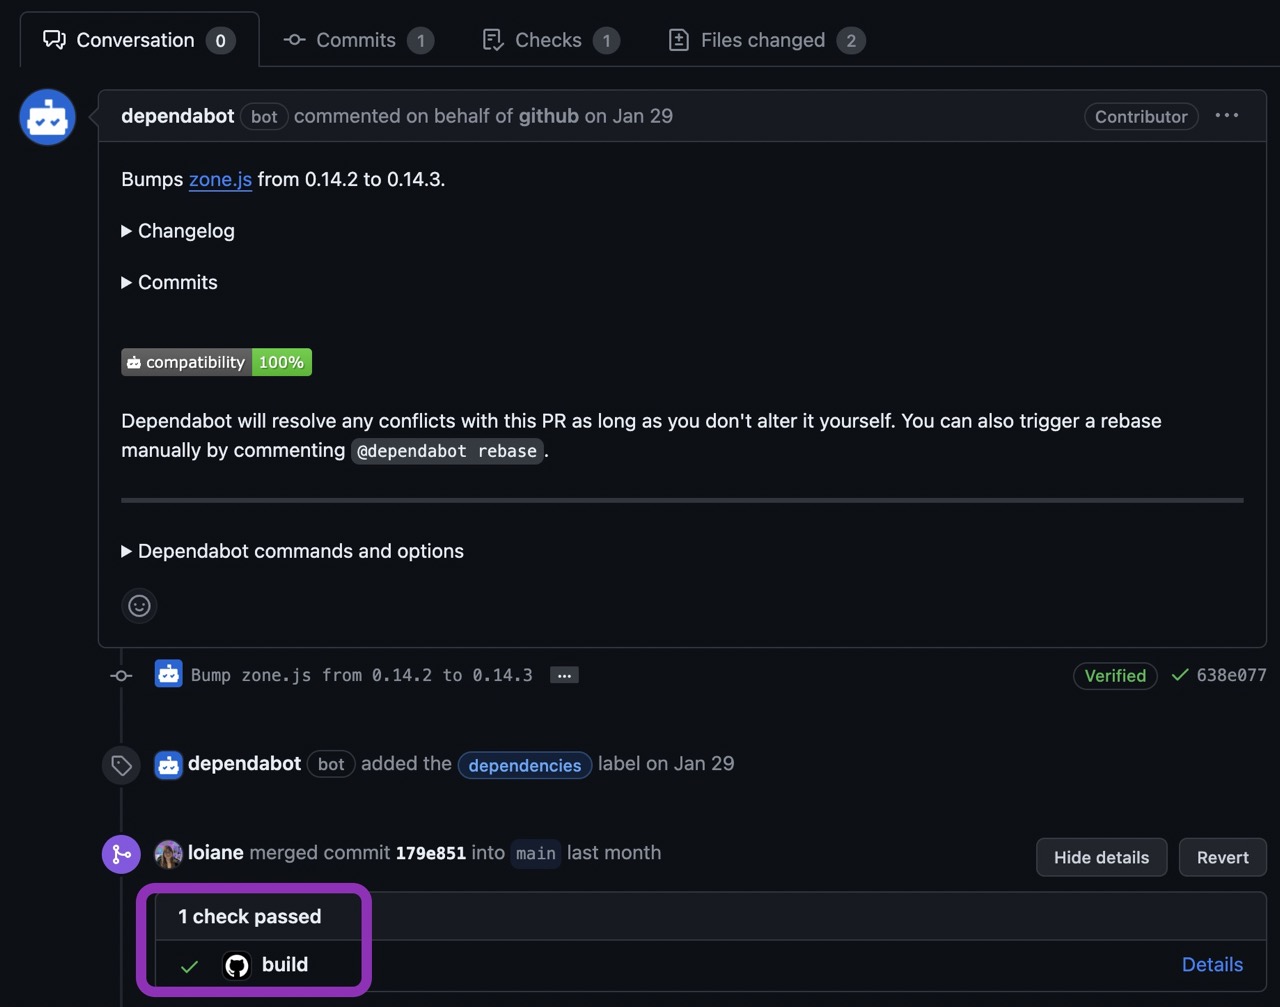
You can set up the frequency you would like the scan to happen in your repository. Once the scans happen, if there are any package upgrades available, it will automatically create the PRs. And because we have set up the build pipeline, it will trigger and we can confirm if upgrading the dependency will break our application or not!
Automated ng update
Dependabot is a great tool, but when it comes to automated Angular upgrades, does not work perfectly, as we don’t want to only update the Angular version mentioned in the package.json file, but also go through the ng update process, as Angular CLI provides an automated tool to scan our code and automatically apply the code changes during the update from one version to the next version.
So we need a robust solution to do this. And there is a Github Action available called Ng Update to help us with this task.
Navigate to the .github/workflows path and Add File:
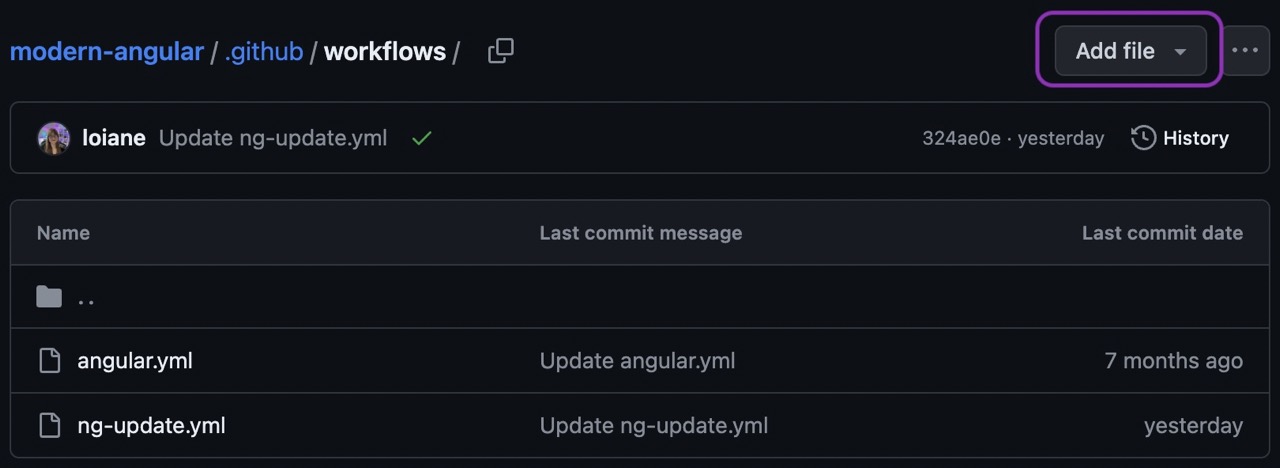
Create a file named ng-update.yml with the following content:
name: "Update Angular Action"
on: # when the action should run. Can also be a CRON or in response to external events. see https://git.io/JeBz1
  schedule:
    - cron: '30 5 * * 1,3,5'

jobs:
  ngxUptodate:
    runs-on: ubuntu-latest
    steps:
      - name: Updating ng dependencies # the magic happens here!
        uses: fast-facts/ng-update@v1
        with:
          base-branch: main
          repo-token: $
We will run this Github Action using a cron schedule, which will run every Monday (1), Wednesday (3), and Friday (5) - you can customize the frequency according to your needs.
We will use the main branch and this Action will automatically create a PR after running the ng update command:
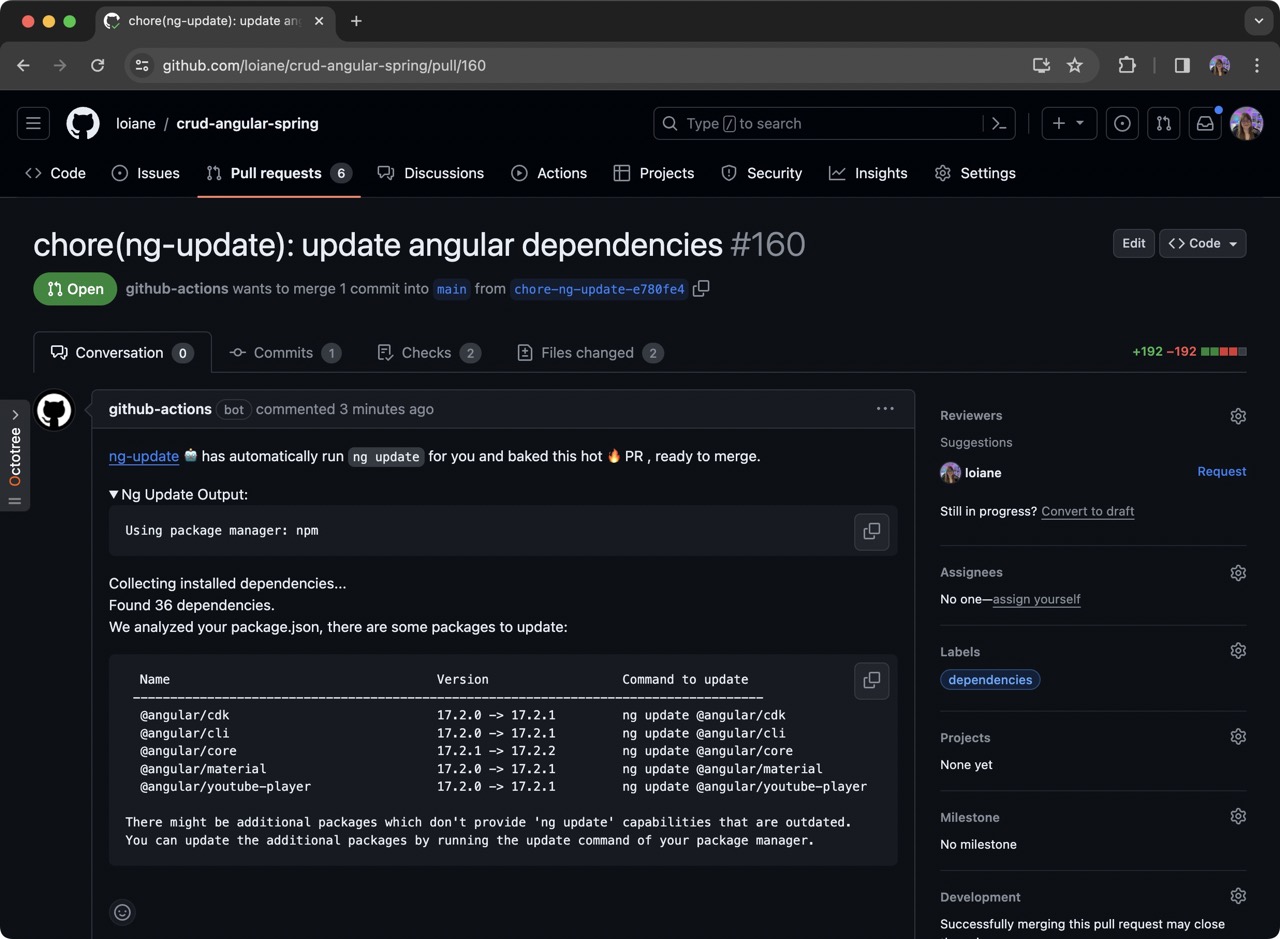
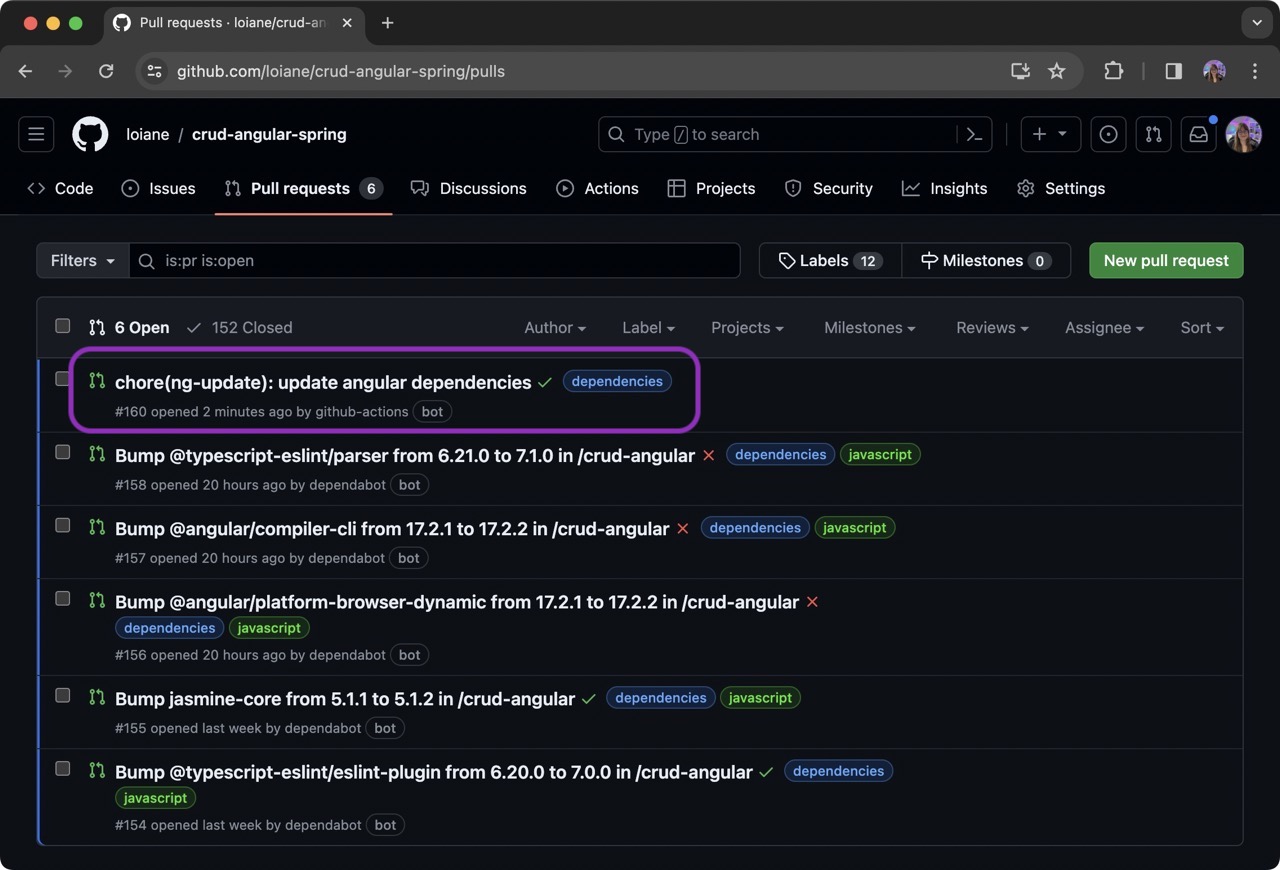
And in case you have Dependabot PRs as well, merge the ng-update PR first and the other dependabot Angular update PRs will be automatically closed:
This Action saves so much time and makes it much easier to keep the Angular projects up to date!
Video Tutorial
If video tutorials are your thing, we have one for you! Check out our YouTube tutorial for a visual guide.
References
Below are some Github repositories using the Actions mentioned in this tutorial so you can check out some different options:
Happy Coding!
