Deploying a Spring Boot REST Application to Oracle Cloud
In this article we will learn how to develop a simple Java Spring Boot 2 REST application and deploy it on Oracle Application Container Cloud.
Before we get started, here is a list of what we need to complete this tutorial:
- Java JDK (v8+)
- Maven (v3+)
- Access to Oracle Cloud (you can create a trial account - $300 of free credits for 30 days)
Content:
Creating the REST Spring Boot application
To create the Spring Boot application, we’ll use start.spring.io, which will provide us some bootstrap code (main class and pom.xml files). We need the Web, JPA, Lombok and H2 packages for this example:
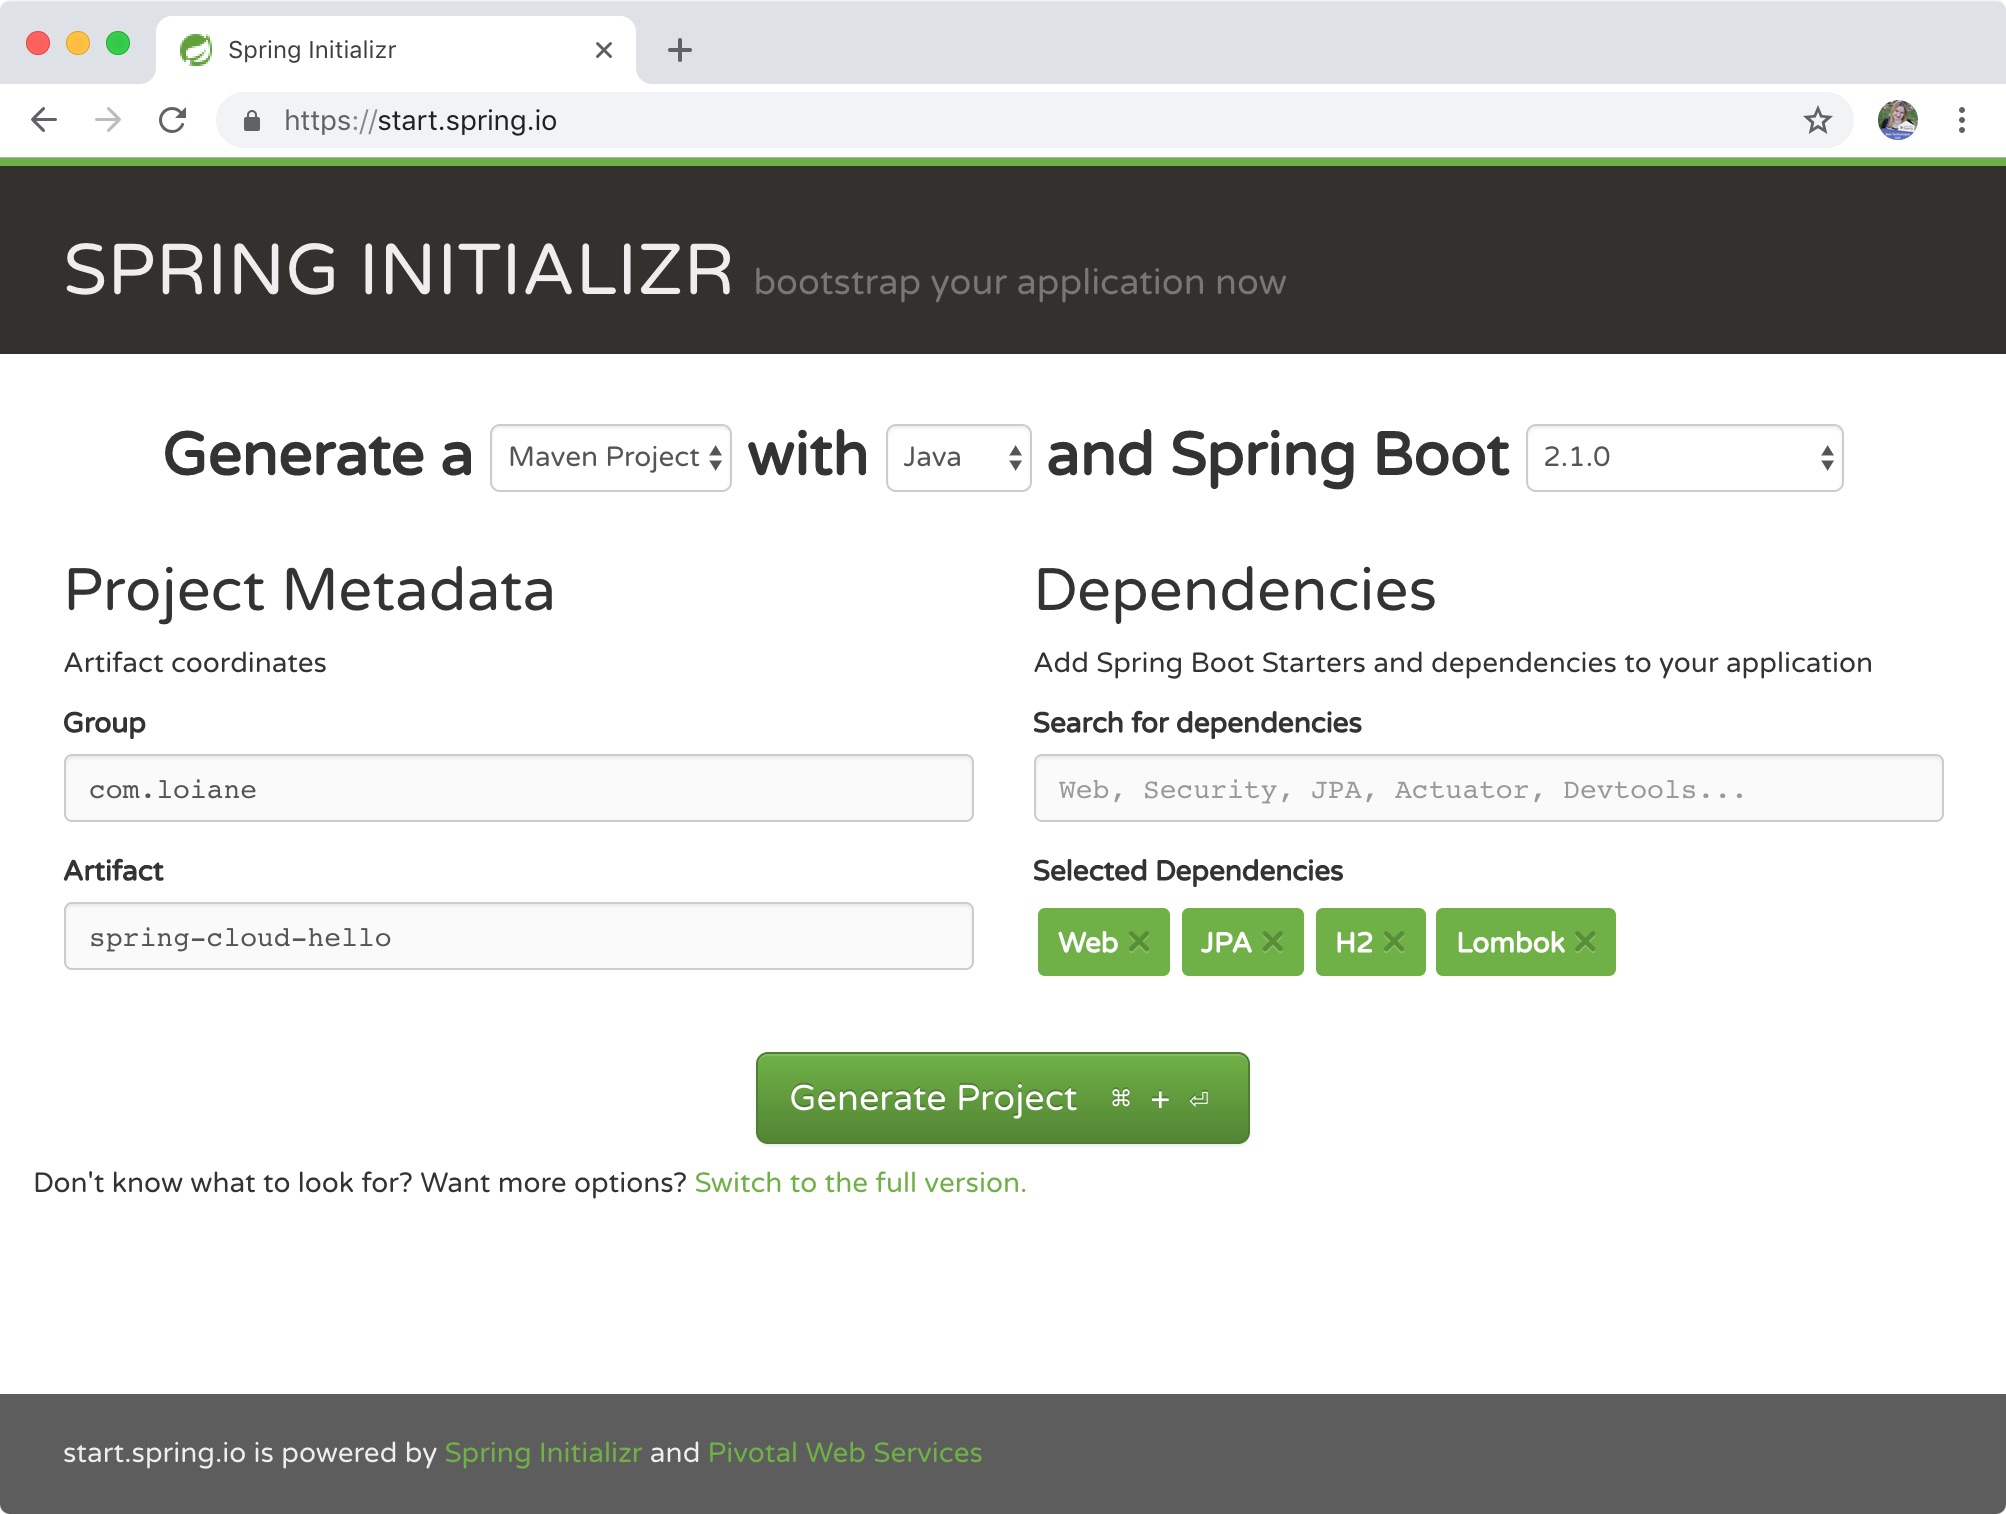
We will use H2 for database access, which is a in memory database. We’ll connect to a real database in a next article of this series.
Download the zip file, extract its contents to your workspace and open it in your favorite IDE.
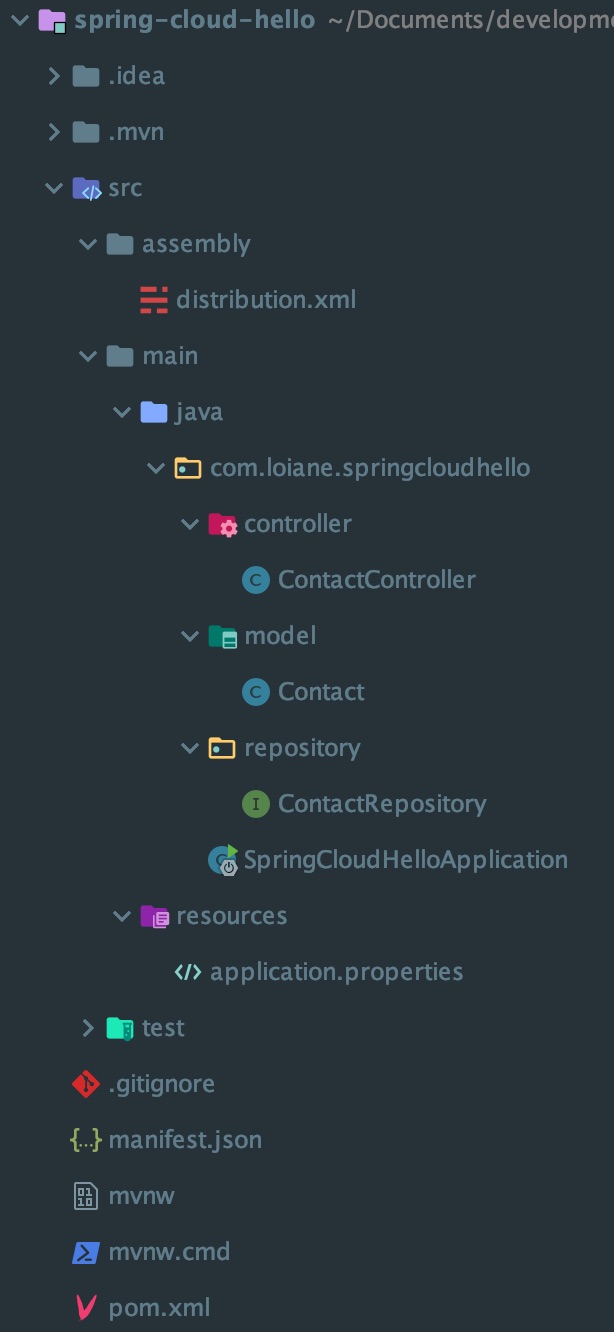
Project Structure
The following screenshot shows the structure of the project we will create.
Creating the model (JPA Entity)
The first class we will create is the JPA Entity. We will create a class Contact with a primary key id:
1
2
3
4
5
6
7
8
9
10
11
12
13
14
@AllArgsConstructor
@NoArgsConstructor
@Data
@Entity
public class Contact {

    @Id
    @GeneratedValue
    private Long id;

    private String name;
    private String email;
    private String phone;
}
The following annotations are from project Lombok and help us keep our classes (specially model/POJO) cleaner without the getters and setters:
AllArgsConstructor: automatically creates a class construtor with all arguments (properties) - this will be usefull later to initialize our H2 database;NoArgsConstructor: automatically creates an empty class construtor with all arguments (properties);Data: createstoString,equals,hashCode,gettersandsetters.
Check this link to configure Lombok in Eclipse.
Install this plugin to configure Lombok in IntelliJ IDEA.
When you run the application, you can launch H2 console at http://localhost:8080/h2-console.
You will see that a table called contact was created in H2 Console with all columns we specified as properties in our class.
Creating the JPA Repository
To easily access the mehotds to manipulate the Contact table, we just need to create an interface that extends JpaRepository passing the class that represents our model and the type of the primary key as generic arguments:
1
2
3
@Repository
public interface ContactRepository
    extends JpaRepository<Contact, Long> { }
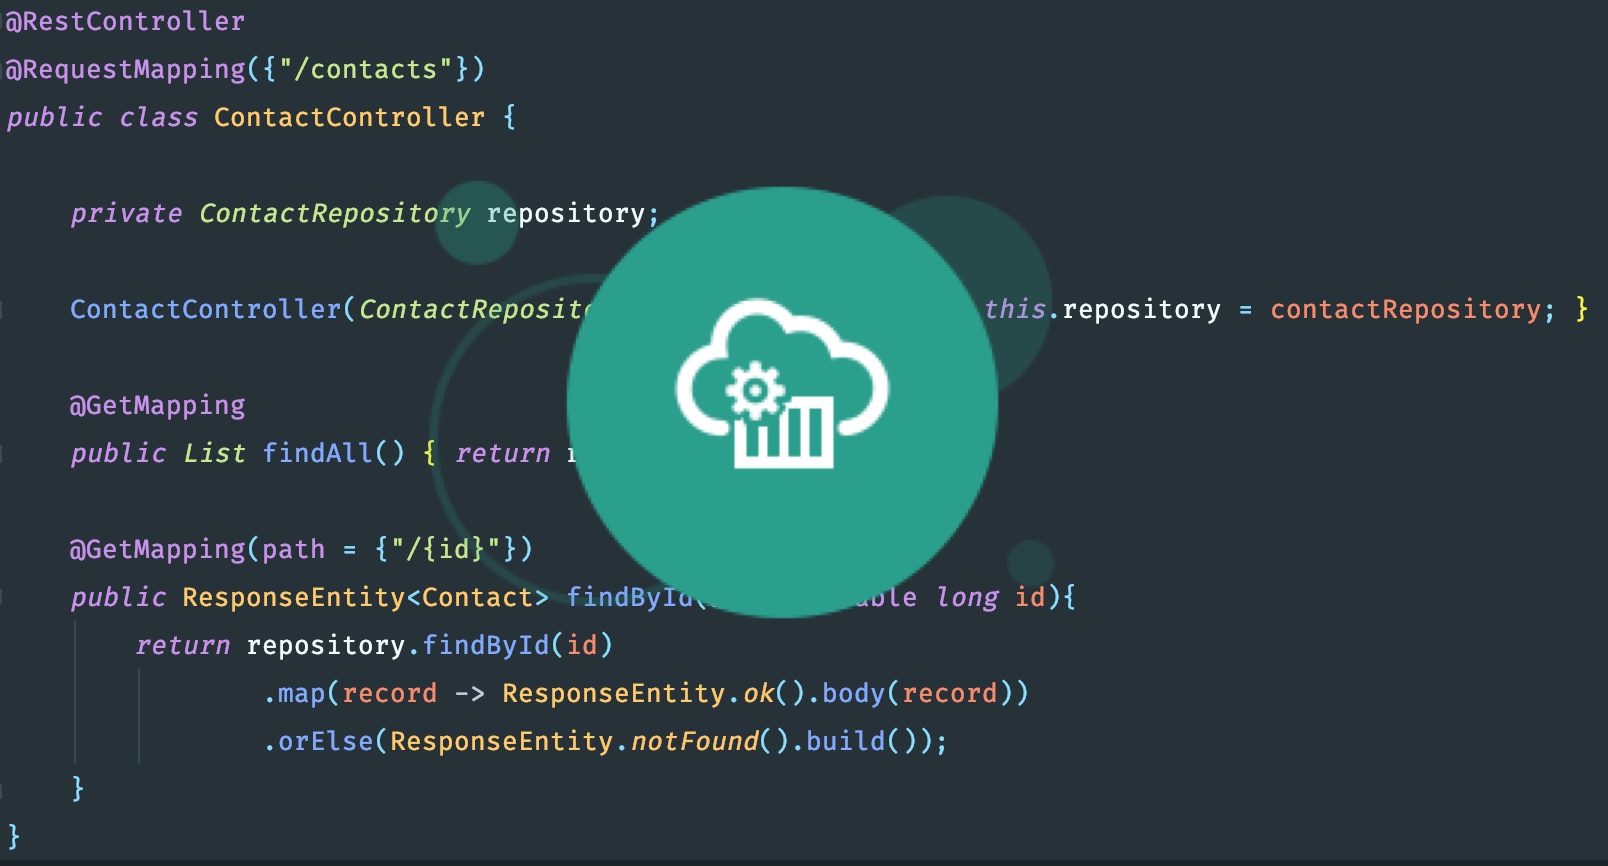
Creating the Controller
To access our data, we will also need a Controller.
For testing purposes, we will only expose two methods: find all and find by id:
1
2
3
4
5
6
7
8
9
10
11
12
13
14
15
16
17
18
19
20
21
22
23
@RestController
@RequestMapping({"/contacts"})
public class ContactController {

    private ContactRepository repository;

    ContactController(ContactRepository contactRepository) {
        this.repository = contactRepository;
    }

    @GetMapping
    public List findAll(){
        return repository.findAll();
    }

    @GetMapping(path = {"/{id}"})
    public ResponseEntity<Contact> findById(@PathVariable long id){
        return repository.findById(id)
                .map(record -> ResponseEntity.ok().body(record))
                .orElse(ResponseEntity.notFound().build());
    }
}
Please note we are not using the @Autowired annotation to automatically inject the repository. We are using dependency injection through the constructor as it is a recommended best practice.
As this is a simple example, we are not creating a Service class to iterate with the repository. Creating a service layer is a good practice as we can keep our controller class clean and add any required business logic to the service instead.
Initializing the H2 database
As a last step, we are going to insert a few records in the H2 contact table by declaring a Bean that returns a CommandLineRunner:
1
2
3
4
5
6
7
8
9
10
11
12
13
14
15
16
17
18
@SpringBootApplication
public class SpringCloudHelloApplication {

	public static void main(String[] args) {
		SpringApplication.run(SpringCloudHelloApplication.class, args);
	}

	@Bean
	CommandLineRunner init(ContactRepository repository) {
		return args -> {
			repository.deleteAll();
			LongStream.range(1, 11)
					.mapToObj(i -> new Contact(i, "Contact " + i, "contact" + i + "@email.com", "(111) 111-1111"))
					.map(v -> repository.save(v))
					.forEach(System.out::println);
		};
	}
}
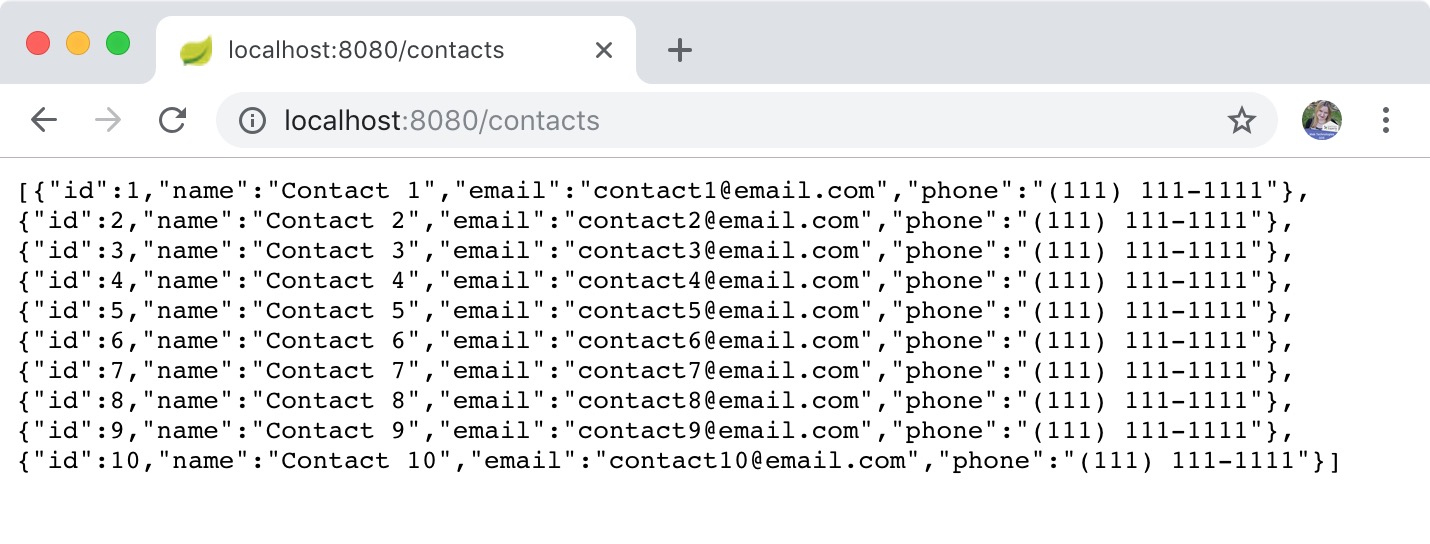
To test if our application is working, we can access http://localhost:8080/contacts:
Preparing the build for Oracle Cloud
Now that our code is complete, we can focus on preparaing the application to be deployed to Oracle Cloud.
Depending on the service we will be using the steps are different. In this example, we will use the Oracle Application Container Cloud. The Application Container Cloud includes Oracle Java SE Cloud Service, which makes the steps much simpler.
Dynamically reading the PORT Environment Variable
Locally, our code runs on port 8080. When we deploy the application, we do not know what port is going to be assigned. For this reason, we need to add the following configuration inside src/main/application.properties file:
1
server.port=${PORT}
Creating the manifest.json file
One of the requirenments to deploy to the Oracle Application Container Cloud is having a manifest.json file. This file needs to be created at the same level as the pom.xml file:
1
2
3
4
5
6
7
8
9
10
11
12
{
  "runtime":{
    "majorVersion": "8"
  },
  "command": "java -jar spring-cloud-hello-0.0.1-SNAPSHOT.jar",
  "release": {
    "build": "2018",
    "commit": "oracle cloud example",
    "version": "0.0.1-SNAPSHOT"
  },
  "notes": "REST Spring Boot 2 app Oracle Cloud"
}
For more information about
manifest.json, please refer to this link.
We are declaring that this application needs Java 8 to run, the command (spring boot application) to bootstrap the application and some release notes.
At the time this article is being written, the following Java versions are supported by this service: 7, 8, 9, 10.
Creating a zip file
We need to upload a .zip, .tgz, or .tar.gz file to Oracle Cloud. The zip file must contain the jar file and also the manifest.json file. We can compile the project and manually create the .zip file.
As we are using maven, we can also use the maven-assembly-plugin to create the .zip file with everything we need.
To do so, we first need to create an XML file with the list of files we want to include and the extension.
Below is the content of src/assembly/distribution.xml:
1
2
3
4
5
6
7
8
9
10
11
12
13
14
15
16
17
18
19
20
21
22
23
24
25
26
27
<assembly xmlns="http://maven.apache.org/plugins/maven-assembly-plugin/assembly/1.1.3"
          xmlns:xsi="http://www.w3.org/2001/XMLSchema-instance"
          xsi:schemaLocation="http://maven.apache.org/plugins/maven-assembly-plugin/assembly/1.1.3 http://maven.apache.org/xsd/assembly-1.1.3.xsd">
    <id>dist</id>
    <formats>
        <format>zip</format>
    </formats>
    <includeBaseDirectory>false</includeBaseDirectory>
    <fileSets>
        <fileSet>
            <directory>${project.basedir}</directory>
            <includes>
                <include>manifest.json</include>
            </includes>
        </fileSet>
        <fileSet>
            <directory>${project.build.directory}</directory>
            <outputDirectory>\</outputDirectory>
            <includes>
                <include>spring-cloud-hello-0.0.1-SNAPSHOT.jar</include>
            </includes>
            <excludes>
                <exclude>*.zip</exclude>
            </excludes>
        </fileSet>
    </fileSets>
</assembly>
And inside the pom.xml -> build -> plugins we are going to add the maven-assembly-plugin:
1
2
3
4
5
6
7
8
9
10
11
12
13
14
15
16
17
18
<plugin>
  <artifactId>maven-assembly-plugin</artifactId>
  <version>2.5.5</version>
  <configuration>
    <appendAssemblyId>false</appendAssemblyId>
    <descriptors>
      <descriptor>src/assembly/distribution.xml</descriptor>
    </descriptors>
  </configuration>
  <executions>
    <execution>
      <phase>package</phase>
      <goals>
        <goal>single</goal>
      </goals>
    </execution>
  </executions>
</plugin>
With this in place we can simply run in the terminal:
1
mvn compile package
And a .zip file will be create inside the target directory. We will upload this file to Oracle Application Container Cloud.
Deploying on Oracle Application Container Cloud
Open the Oracle Application Container Cloud Service console.
You can access the Application Container service from your console - the link is something like this https://myservices-xxxxxx.console.oraclecloud.com/mycloud/cloudportal/dashboard or you can try to access the service console directly: https://psm-xxxxxx.console.oraclecloud.com/apaas/index.html
It will look something like this:
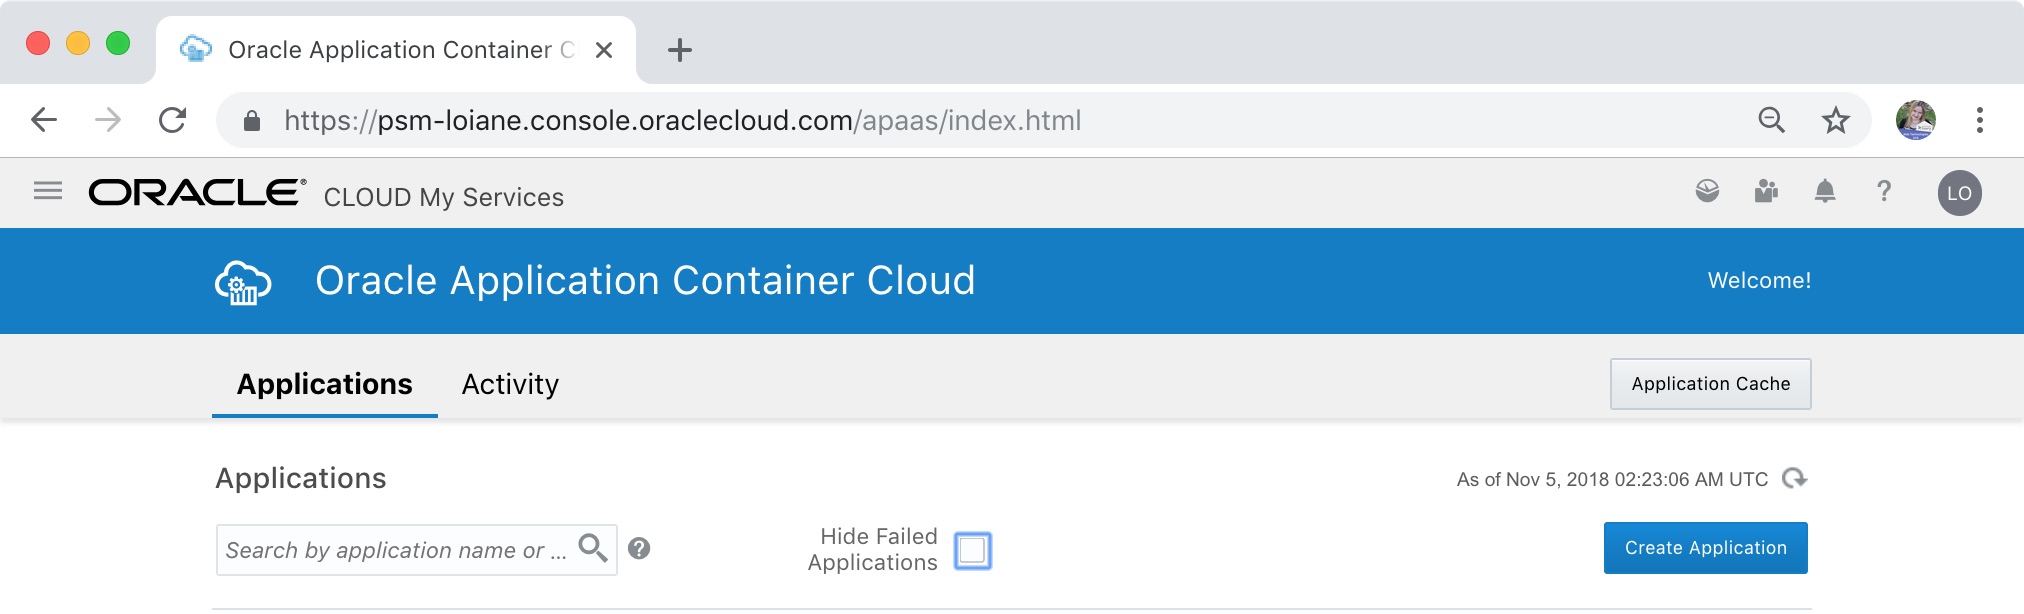
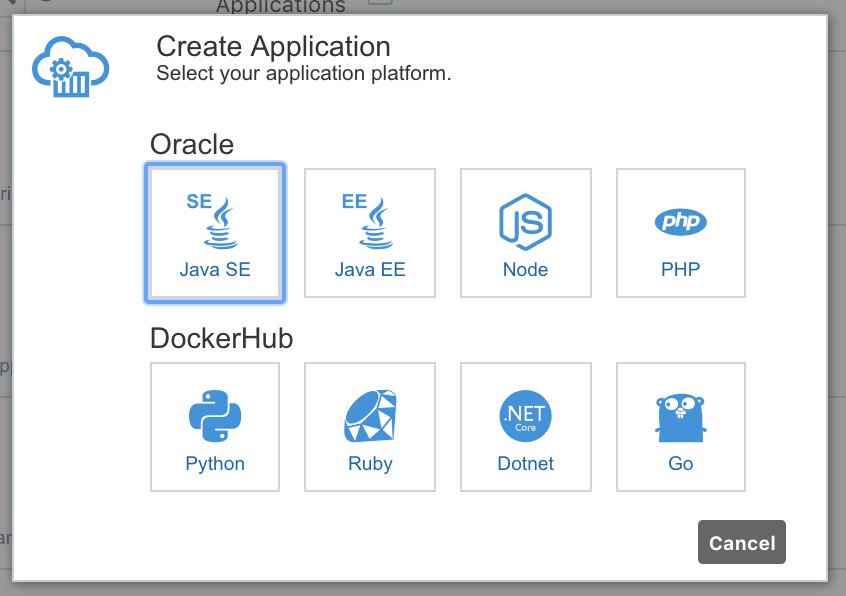
Click on Create Application and select Java SE:
Provide a name, select the .zip file from the target directory. If you don’t provide the manifest.json along the .zip file, you can also upload it separetely.
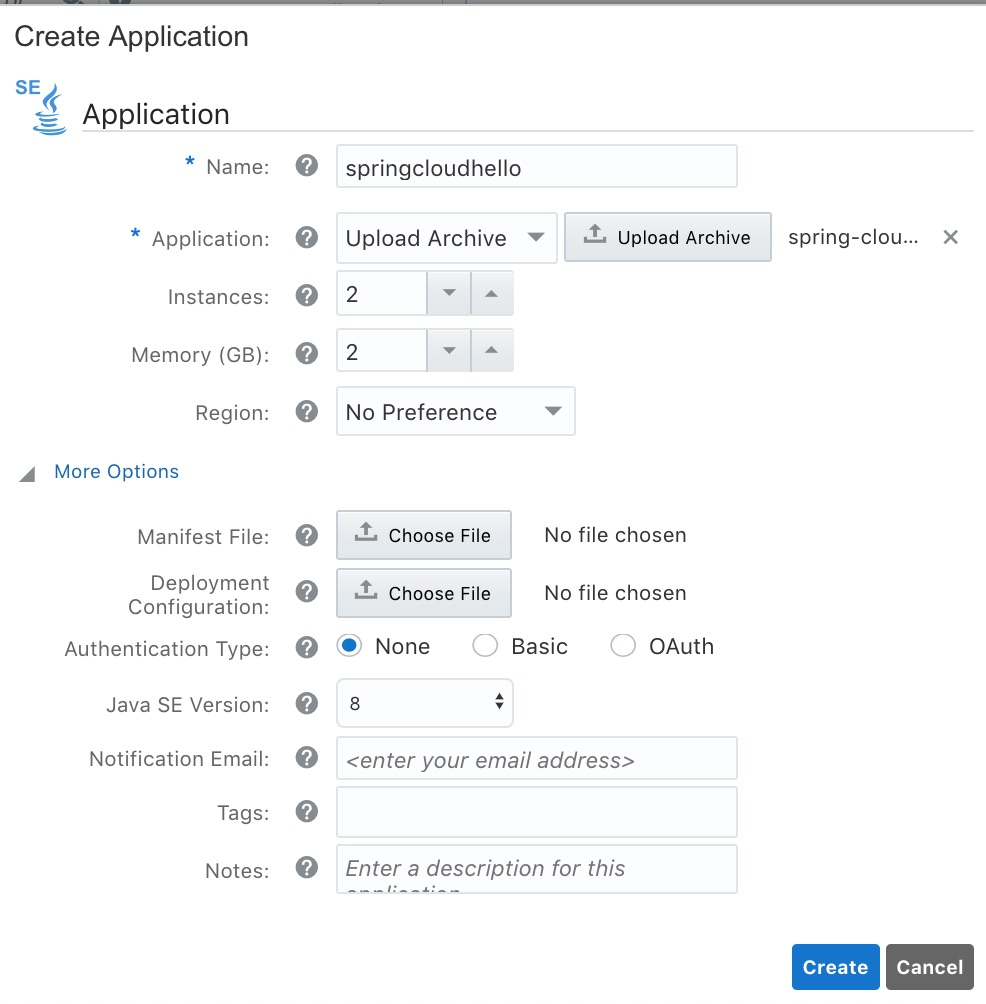
For more information about each option available, please refer to this link.
Click on Create. It will take a few seconds to deploy the application. Once the application has been successfully deployed, you will see the link to access it:
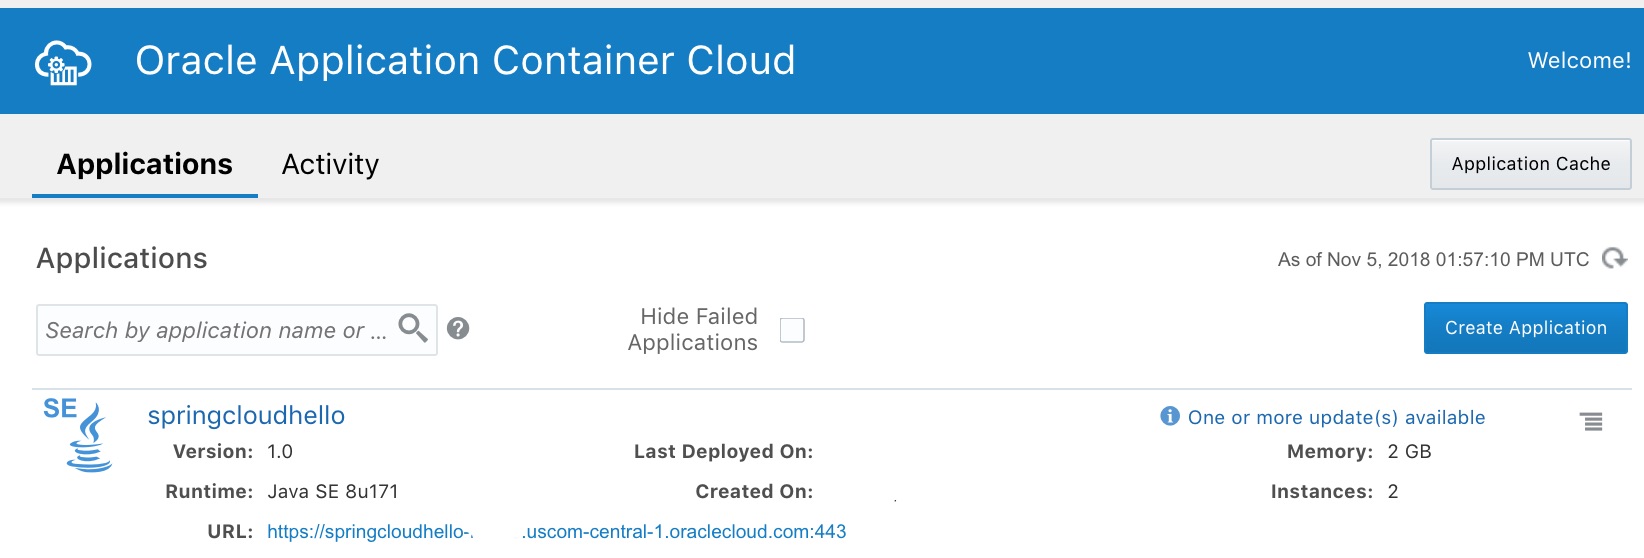
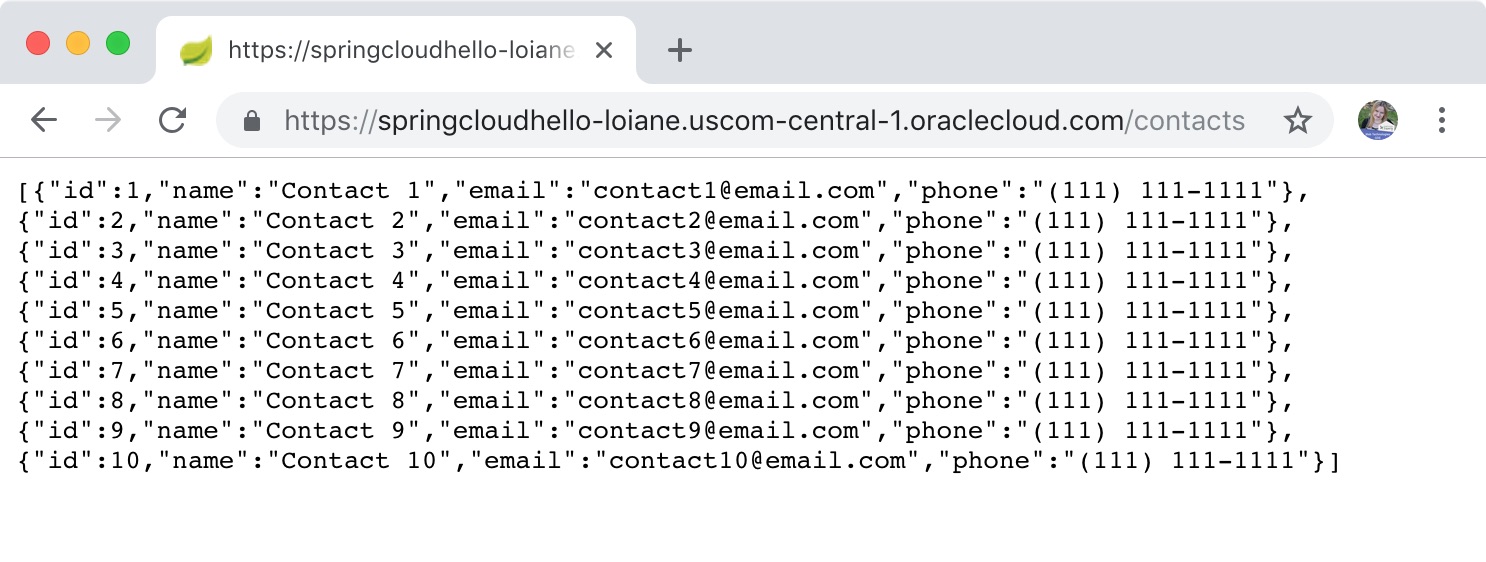
Now we can access our API from the cloud:
In case of any issues or if you need to update the .zip file, click on the name of the application ->
Deployments-> select a new archive and click onApply Edits.
Conclusion
These are very simple steps we can use to get started with a cloud environment. Ideally, we would have a complete infrastructure using Continuous Integration (CI) to automatically deploy our application trigged by a new commit to the source code repository.
Also, this example did not cover connecting to a real database. We will learn how to do this in the next article of this series.
Part 2 of this series of blog posts coming soon
Source code
Source code available on GitHub
References:
Happy coding!