
CRUD REST API Using Spring Boot 2, Hibernate, JPA, and MySQL
In this article we will learn how to develop a CRUD RESTFul API with Spring Boot 2 + JPA/Hibernate and MySQL as database.
The end goal of these articles is to deploy this application on Oracle Cloud. But first, we will develop and test the application using a local database.
Before we get started, here is a list of what we need to complete this tutorial:
Content:
Want the code? Go straight to GitHub
The API we will develop
We will create a Contact Resource exposing three services using RESTFul URIs and HTTP methods:
- Retrieve all contacts -
@GetMapping(“/contacts) - Get details of specific contact -
@GetMapping(“/contacts/{id}”) - Delete a contact -
@DeleteMapping(“/contacts/{id}”) - Create a new contact -
@PostMapping(“/contacts) - Update existing contact details -
@PutMapping(“/contacts/{id}”)
Creating the REST Spring Boot application
To create the Spring Boot application, we’ll use start.spring.io, which will provide us some bootstrap code (main class and pom.xml files). We need the Web, JPA, Lombok and MySQL packages for this example:

Look at the From the above diagram, we have specified the following details:
Generate: Maven Project
Java Version: 1.8 (Default)
Spring Boot:2.1.1
Group: com.loiane
Artifact: spring-cloud-mysql
Dependencies: Web, JPA, Lombok, MySQL
After entering all details, click on Generate Project button, download the zip file, extract its contents to your workspace and open it in your favorite IDE.
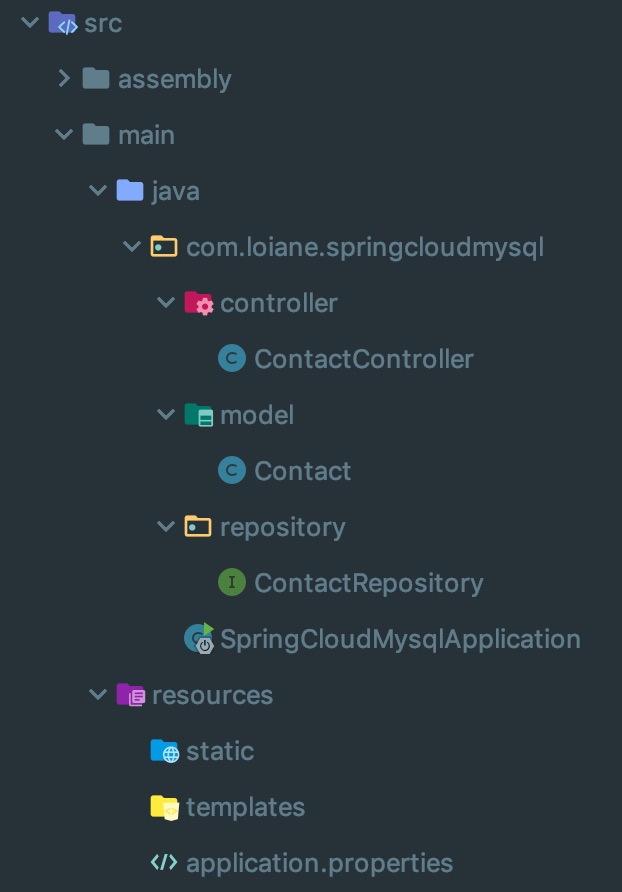
Project Structure
The following screenshot shows the structure of the project we will create.
Creating the model (JPA Entity)
The first class we will create is the JPA Entity. We will create a class Contact with a primary key id:
The model is the same as part 1 of this article series, but we will specify the how the ID will be auto generated because we are no longer using H2 database.
@AllArgsConstructor
@NoArgsConstructor
@Data
@Entity
public class Contact {

  @Id
  @GeneratedValue(strategy = GenerationType.IDENTITY)
  private Long id;

  private String name;
  private String email;
  private String phone;
}
The following annotations are from project Lombok and help us keep our classes (specially model/POJO) cleaner without the getters and setters:
AllArgsConstructor: automatically creates a class construtor with all arguments (properties).NoArgsConstructor: automatically creates an empty class construtor with all arguments (properties).Data: createstoString,equals,hashCode,gettersandsetters.
Check this link to configure Lombok in Eclipse.
Install this plugin to configure Lombok in IntelliJ IDEA.
Creating the JPA Repository
To easily access the methods to manipulate the Contact table, we just need to create an interface that extends JpaRepository passing the class that represents our model and the type of the primary key as generic arguments:
@Repository
public interface ContactRepository
    extends JpaRepository<Contact, Long> { }
The JpaRepository interface provides a simple and easy way to access all the CRUD operations.
Creating the Controller
To access our data, we will also need a Controller.
@RestController
@RequestMapping({"/contacts"})
public class ContactController {

  private ContactRepository repository;

  ContactController(ContactRepository contactRepository) {
      this.repository = contactRepository;
  }

  // CRUD methods here
}
The @RestController annotation contains the @Controller and @ResponseBody annotations. The @Controller annotation represents a class with endpoints and the @ResponseBody indicates indicates a method return value should be bound to the web response body (according to the documentation).
The @RequestMapping("/contacts") indicates that the url of the API in this controller will start with /contacts, so we will be able to access http://localhost:8080/contacts as our endpoint.
Please note we are not using the @Autowired annotation to automatically inject the repository. We are using dependency injection through the constructor as it is a recommended best practice.
As this is a simple example, we are not creating a Service class to iterate with the repository. Creating a service layer is a good practice as we can keep our controller class clean and add any required business logic to the service instead.
Let’s take a look at each method next.
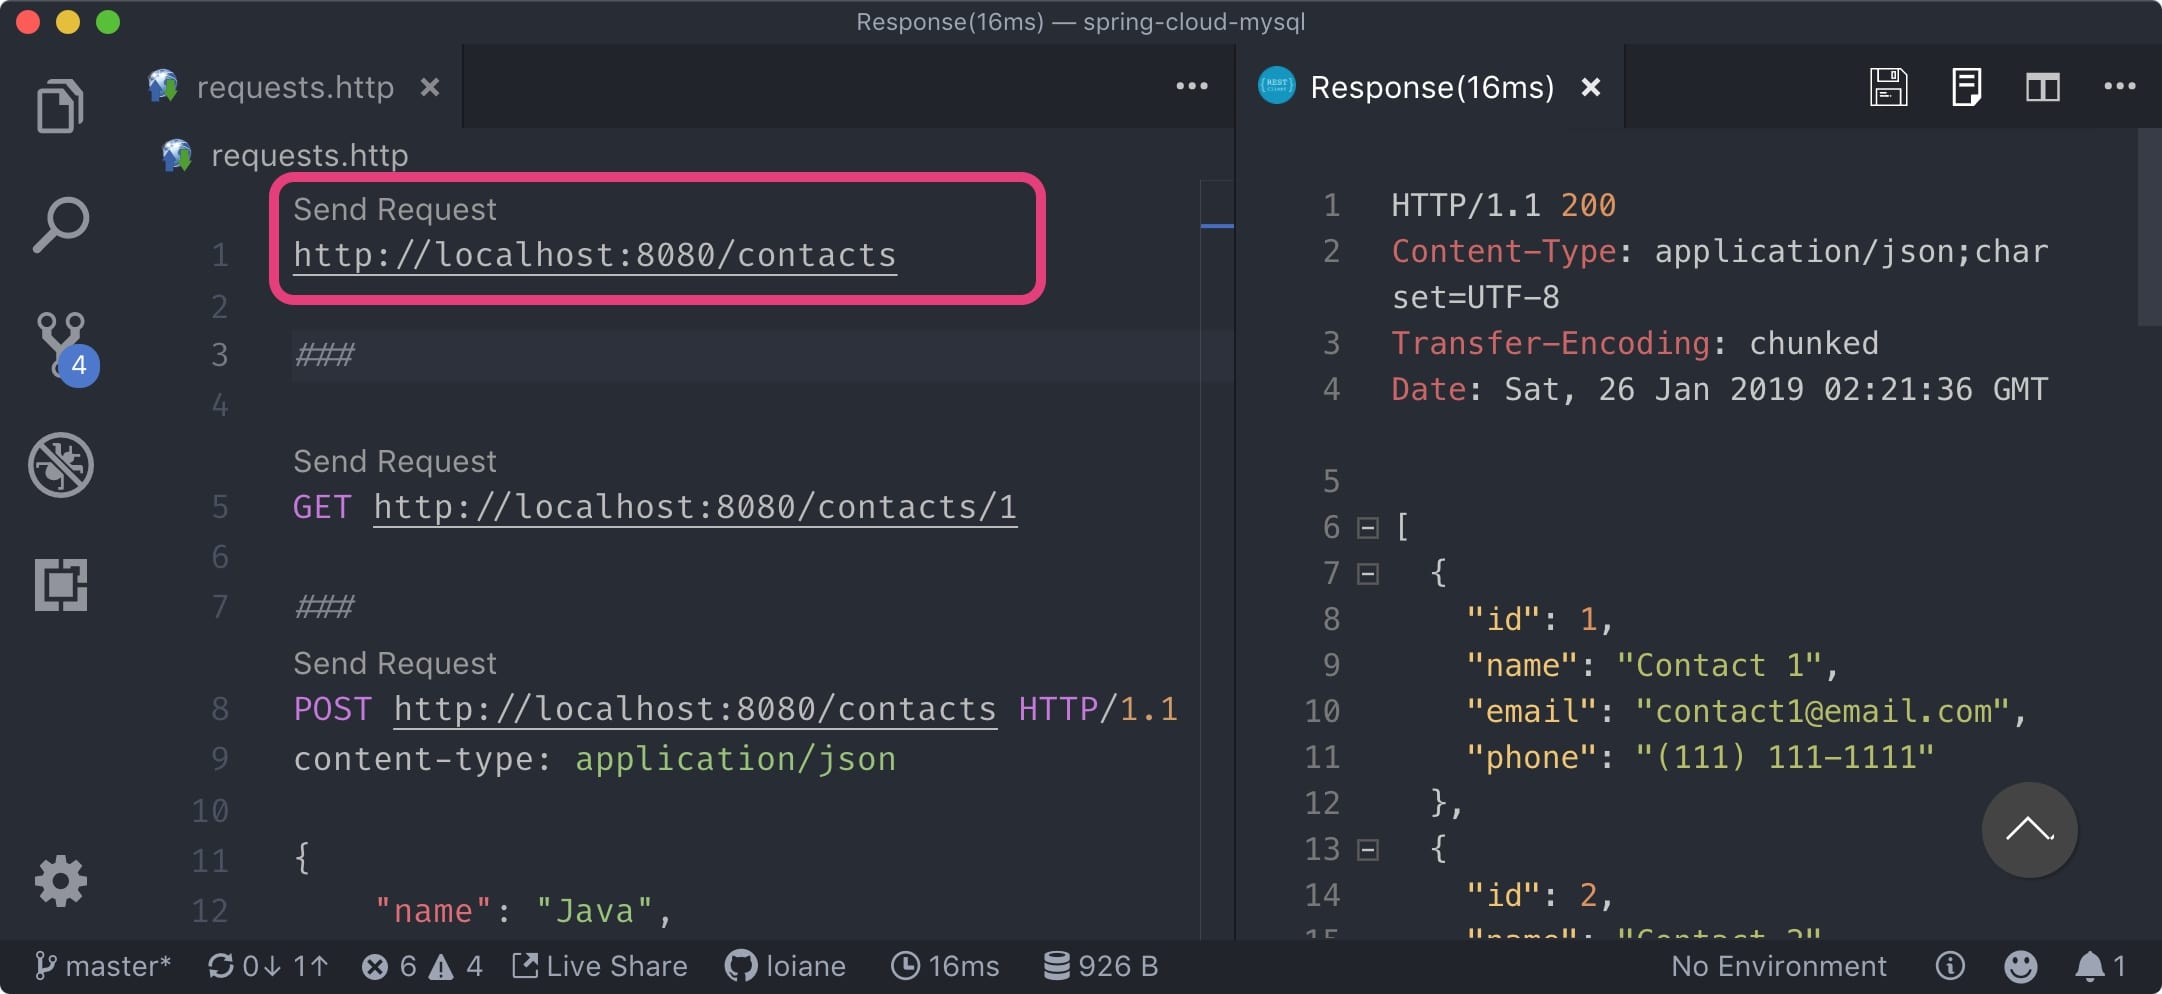
Retrieve All Contacts (GET /contacts)
@GetMapping
public List findAll(){
  return repository.findAll();
}
The findAll method is going to retrieve all the records from the database (select * from contact).
As this is a RESTful API, we can omit the @RequestMapping(value="/contacts", method=RequestMethod.GET) and simply use @GetMapping.
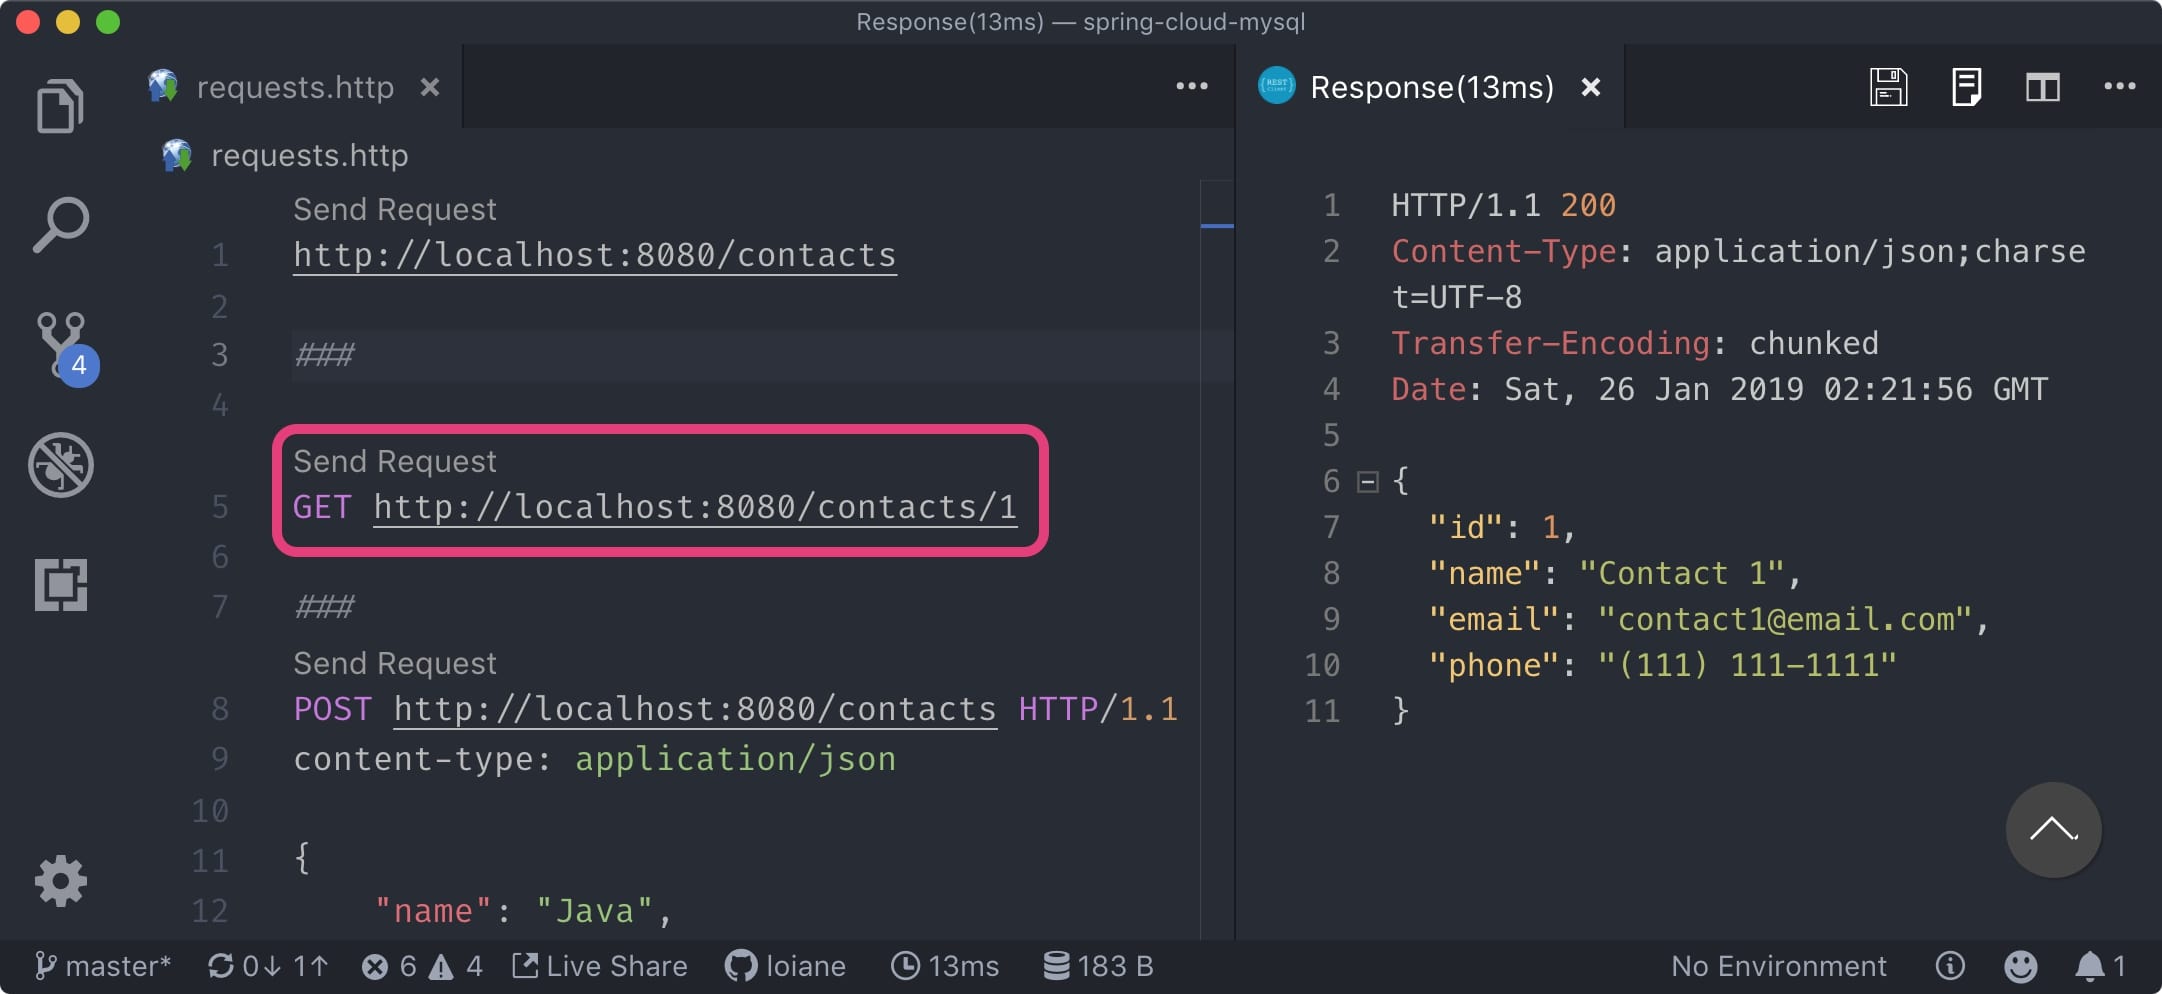
Retrieve a Contact by ID (GET /contacts/{id})
@GetMapping(path = {"/{id}"})
public ResponseEntity<Contact> findById(@PathVariable long id){
  return repository.findById(id)
          .map(record -> ResponseEntity.ok().body(record))
          .orElse(ResponseEntity.notFound().build());
}
The @PathVariable annotation binds the method parameter id with the path variable \{id}.
we will go to the database and will try to retrieve the contact (select * from contact where id = ?). If a contact is found, we return it (HTTP 200 - OK), else, we return HTTP 404 -Not Found.
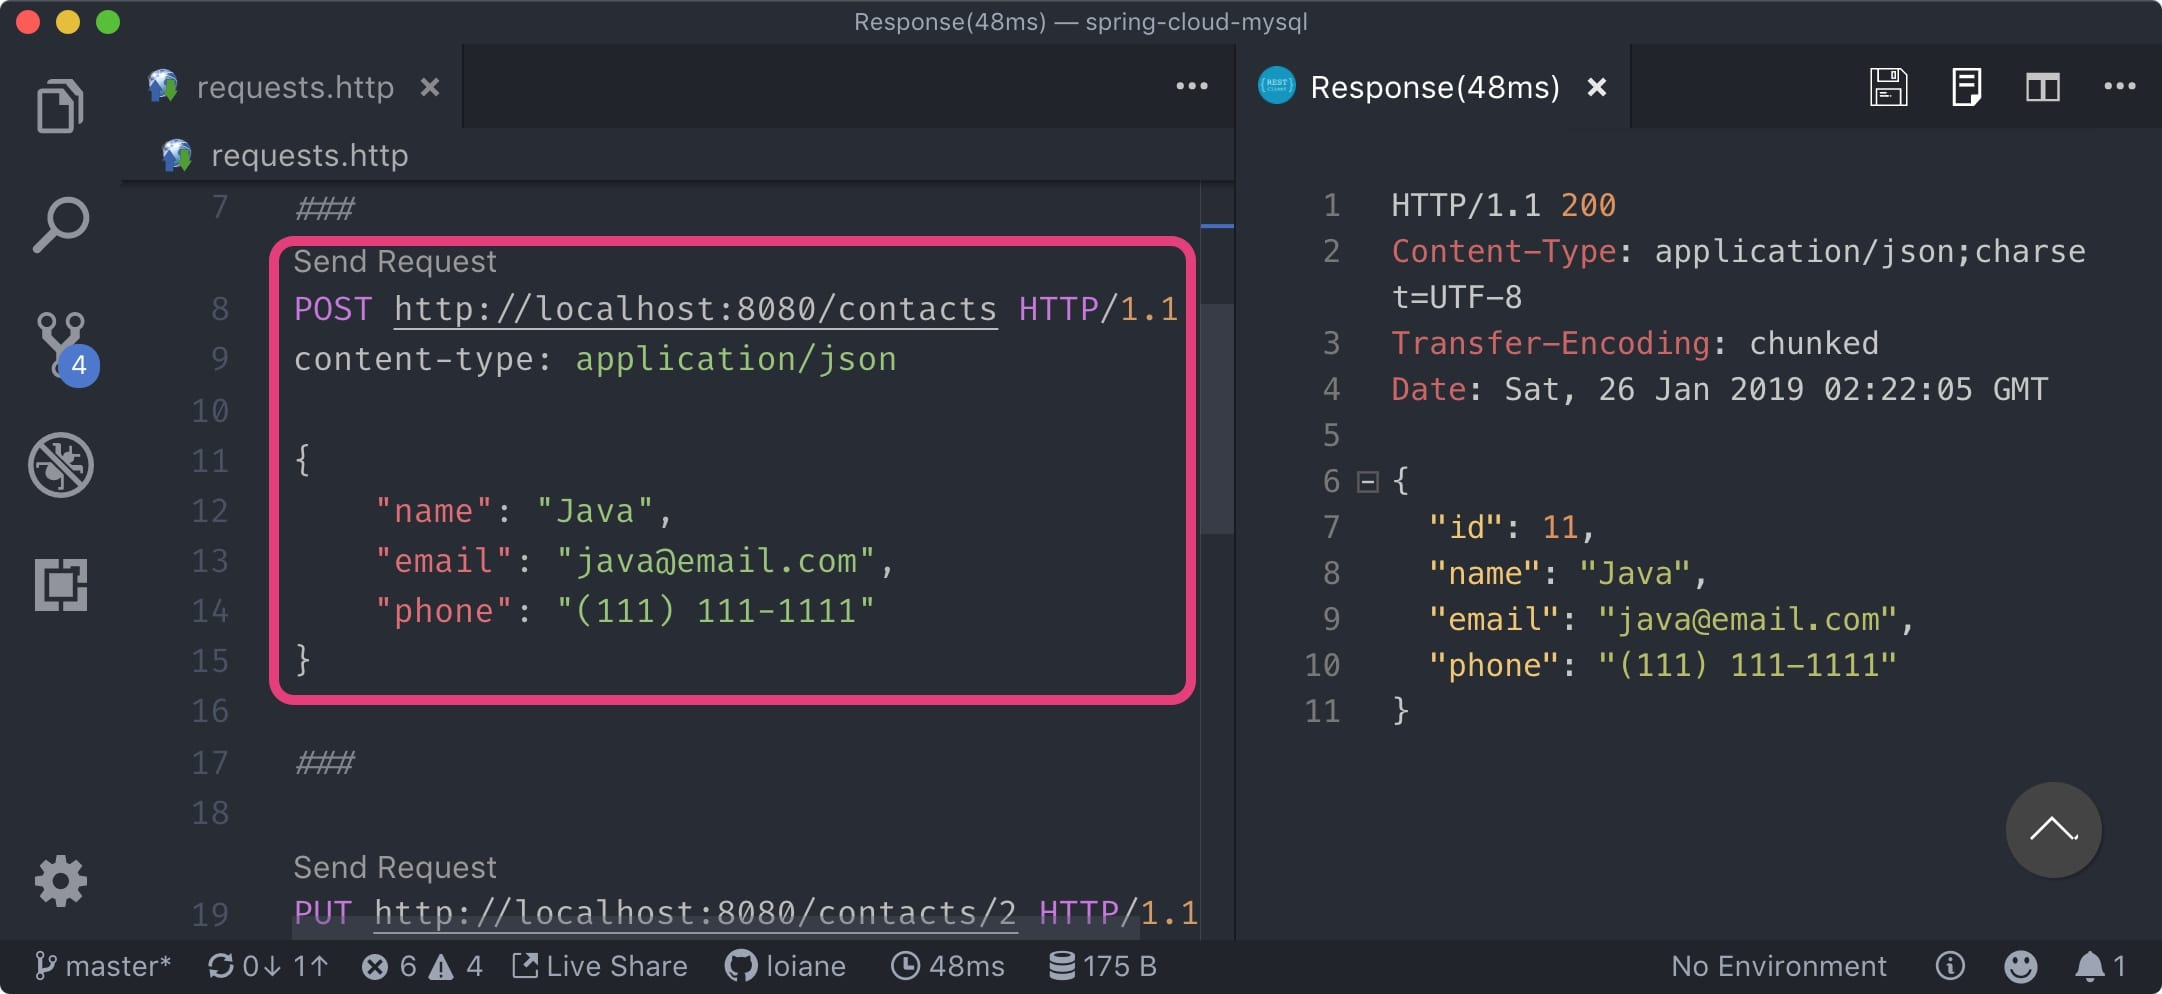
Create a new Contact (POST /contacts)
@PostMapping
public Contact create(@RequestBody Contact contact){
    return repository.save(contact);
}
The @RequestBody annotation indicates a method parameter should be bound to the body of the web request. This means the method expects the following content from que request (in JSON format):
{
    "name": "Java",
    "email": "java@email.com",
    "phone": "(111) 111-1111"
}
Spring will automatically parse the request and create a variable of type Contact with its contents. Then, it will save it. The id of the contact will be null, therefore the save method will perform an insert into the Contact table.
Update a Contact (PUT /contacts)
@PutMapping(value="/{id}")
  public ResponseEntity<Contact> update(@PathVariable("id") long id,
                                        @RequestBody Contact contact){
    return repository.findById(id)
        .map(record -> {
            record.setName(contact.getName());
            record.setEmail(contact.getEmail());
            record.setPhone(contact.getPhone());
            Contact updated = repository.save(record);
            return ResponseEntity.ok().body(updated);
        }).orElse(ResponseEntity.notFound().build());
  }
In order to update a contact, we need to inform its ID in the path variable. We also need to pass the updated contact.
Next, we will try to find the contact to be updated. If the contact is found, we update the values from the record from the database with the values passed as parameter to the method and save it. In this case, as the record exists, an update statement will performed in the contact table. We also return the updated contact. In case the contact is not found, it returns HTTP 404.
Remove a Contact (DELETE /contacts/{id})
@DeleteMapping(path ={"/{id}"})
  public ResponseEntity<?> delete(@PathVariable("id") long id) {
    return repository.findById(id)
        .map(record -> {
            repository.deleteById(id);
            return ResponseEntity.ok().build();
        }).orElse(ResponseEntity.notFound().build());
  }
To remove a contact, we first need to retrieve it from the database. In case it is found, we delete it passing its ID and return HTTP 200 to indicate the deletion was performed successfully. In case the contact is not found, we return HTTP 404.
Initializing the MySQL database
As a last step, we are going to insert a few records in the MySQL contact table by declaring a Bean that returns a CommandLineRunner - this step is optional in case you already using an existing database/table.
@SpringBootApplication
public class SpringCloudMysqlApplication {

	public static void main(String[] args) {
		SpringApplication.run(SpringCloudMysqlApplication.class, args);
	}

	@Bean
	CommandLineRunner init(ContactRepository repository) {
		return args -> {
			repository.deleteAll();
			LongStream.range(1, 11)
					.mapToObj(i -> {
						Contact c = new Contact();
						c.setName("Contact " + i);
						c.setEmail("contact" + i + "@email.com");
						c.setPhone("(111) 111-1111");
						return c;
					})
					.map(v -> repository.save(v))
					.forEach(System.out::println);
		};
	}
}
Configuring MySQL Database
In order for our code to be able to connect to a MySQL database, we also need to inform the connection details. We are going to add these details inside src/maind/resources/application.properties:
## Spring DATASOURCE (DataSourceAutoConfiguration & DataSourceProperties)
spring.datasource.url=jdbc:mysql://localhost:3306/mydatabase?useSSL=false
spring.datasource.username=root
spring.datasource.password=root

# The SQL dialect makes Hibernate generate better SQL for the chosen database
spring.jpa.properties.hibernate.dialect=org.hibernate.dialect.MySQL5InnoDBDialect
In case you want Hibernate to automatically generate the table in the database, we can use the following configuration as well:
# Hibernate ddl auto (create, create-drop, validate, update)
spring.jpa.hibernate.ddl-auto=update
Although this makes easier during the development, this is not recommended in production. For production, you might want to create a functional ID (user/password) that can perform all CRUD operations in the tables (DML (Data Manipulation Language) commands), but cannot perform any DDL (Data Definition Language) commands (Create, Drop, Alter tables, and so on).
To create the contact table, we can use the following SQL script:
CREATE TABLE `mydatabase`.`contact` (
  `id` INT NOT NULL,
  `name` VARCHAR(255) NULL,
  `email` VARCHAR(255) NULL,
  `phone` VARCHAR(45) NULL,
  PRIMARY KEY (`id`));

  ALTER TABLE `mydatabase`.`contact`
  CHANGE COLUMN `id` `id` INT(11) NOT NULL AUTO_INCREMENT ,
  ADD UNIQUE INDEX `id_UNIQUE` (`id` ASC);
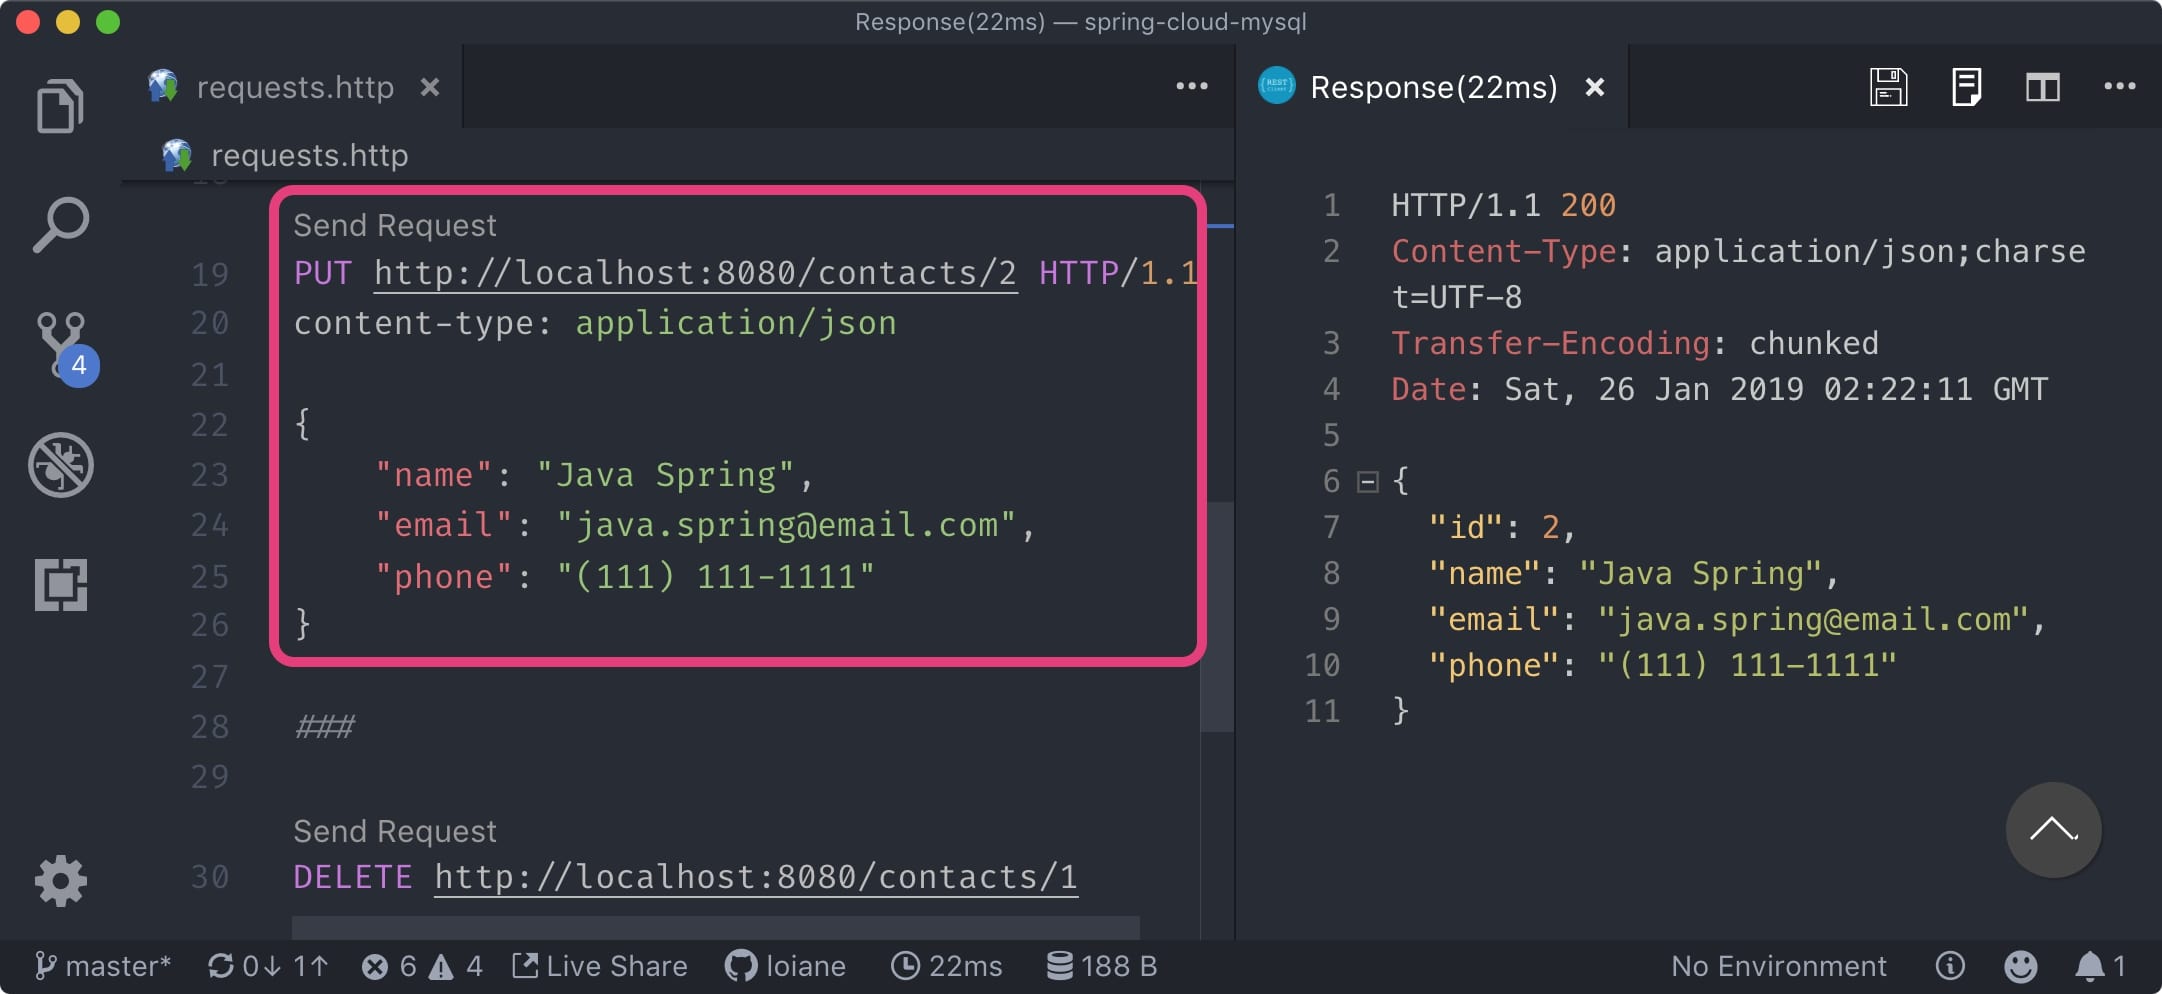
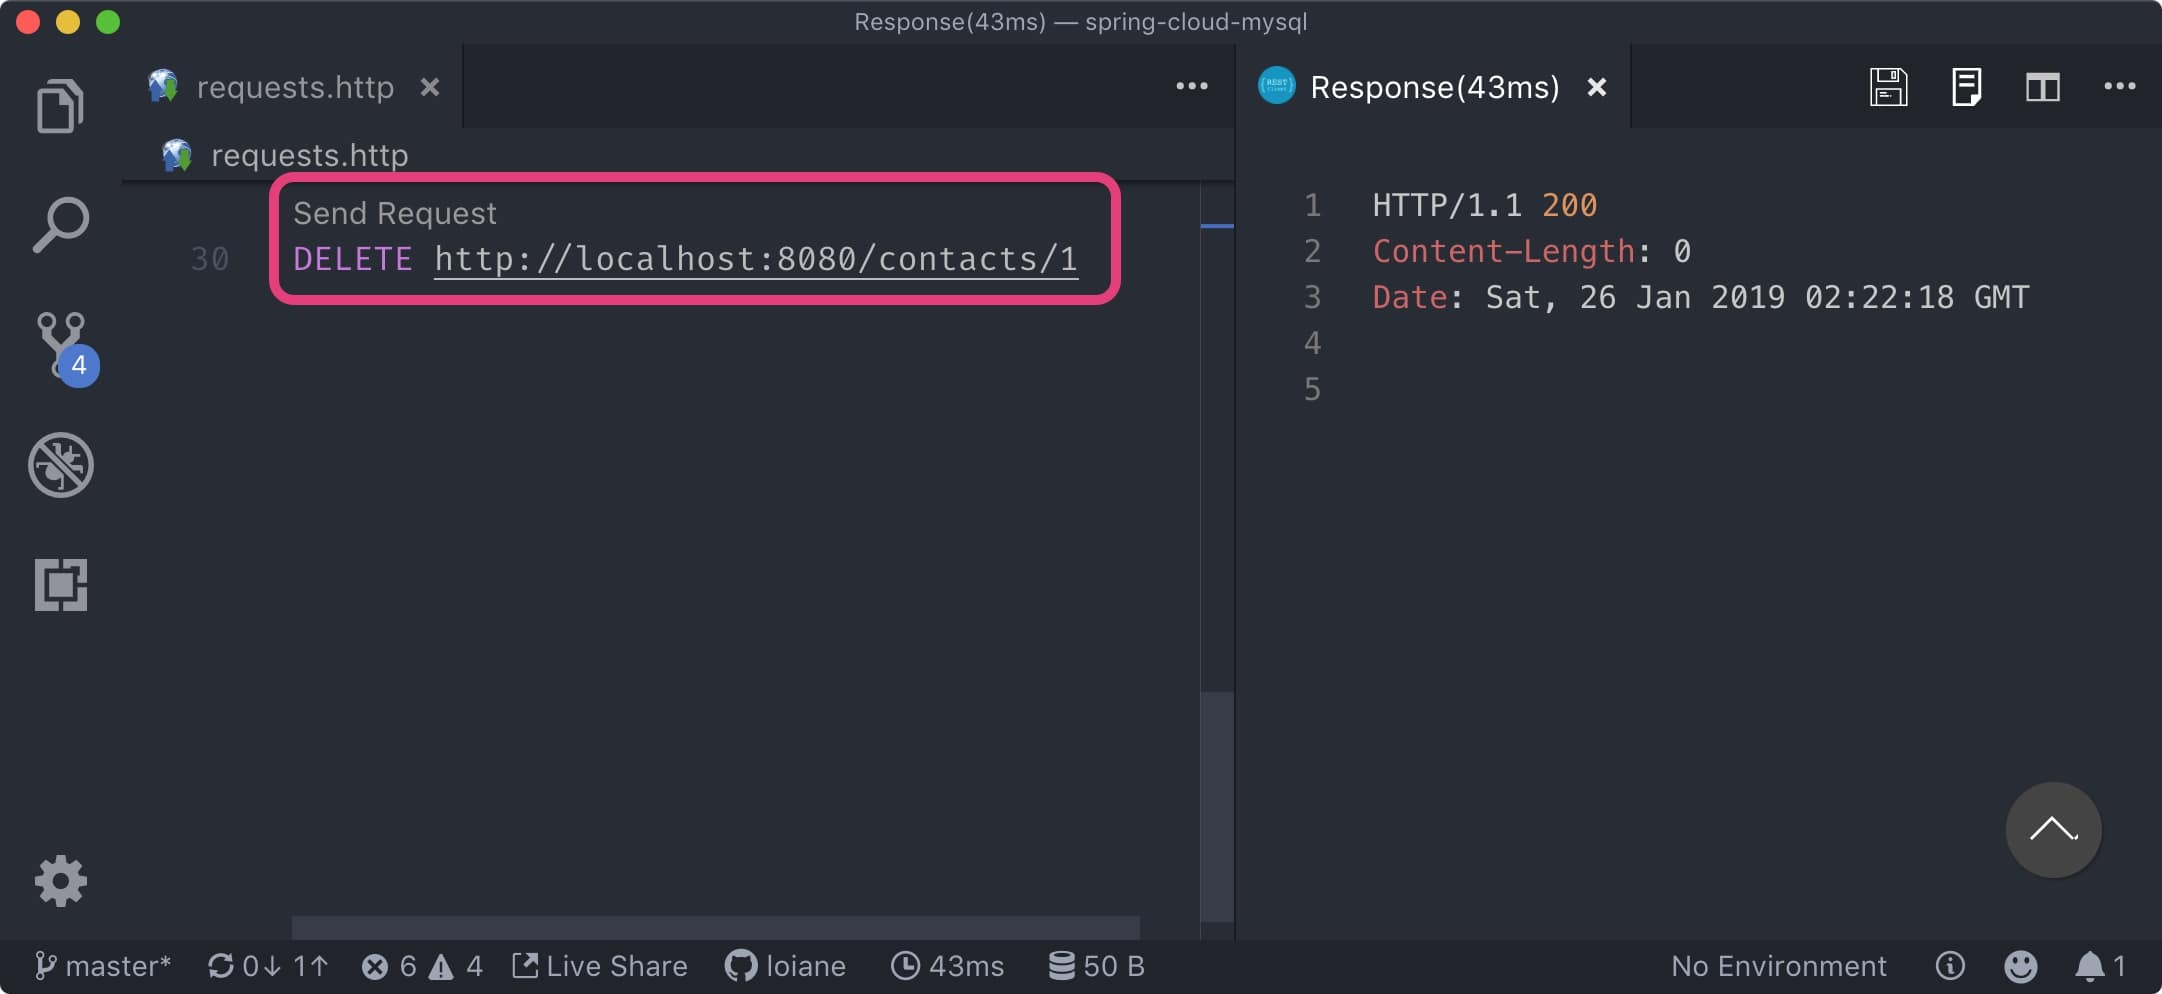
Testing the APIs
We can test the API using Postman. If you use Visual Studio Code, you can also use the REST Client extension.
File for testing using the REST Client extension is also included in the source code
Conclusion
In this article, we developed and tested a CRUD API connecting to a real database locally. Our next steps are:
- creating the database in the cloud
- update our application so it uses the cloud database (and deploy it on the cloud as well)
Posts in this series:
- Part 1: Deploying a Spring Boot REST Application to Oracle Cloud
- Part 2: CRUD REST API Using Spring Boot 2, Hibernate, JPA, and MySQL (this post)
- Part 3: coming soon
- Part 4: coming soon
Source code
Source code available on GitHub
Happy coding!