
Setting up MySQL on Oracle Cloud + Connecting with MySQL Workbench
In this article we will learn step by step how to setup a MySQL instance on Oracle Cloud.
MySQL is the most popular open source database, and we can easily setup an instance on Oracle Cloud so we can use it in the application we developed on this post.
Before we get started, here is a list of what we need to complete this tutorial:
- Access to Oracle Cloud (you can create a trial account - $300 of free credits for 30 days)
- MySQL Workbench so we can access the database from our local computer.
Content:
Creating a MySQL instance
Login to your Oracle Cloud dashboard. The link looks like: https://myservices-xxxxxx.console.oraclecloud.com/mycloud/cloudportal/dashboard
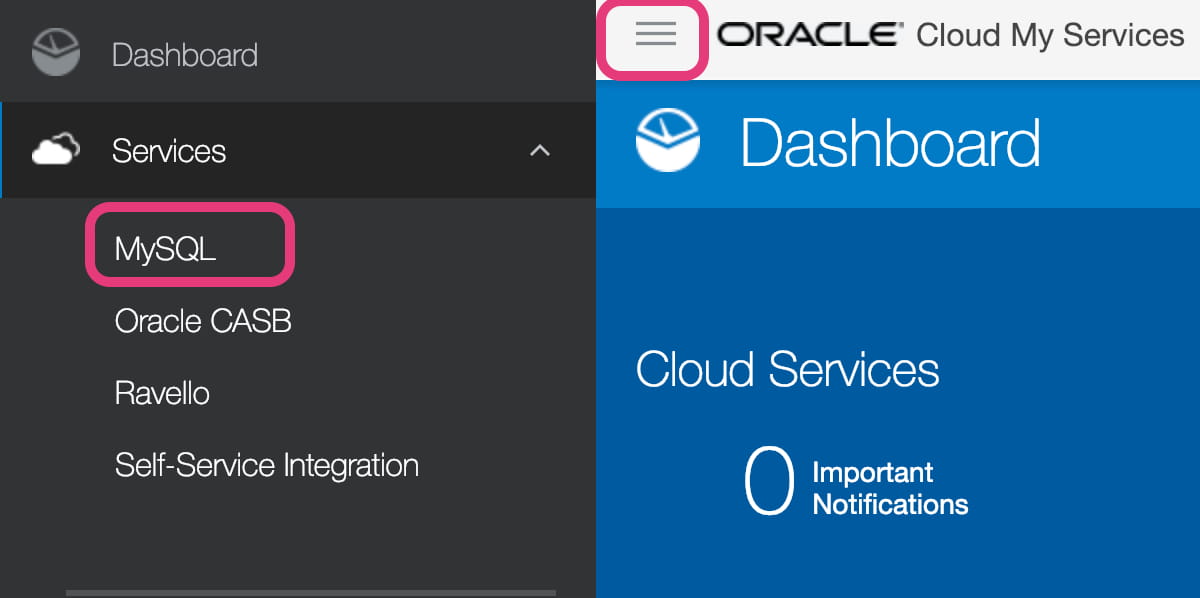
Click on the menu icon -> Services. Scroll down and click on MySQL:
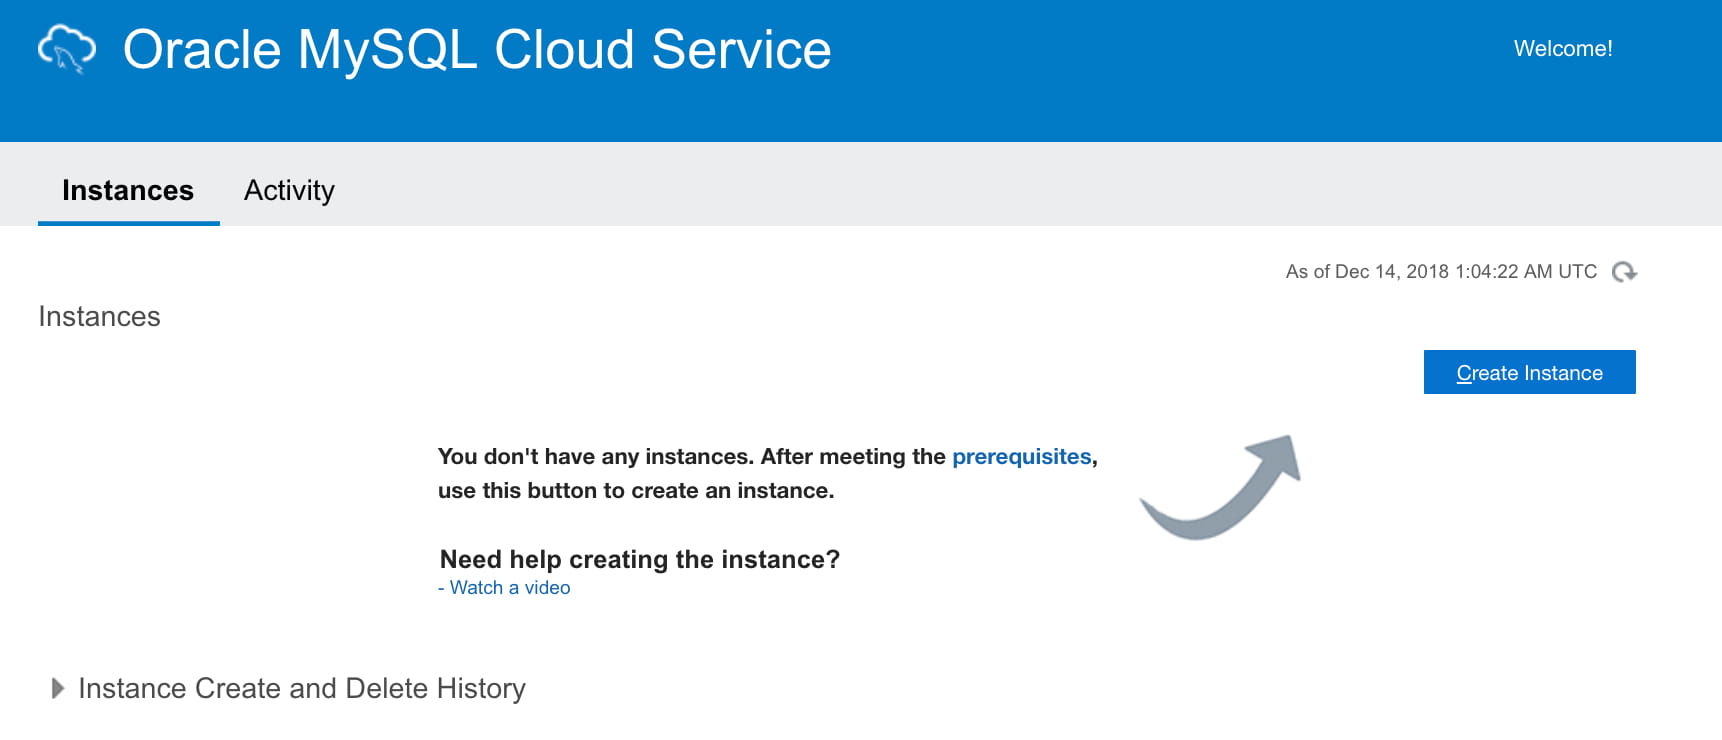
If you don’t have any instances created yet, click on Create Instance button:
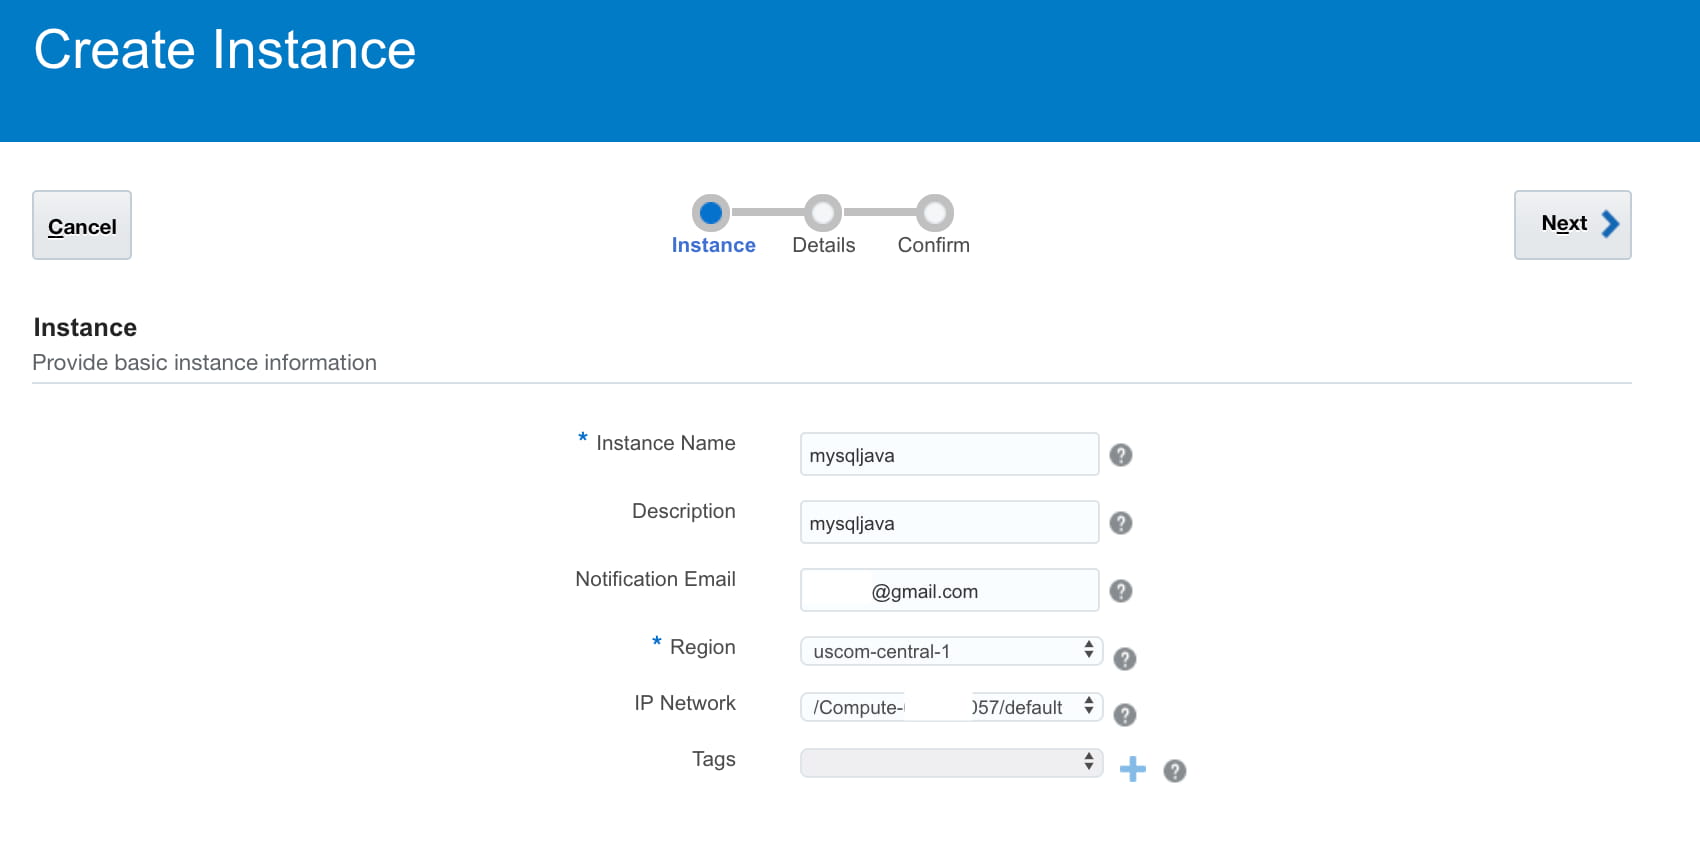
Enter the instance name and choose the compute region. You can also create tags to easily identify the database later:
Next, enter the details of the database (default values are already populated), such as how much compute power it is required, database administrator username and password, backup configuration (select none if you are creating an instance for testing purposes only):
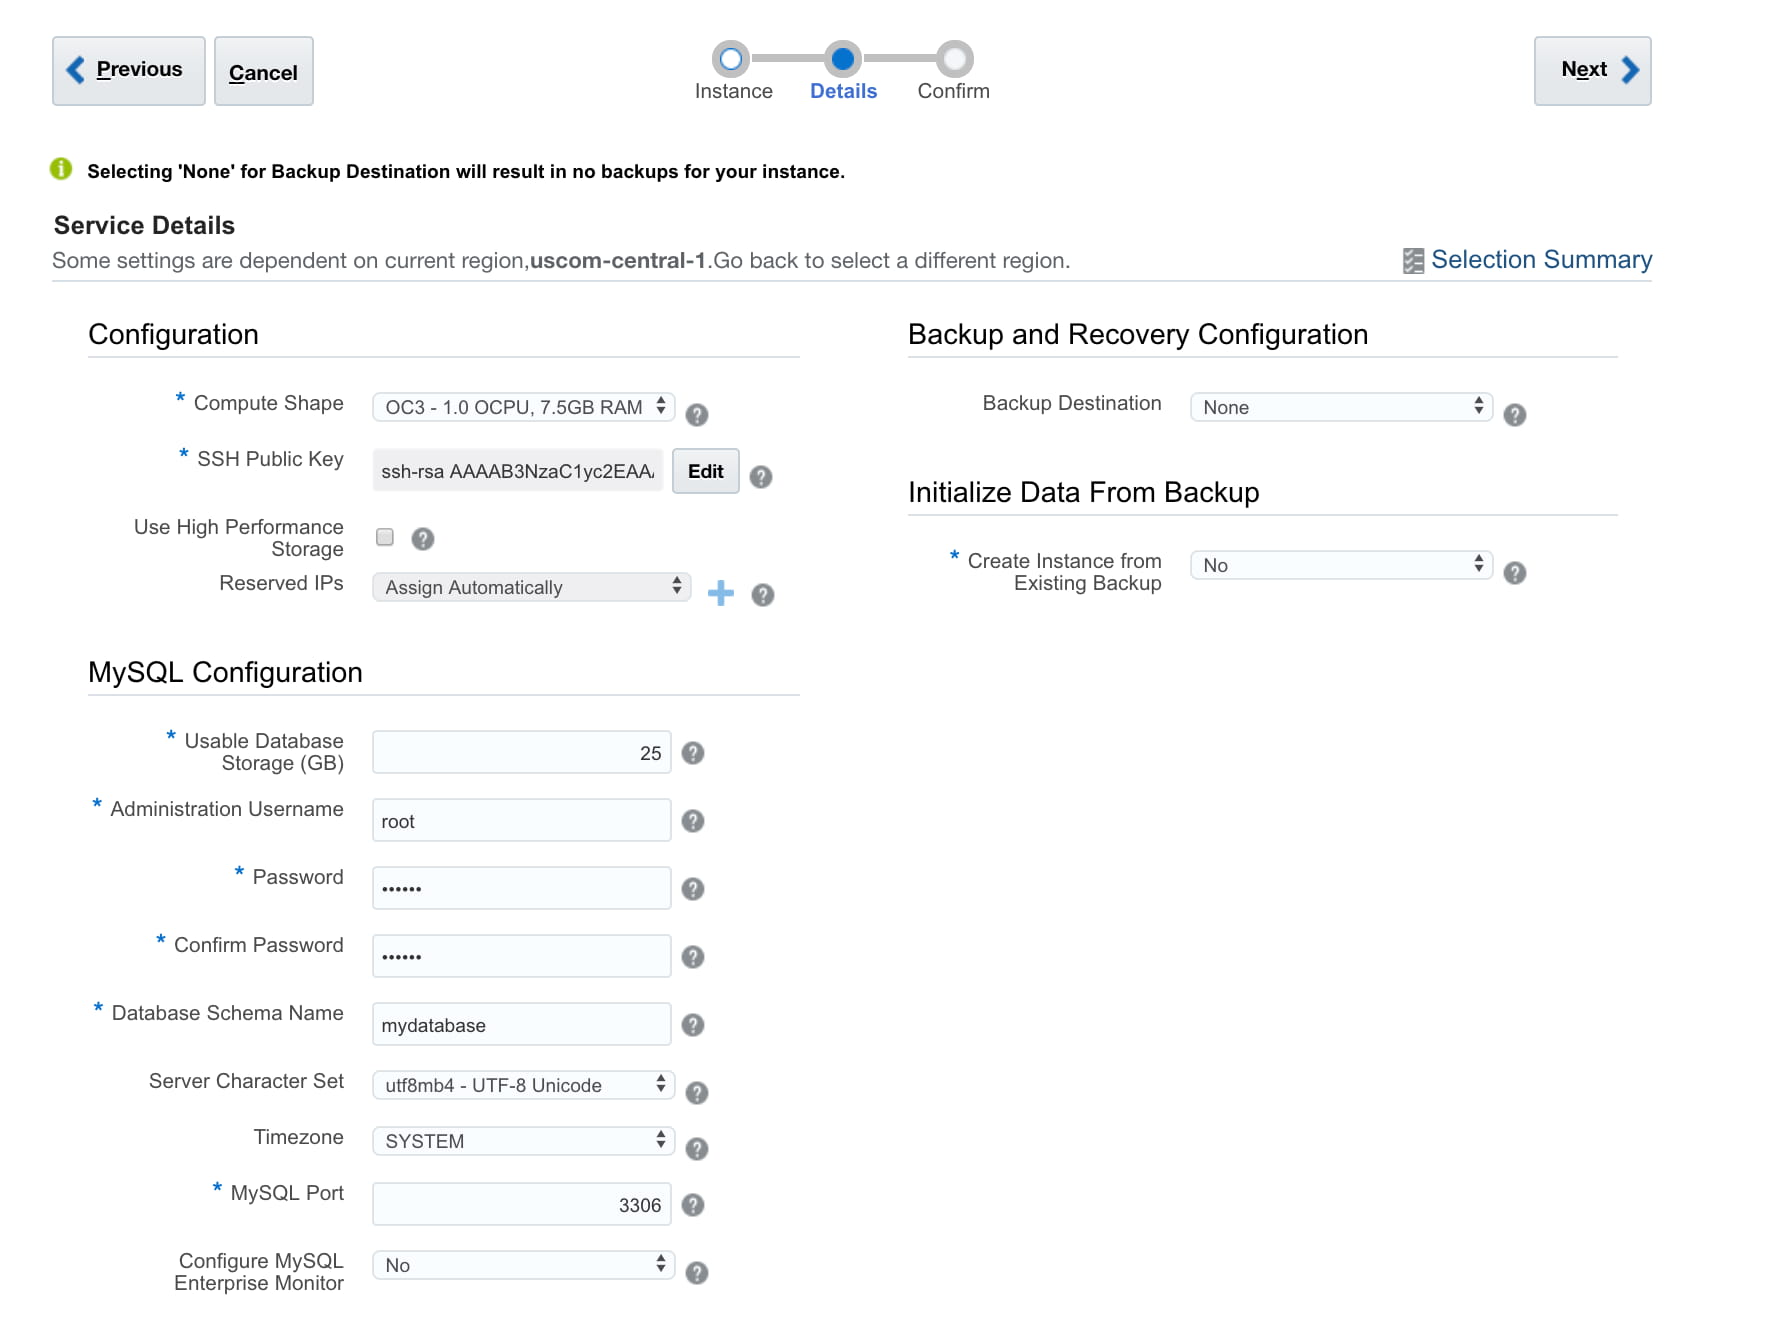
A full explanation of all fields are available in the documentation as well.
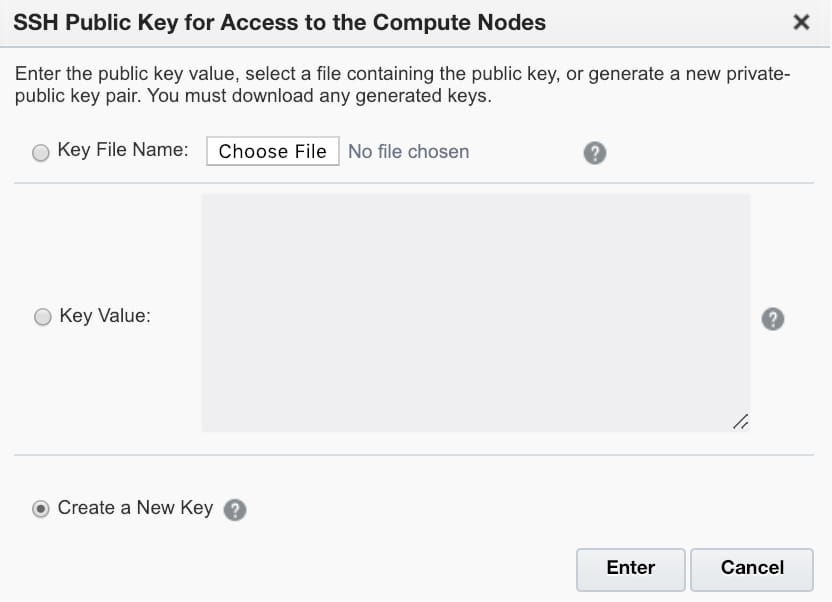
You will also need to configure an SSH Public Key, that can be used to login to the VM instance on which MySQL Cloud service instance is running. If you already have an SSH Public Key, you can enter its details, otherwise, click on the Edit button and select Create a New Key and click on Enter. Don’t forget to download the sshkeybundle.zip file that contains the private and public keys. The wizard will automatically populate the SSH details.
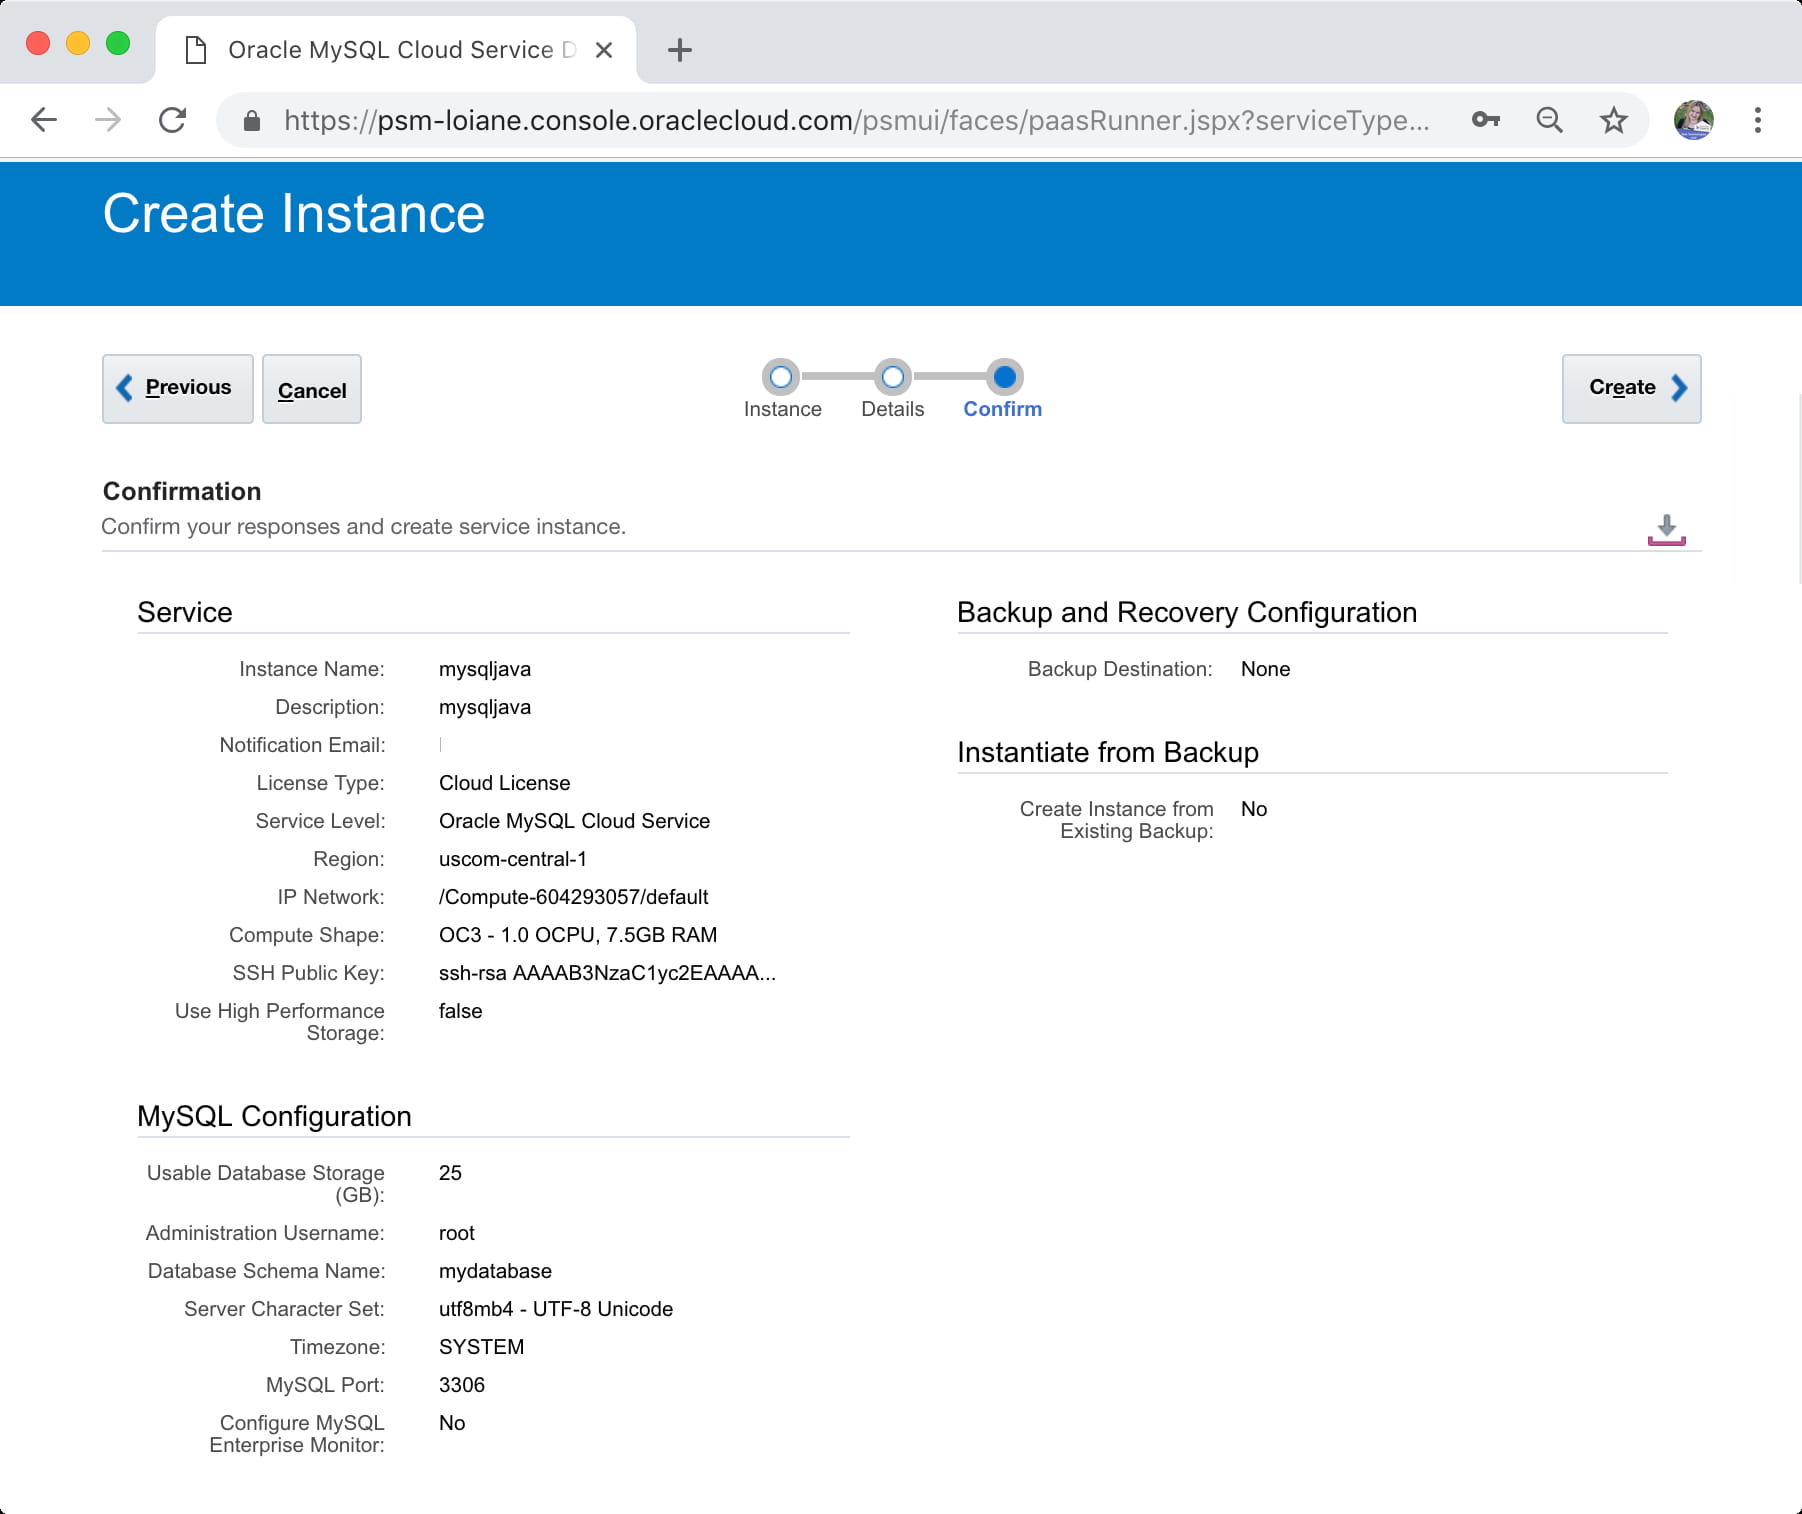
Once completed, click on Next, review and confirm the details by clicking on Create.
Next, the service will be created. On the Oracle MySQL Cloud Service console page we will see that the service is being created:
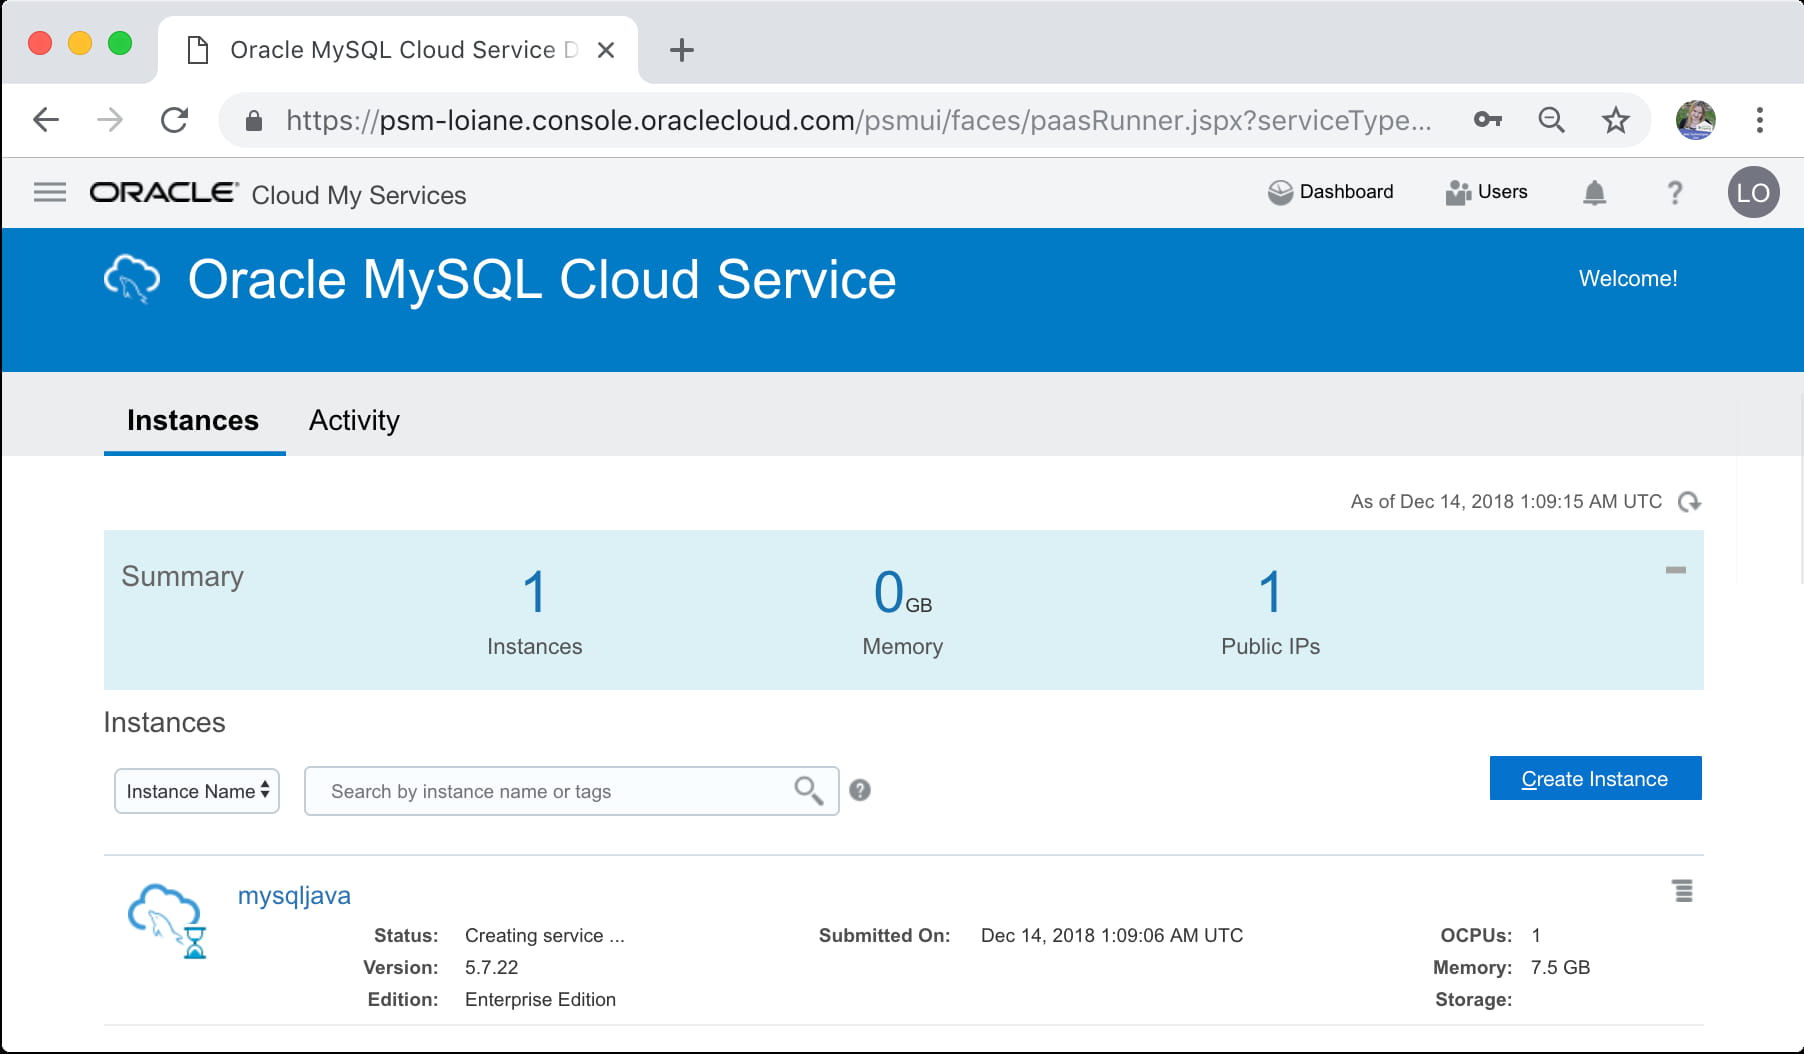
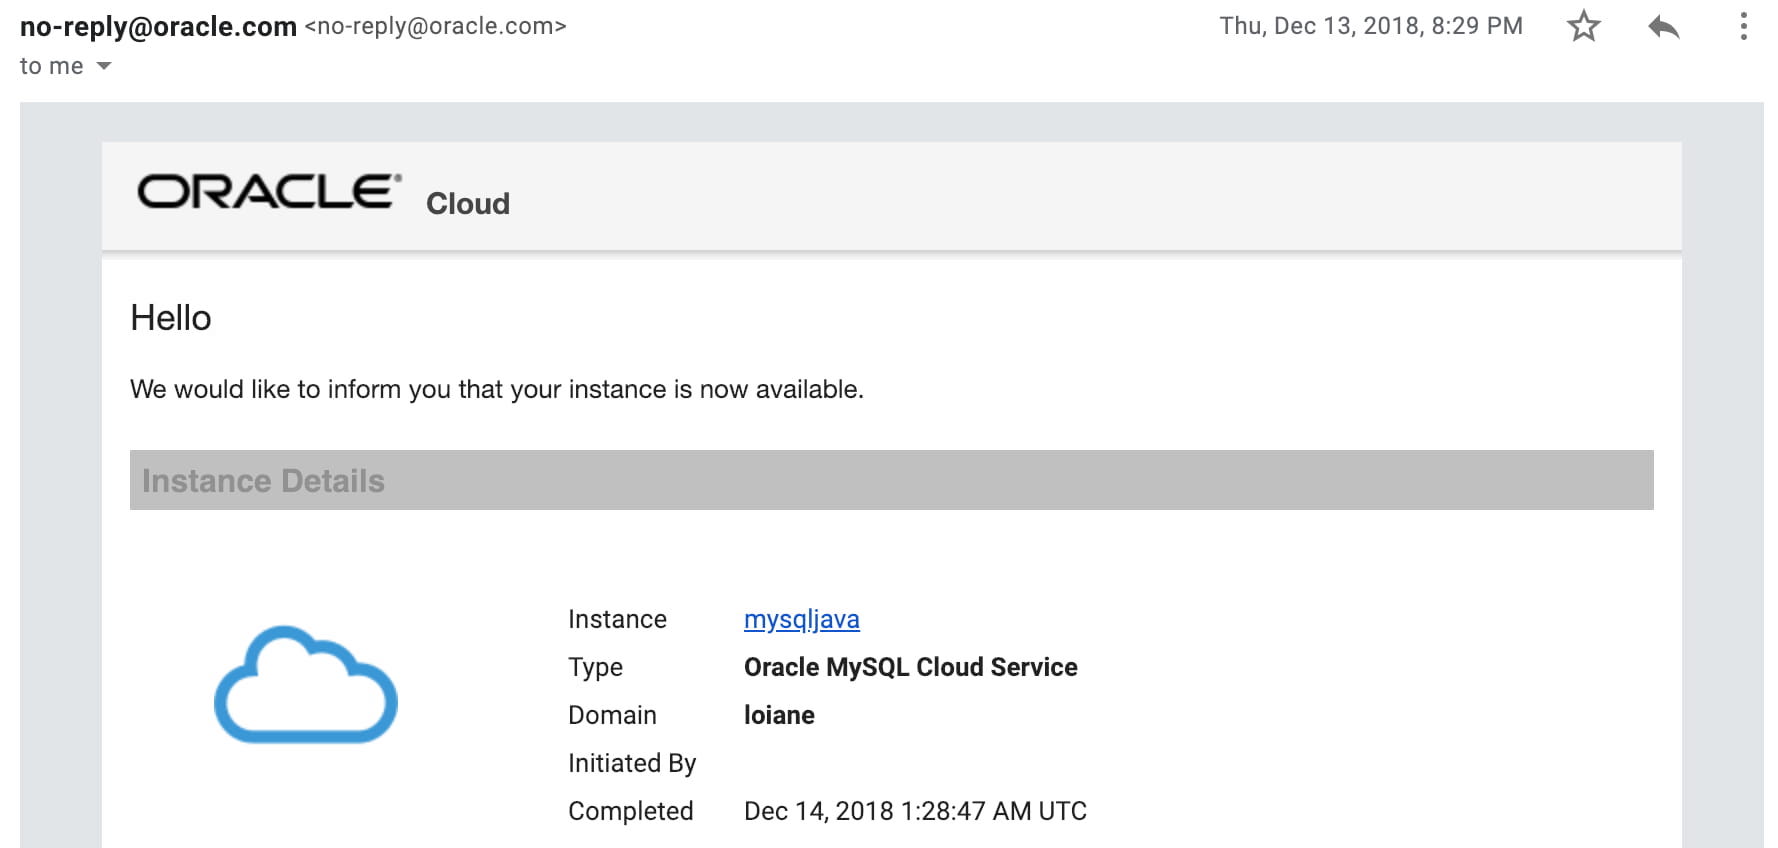
It might take up to 20-30 minutes to be created. You will receive an email once the service is ready to be used:
Exploring the Oracle MySQL Cloud Service instance
Once the service has been created, we can click on it and we can see its overview:
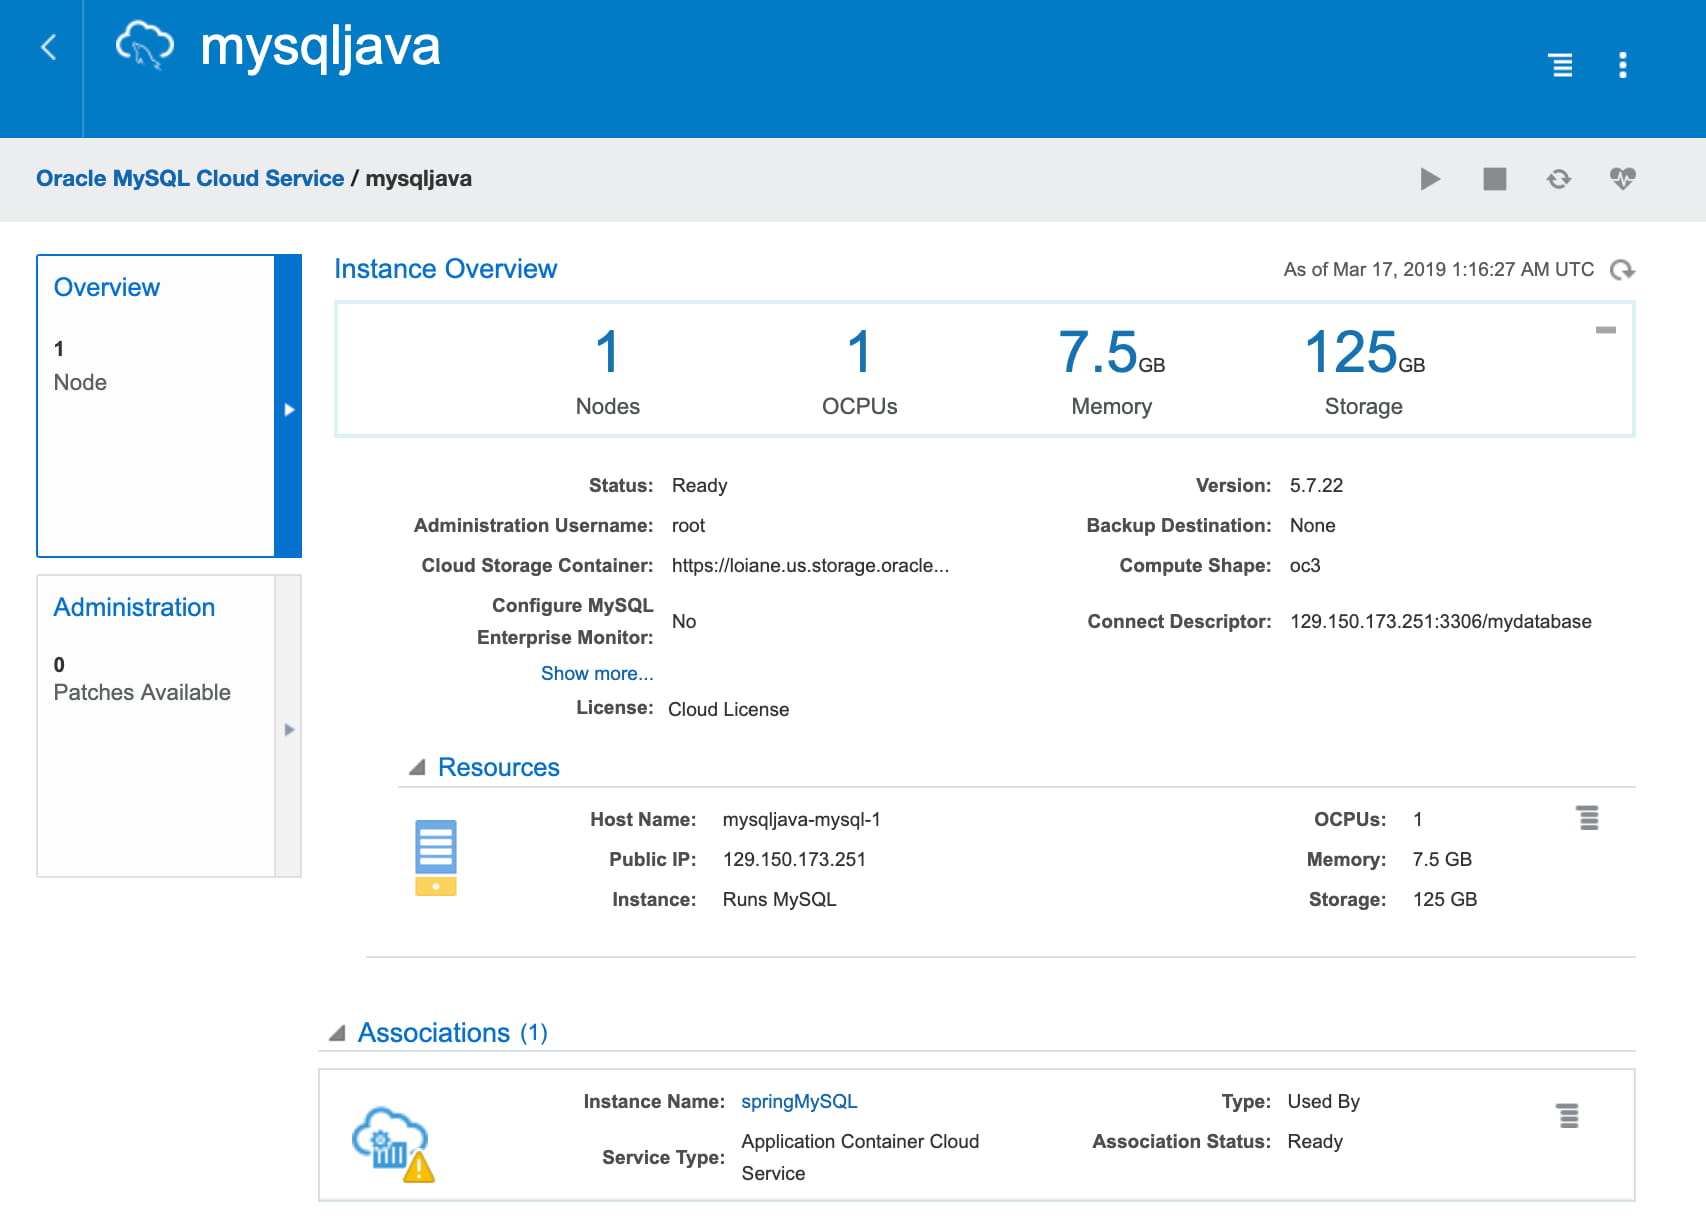
On the top right corner we can start, stop, restart the service and also display monitoring information.
On the bottom, we can also see all other services that are linked or using this database. In this example, we have one application using this database (that we will learn how to do this link in the next article).
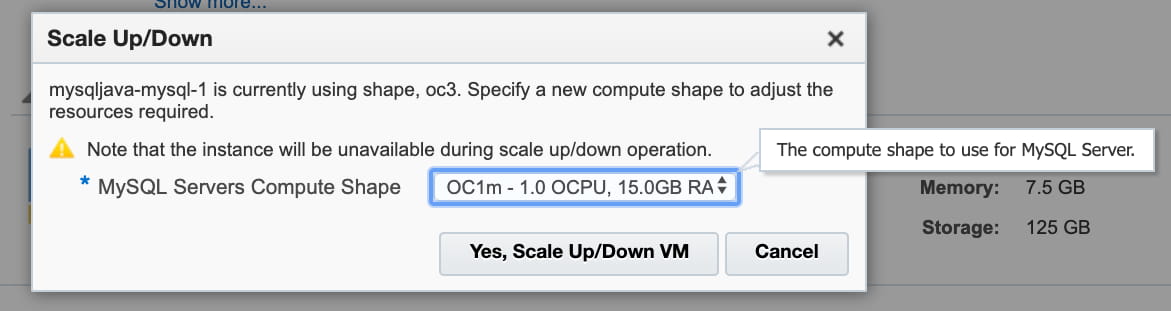
And if we need to, we can also scale up and down and add storage to the database:
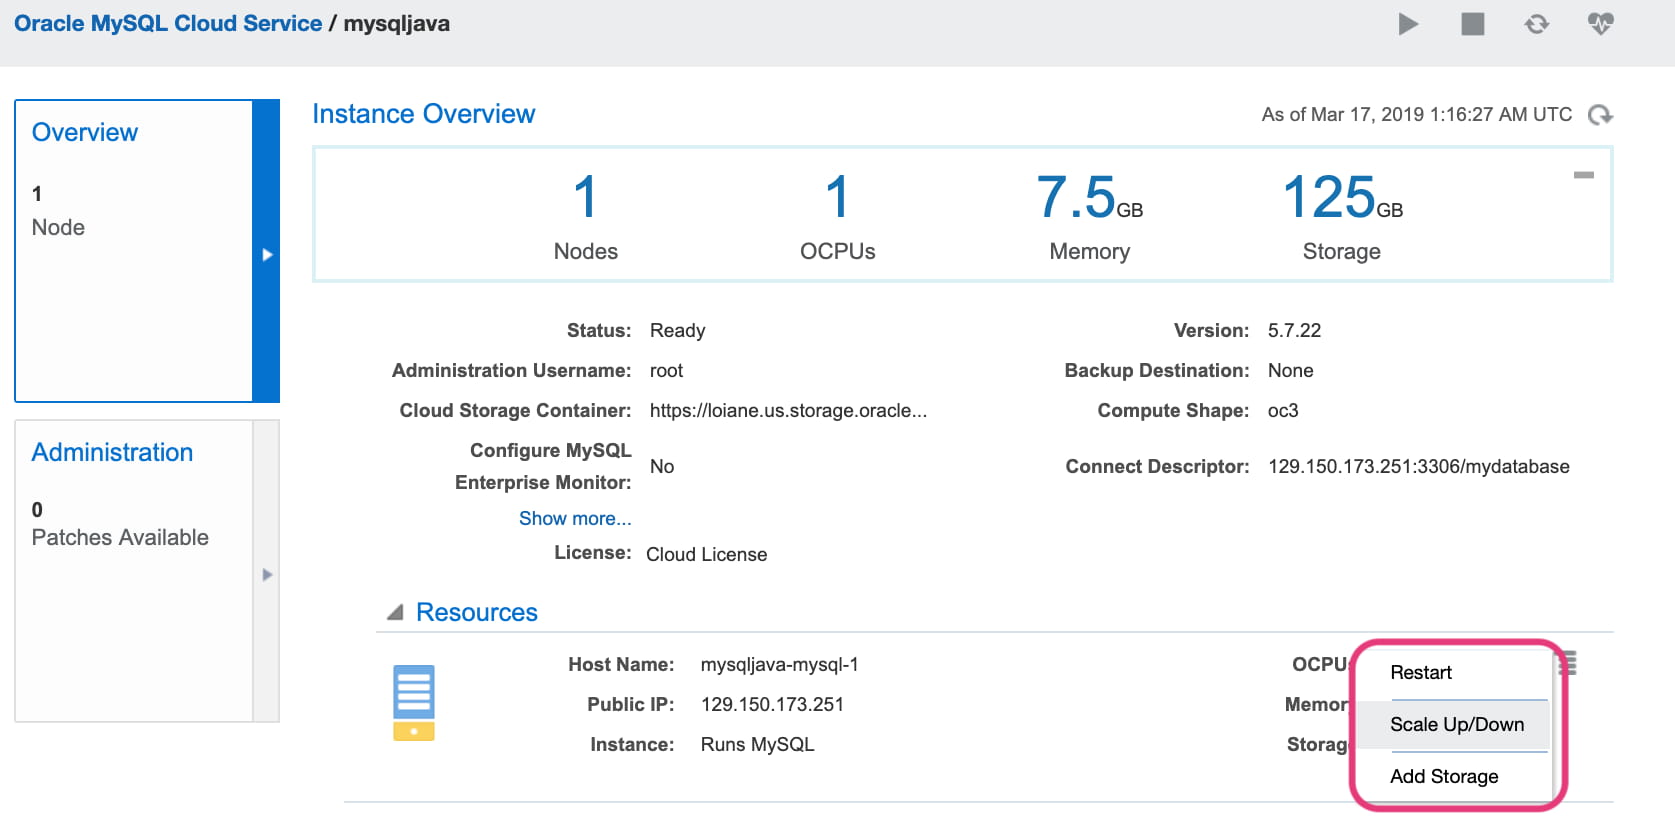
To scale up and down, we can select the option Scale Up/Down option and select the new requirenments:
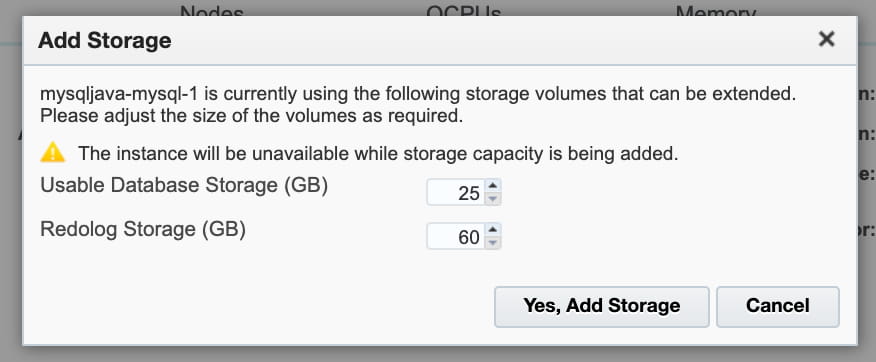
To add more storage, the process is very similar - once you click on Yes, the service will become temporary unavailable (you might want to do this during the green zone in case this is a production database):
Connecting to the MySQL Database - SSH Access
Now that the instance has been created and we explored its options, let’s connect to the database. First option is connecting through SSH Access. By clicking on the ‘hambuguer’ menu, we can click on SSH Access:
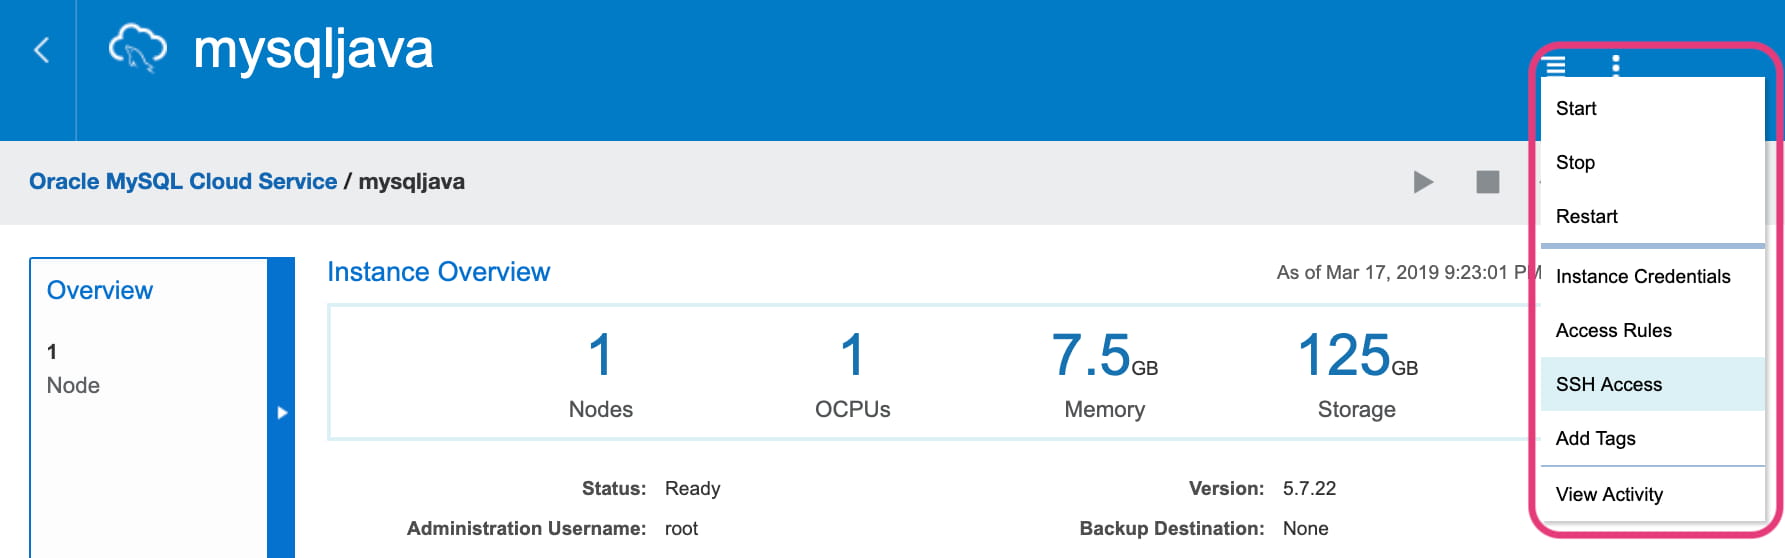
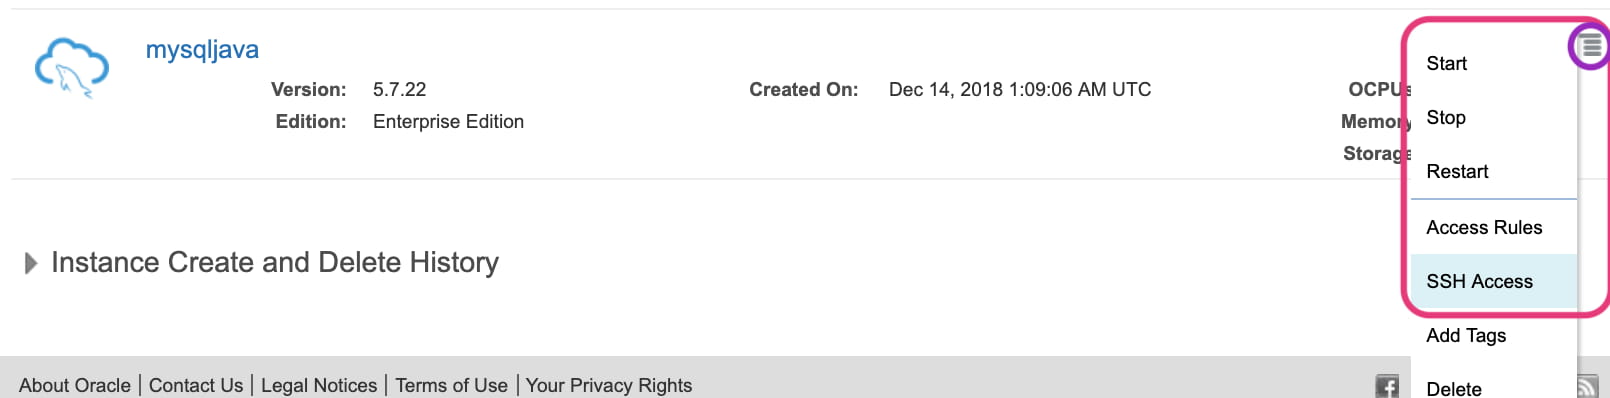
Additionally, in the list of instances, you can also select the SSH Access from the instance menu:
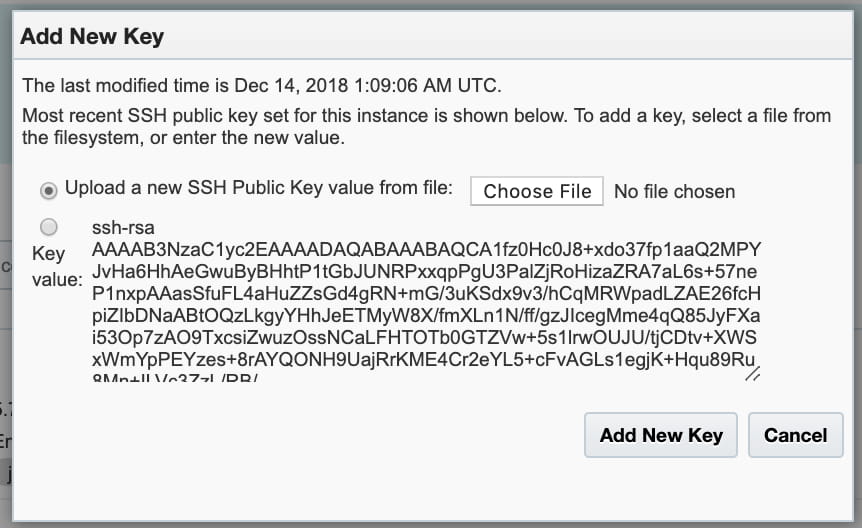
When clicking on the SSH Access menu option, we will see a popup to Upload a new SSH Public Key from a file. When we created the instance, we already created and downloaded an SSH Key. The latest public key is also listed. For this example, we will not upload a new one, we will use the one we generated previously:
Now that the SSH Access is ok, let’s connect to the database from a terminal. You can use Linux or Mac terminal.
First, we need to make sure we have read and write permissions on the privateKey file, otherwise we’ll have issues connecting to the database. In the terminal, change directory to the folder where the privateKey file is located and run the following command:
chmod 600 privateKey
The command above will give read and write permission to the owner.
Next, we need to connect to the database. We need to locate the public IP of the instance:

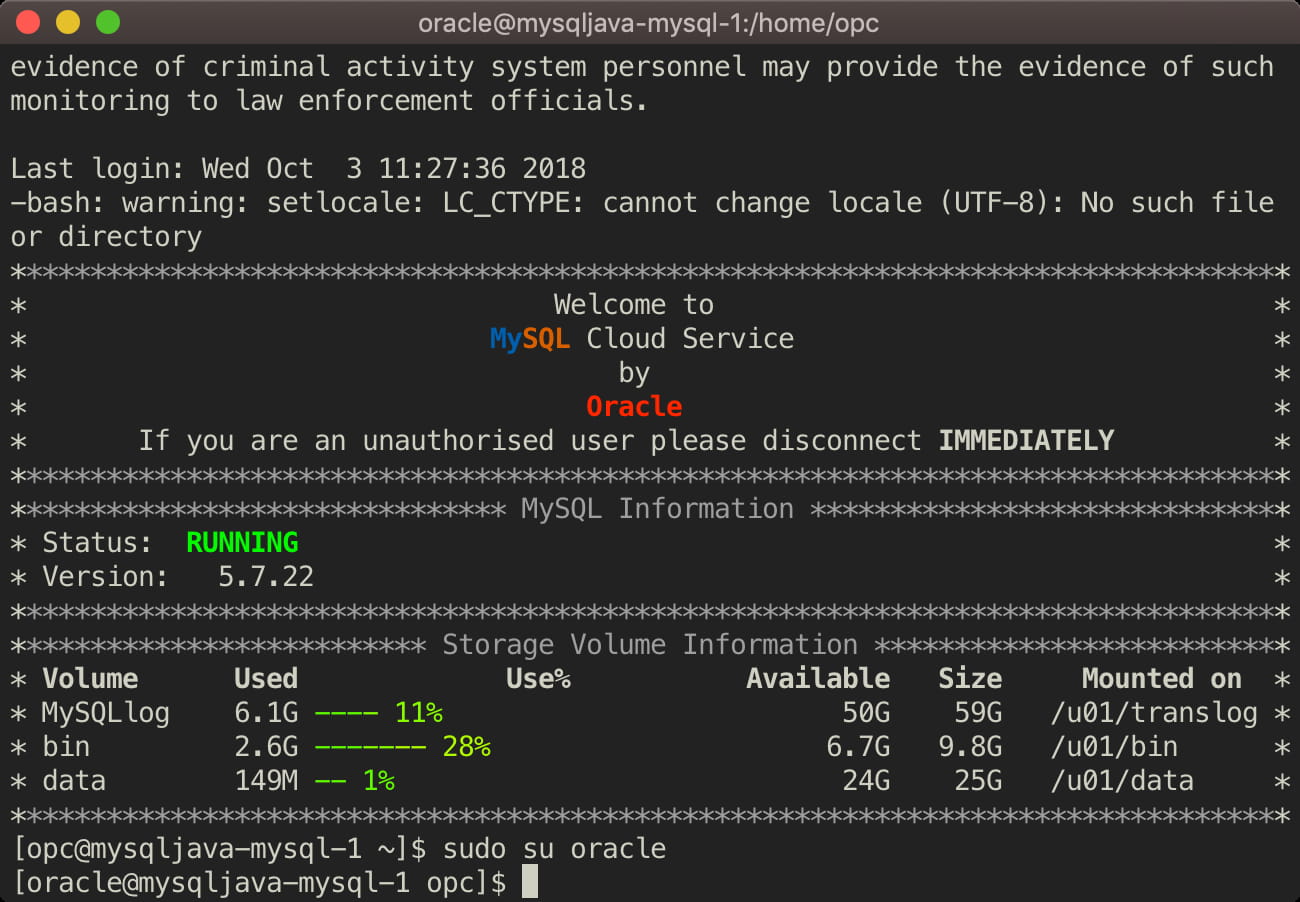
With the public ip and privateKey, we can SSH login to the VM instance with user ocp:
ssh -i privateKey opc@129.150.173.251
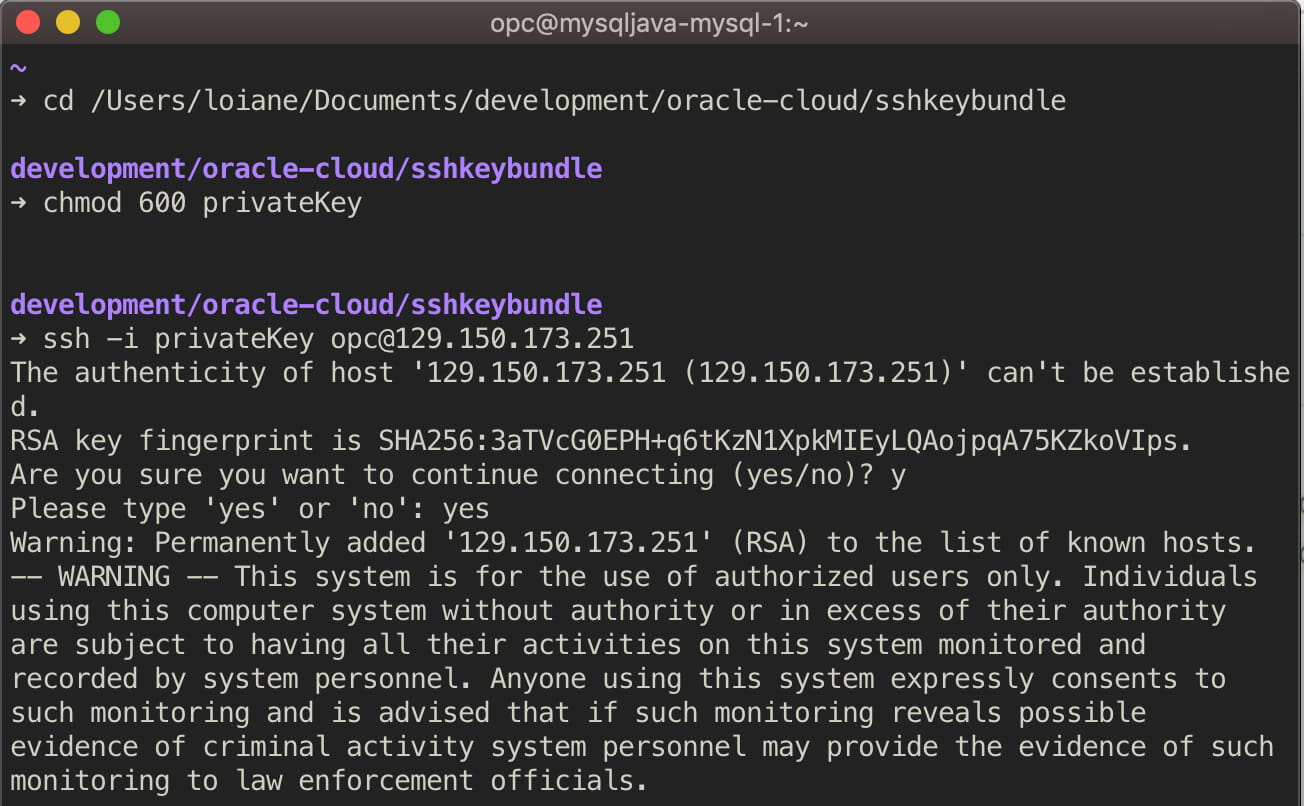
Once we are logged in, we can see the VM instance command prompt.
Next, in order to be able to access the database commands, we also need to access the VM instance with oracle user (sudo su for admin permissions):
sudo su oracle
Once we have permission, we can use command mysql and list the databases available (list databases;):
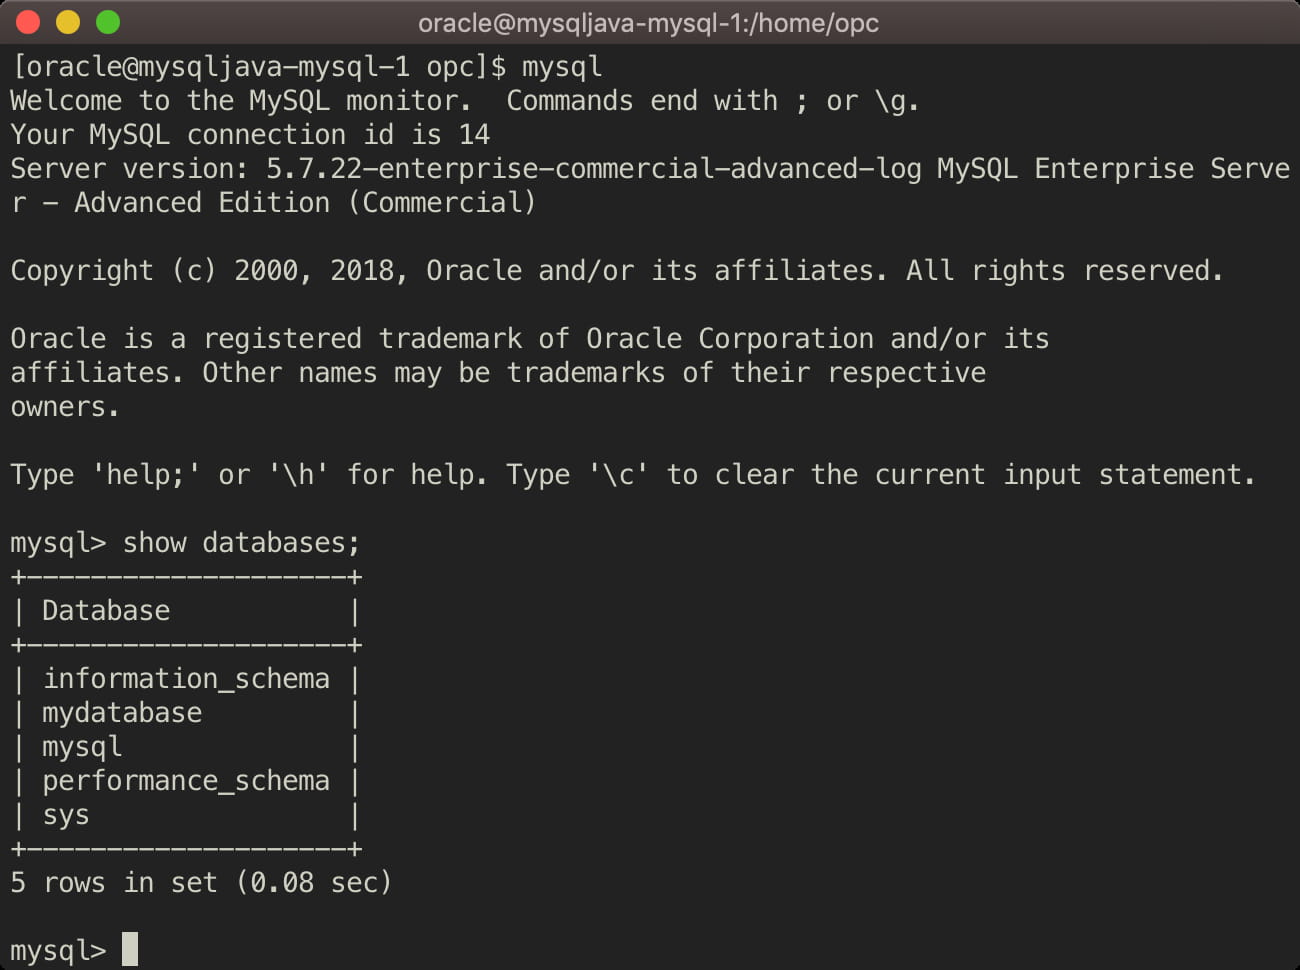
From here, we can run SQL queries (use schema), create new databases, tables, run insert scripts and so on. These steps are very useful to know when we don’t have any UI tools. But since we do have UI tools available, let’s learn how to use them!
Connecting to the MySQL Database - MySQL Workbench
In order to connect to the VM instance database we have two options: first one is through SSL and second one is through user/password as if it was a local database. We have covered the SSH access in this post, so next we’ll see how to connect to our MySQL database on Oracle Cloud as a public database.
To connect MySQL Workbench to the Oracle Cloud database using SSL we will also need to generate a certificate. MySQL Workbench provides a wizard to generate the certificate, the steps are straightforward.
Create a new connect from MySQL Workbench, enter the public IP, port, username (root) and password (same password used when creating the VM instance):
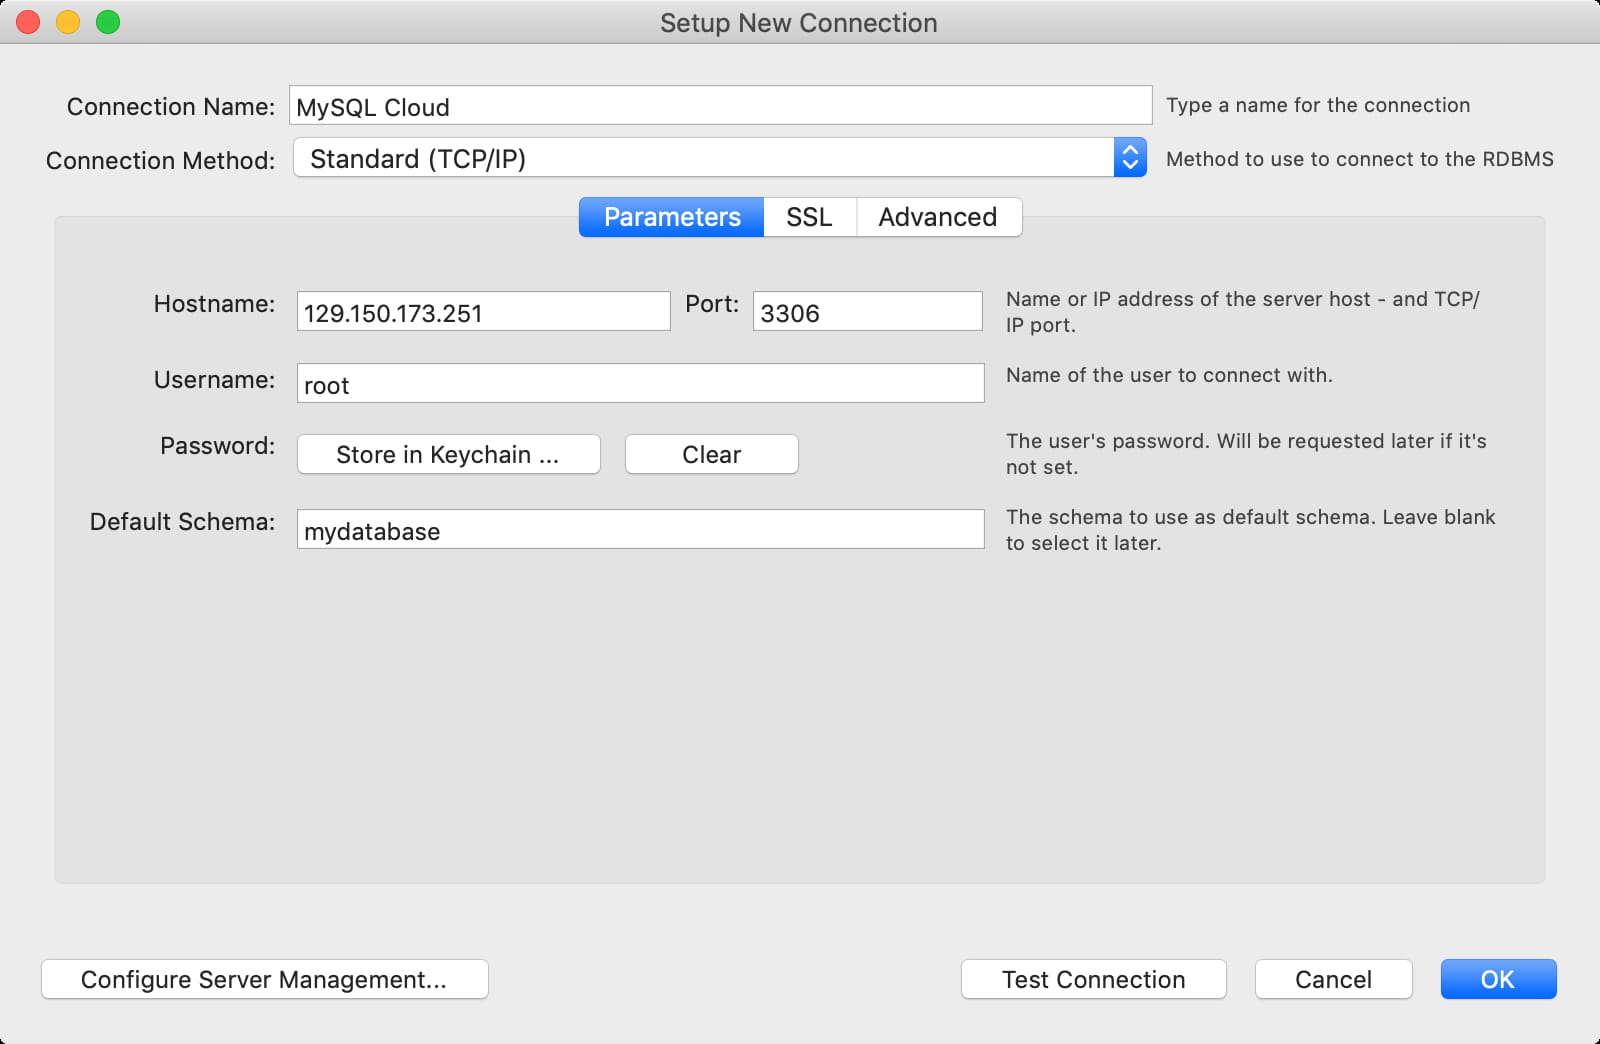
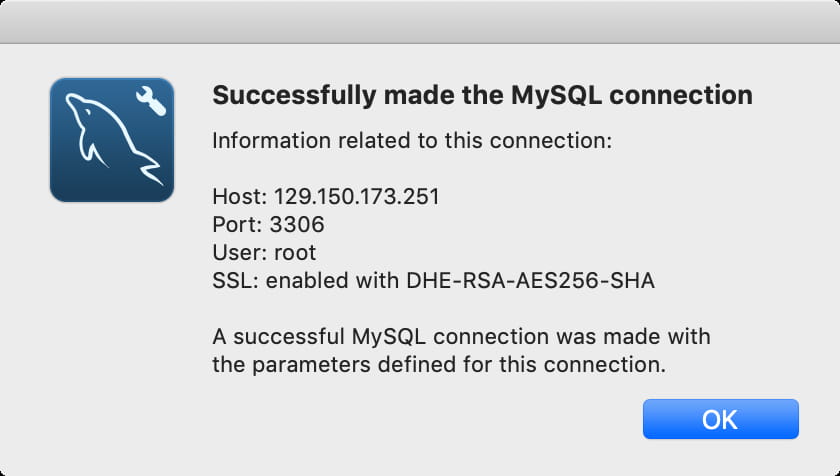
If we try to connect as is (Test Connection), the connection will fail. By default, the databases created on Oracle Cloud cannot be accessed publicly. In order to change it, we need to modify the rules of the VM instance. To do, we can access the instance menu (same menu we used to SSH Access, but instead click on Rules):
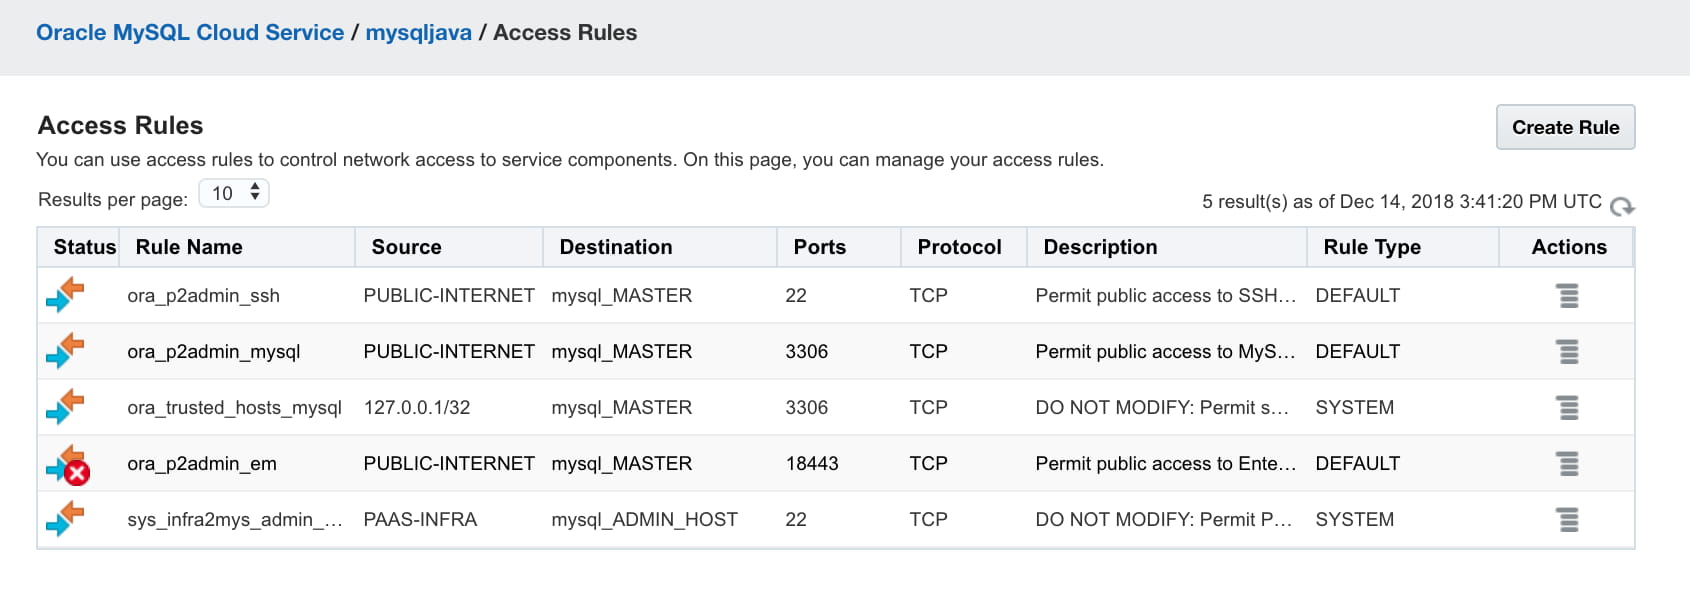
We can click on the Actions menu button and Enable/Disable the rules acoordinly. Once the rule for public internet port 3306 is enabled, we can test the connection again, and this time will be successfull:
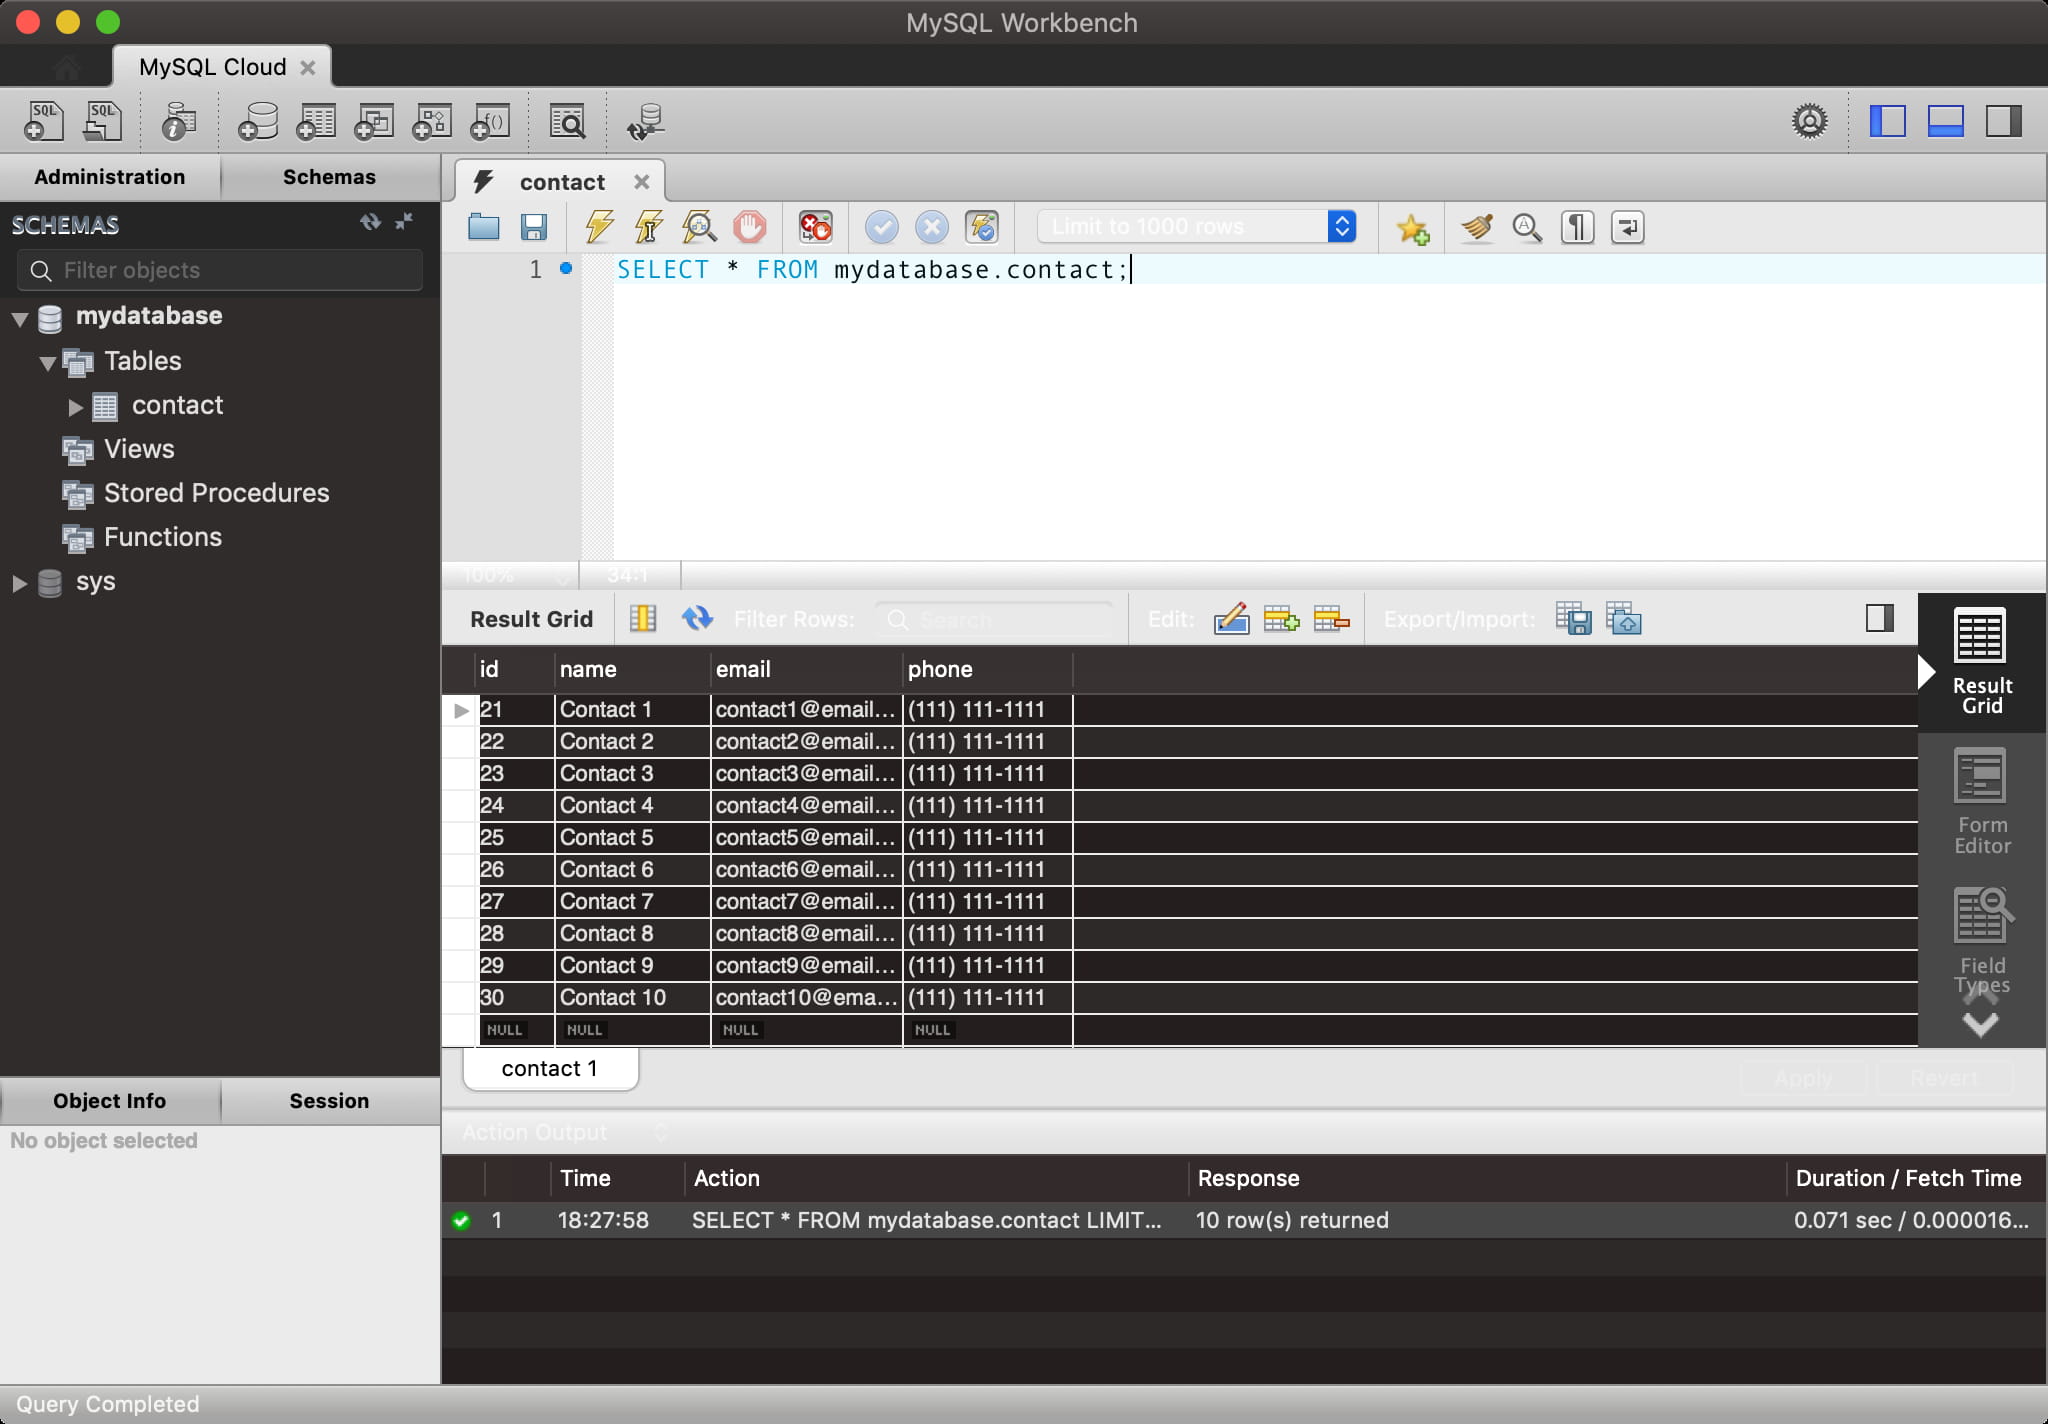
Now we can open the administration panel and run our queries in a user friendly environment!
Conclusion
In this article, we learned how to create a MySQL database on Oracle Cloud, how to connect through SSH and how to connect using MySQL Workbench. In the next article, we will update our application’s code and deploy it on the cloud using the MySQL cloud instance as well.
References:
- MySQL Oracle Cloud
- MySQL Oracle Cloud documentation
- Deploy MySQL on Oracle’s High-Performance Cloud (Step-by-step Guide)
This post is part of a series:
Happy coding!